Thursday, July 23, 2009

The pond is looking good!

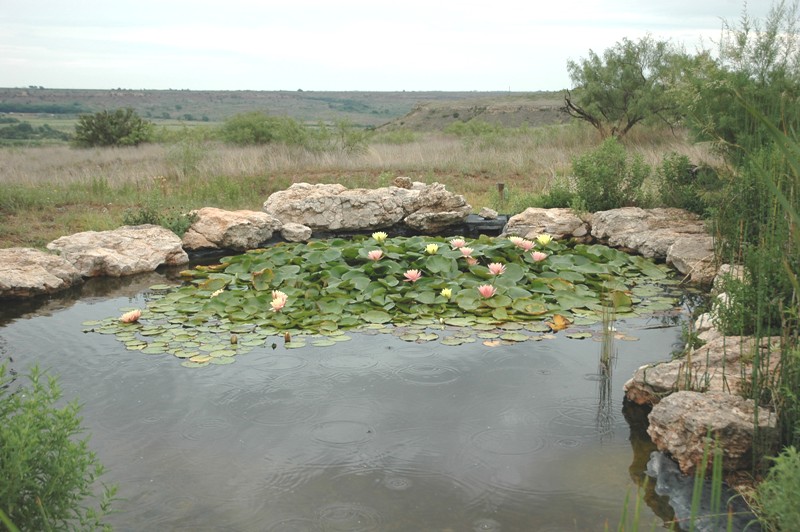
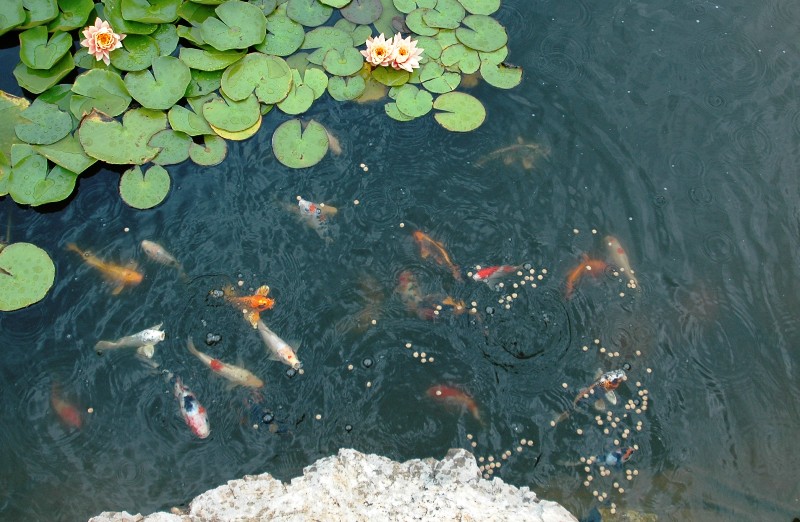
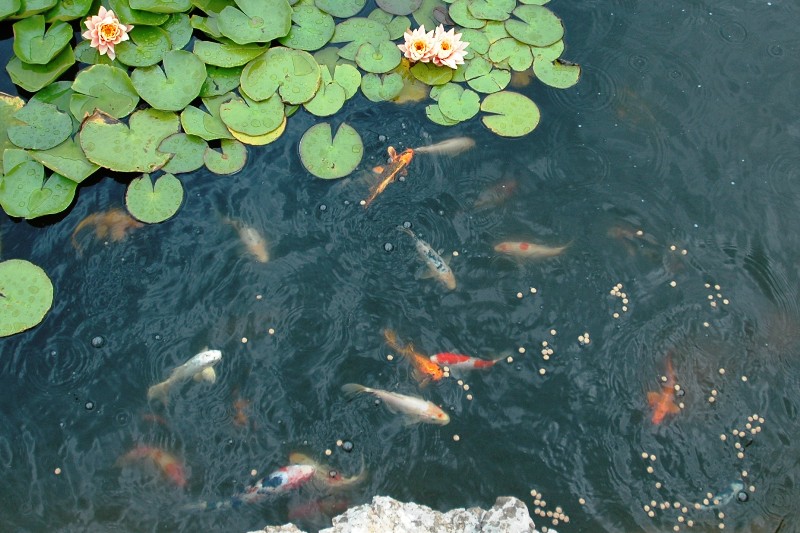
Well, I usually just post on my projects as they are in progress and rarely post on them after they are finished, but when I went out to the pond at the house yesterday to feed the Koi the water lilies were out after the rain so I went ahead and took a few pictures to share.

Here it is looking back toward the east. The pond is about 17 feet long and 12 feet wide. It's just over 3 feet deep at it's deepest point and levels out to just a few inches deep on the far west side.

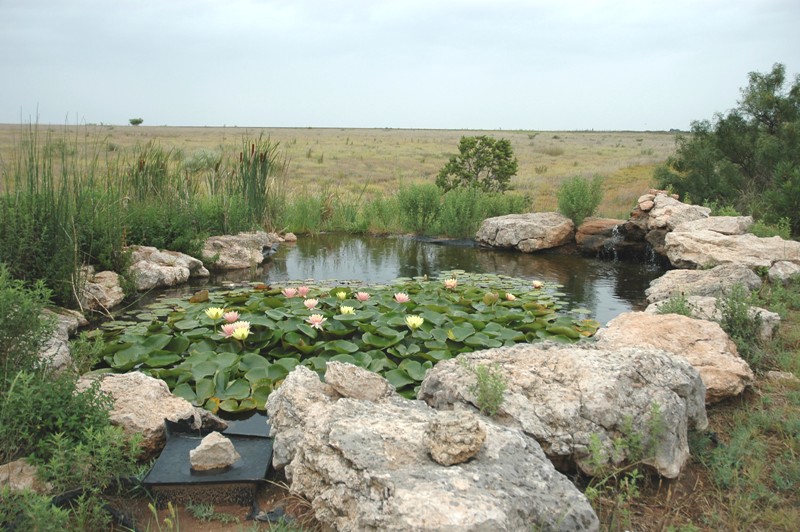
And a shot of it looking toward the west. Not much of a waterfall, but it serves it's purpose of aerating the water.

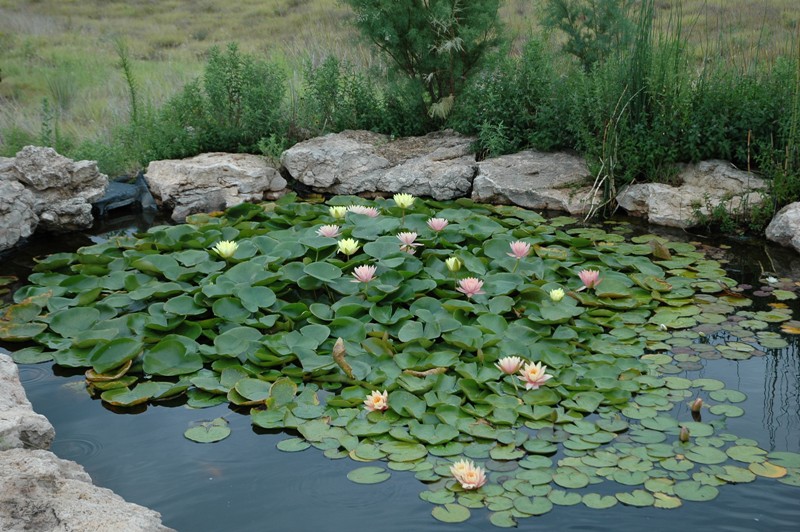
Here's a closer view of the water lilies. They started out at 10 small plugs that I bought 3 years ago.

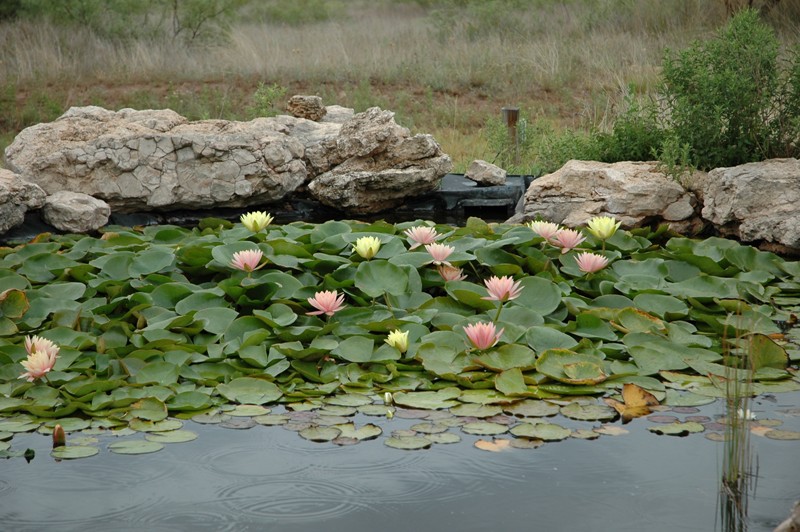
Another shot of the lilies. Some of the more colorful ones actually weren't blooming in this picture. There are pink, yellow, white, orange and some bright pink/purple ones that aren't blooming in this picture.

And lastly a couple pictures of some of the fish. Most of them are about 5 or 6 inches long but there is one that is close to a foot long and one that is pushing 18 inches.

The water isn't crystal clear, but one of the dogs loves to swim in it and I don't really put any effort into it, so I'm happy with it the way it is.

The pond is actually about 150 yards from the house on my CRP property. I was required to establish a permanent water source for wildlife when I put in for the contract so I figured I would go ahead and go all out on it. It can be a pain walking out there when it is hot and windy, but you don't have to feed the fish in the winter so at least I'm not having to go out there in the cold.

That's pretty much it. When I went out and saw the lilies in bloom I thought it looked good enough to take some pictures and share.

Nathan

Wednesday, July 22, 2009

The pigs are back...

Well, I went down to the land last weekend with Eli to check the trail cameras and fill the feeders and am just now getting around to posting about it.

We got some rain on July 4th so the pond is no longer dry, but it isn't exactly full and overflowing either. It probably is about 1 foot deep or so right now but that's a lot better than being dry! I'm debating on whether I'm going to put in some irrigation tubing and put in a small watering hole for the future in the event of another drought and possibly to water some trees and stuff as well.

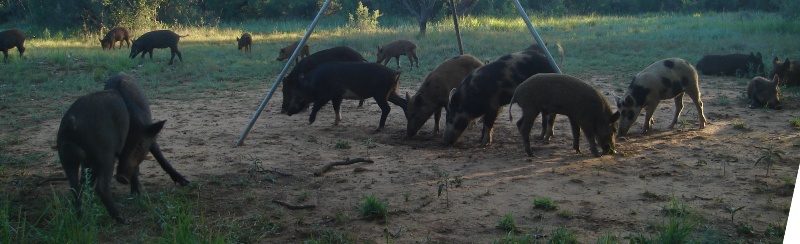
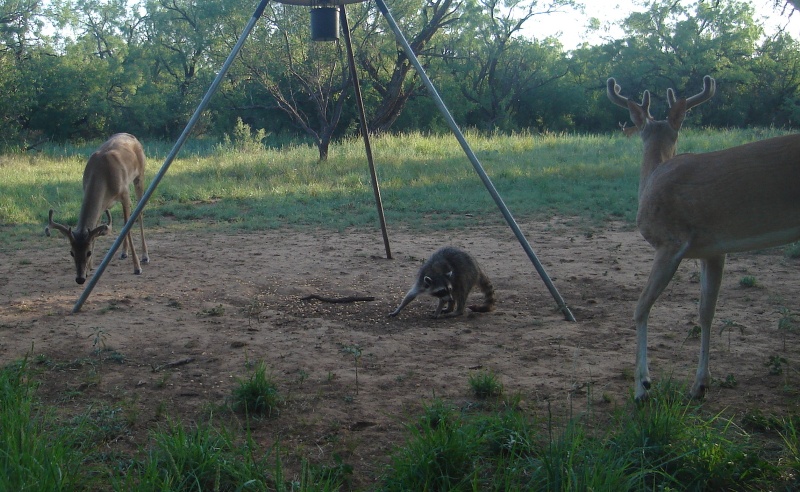
After a month long absence the pigs are back and they brought some friends with them! I got 18 pigs in one picture!

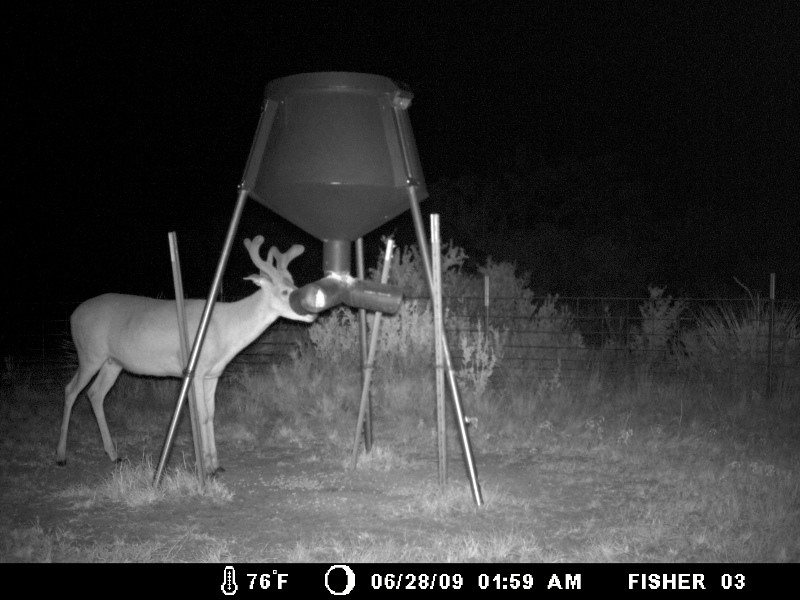
The deer are really hitting the protein feeder and it was completely out of pellets for a couple weeks based on the trail camera photos so hopefully they will come back around now that it is refilled. I'm getting a decent amount of bucks on camera, but I'll have a much better chance of identifying exactly how many different ones once their antlers grow a bit more.

Stickers is a couple weeks behind last year on his antler development. Since I didn't get pictures of him until he had already dropped his antlers this year I'm not sure if he dropped his antlers late this year or what, but hopefully he'll grow as big as last year and hopefully keep his kickers and stick around for a bit during hunting season too!

Here's about the most recent picture I have of him.

I ended up with 2 cameras at feeders that were either out of food or not working properly and I accidentally turned the flash off on my other camera that was at a feeder that was working properly the whole time so I didn't get many consistent pictures for the entire month between checking cameras. I still got quite a few pictures though.

Here's a couple younger bucks. I think the one on the right is a 3 year old this year.

Here are 3 younger bucks hanging out together. The one in the front should be decent this year, but if he makes it to next year he'll end up even better.

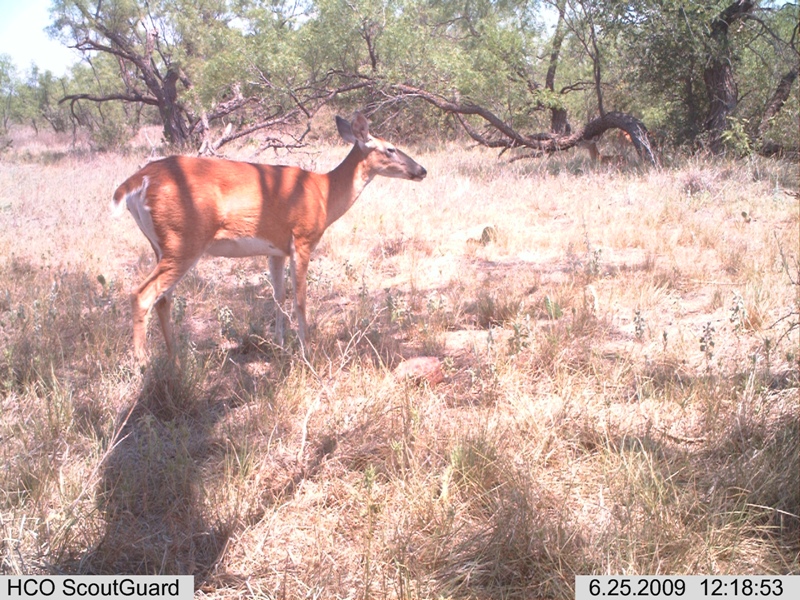
I'm pretty sure this doe was still pregnant when this picture was taken on June 25th. Whitetail deer have a gestation period of about 200 days so if you go backwards that means doe would have conceived the 2nd week of December or later. This either means that the rut was later than some folks think for that area, or there were more does than bucks and this doe was bred on her 2nd cycle. More than most of you wanted to know I'm sure!

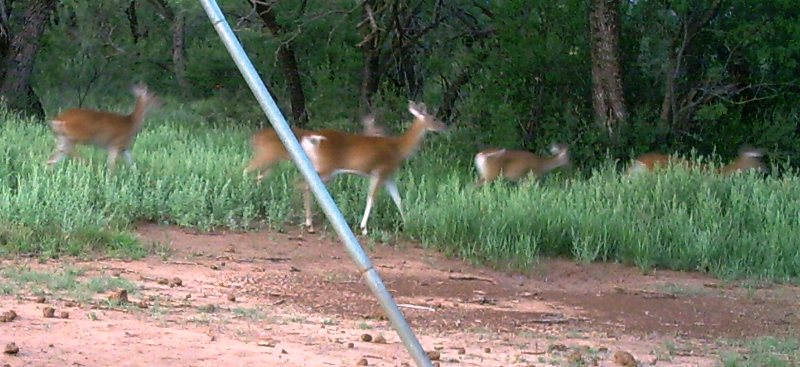
I haven't gotten any pictures of fawns yet this year, but I did get this odd picture of what appears to be 5 does together going by one of my feeders that wasn't working at the time. It seems odd that the does would be together this time of the year so I'm not really sure what to make of it. Some appear to be smaller and they could have been yearlings last year and they might not have fawns of their own this year but it still seems odd to me.

I got pictures of a bobcat, coyote, armadillo, skunk, raccoons, turkey, deer, pigs, quail, dove, squirrels, etc. this month so plenty of activity going on.

If you want to check out some more they are at http://padens.com/v-web/gallery/album08?page=6 and the new ones start at the bottom of page 6 and go onto page 8. On the 4 cameras I had out I actually went through over 2,000 pictures and most were obviously left on the cutting room floor.

That's about it for now.

Nathan

Tuesday, July 14, 2009

More work in the barn.

Well, I got a little more done in the barn this week. Nothing major, but things I've been meaning to do for a couple years now, so I'm glad to have them done for the most part!

Along with all the light fixtures that I got when we remodeled our accounting firm's office, I got several cabinets as well. Of course they've just been sitting in the barn ever since. I was able to use the regular counter top ones, but the wall cabinet one had been sitting upside down in the way for a couple years and the one with a sink had also pretty much been collecting dust.

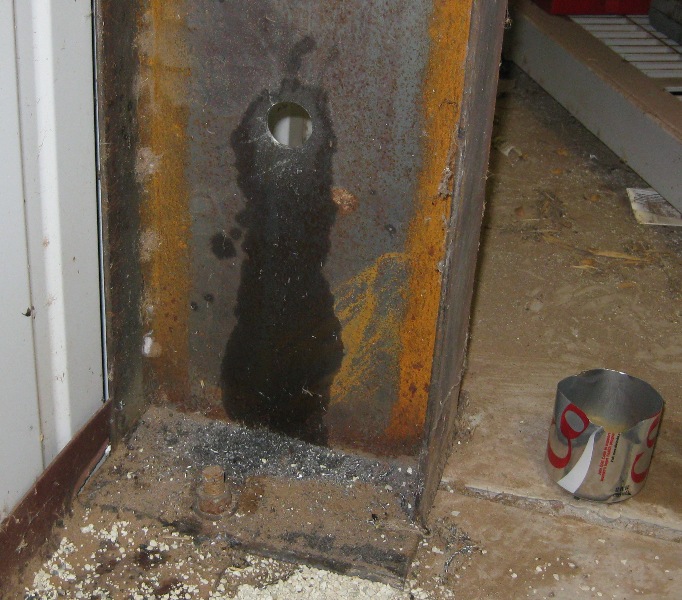
One issue I had to overcome was the fact that when we poured the slab I put the incoming water line near the front of the barn and put the drain line toward the back with the thought that I could just run it over there inside the barn after it was finished. The issue was that there was an 8" I-Beam right in the way and it was going to be a pain to run the water line around it. After checking with a coworkers husband who is a structural engineer who designs steel buildings, I decided to drill a hole through one of the I-Beams to run my water line through it.

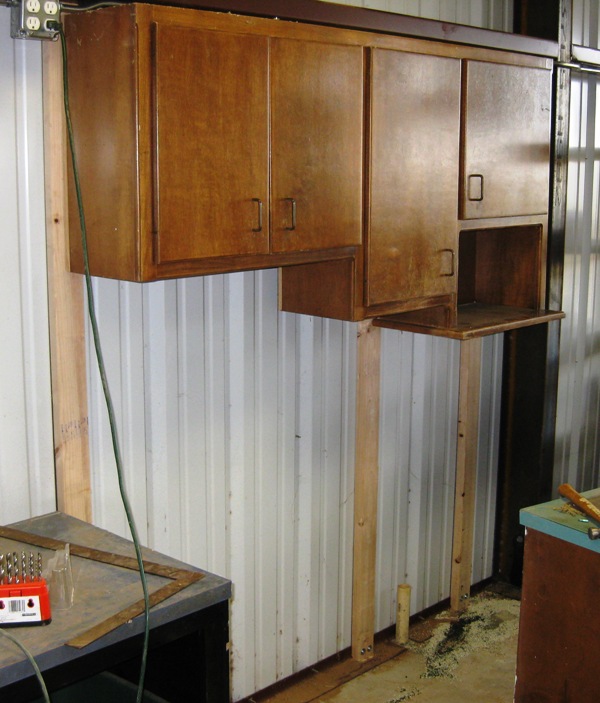
It doesn't look like much, but drilling a 1 inch hole through a 1/4" thick steel I-Beam isn't exactly easy. With the help of some oil to cool the bit and some patience, I was able to get it done without much issue though. I did have to enlarge the hole just a little bit with a dremel to get the 3/4" PVC to fit through it though. You can see some of the metal shavings under the hole in this picture. The next step was to actually hang the wall cabinet. The problem there is that the only structural support on the wall of the barn is the C Purling at 7 feet and 12 feet and some angle iron on the floor. To hold the cabinet I had to first put up something to hang it on. My simple solution to this is to cut 2x4's and screw them to the C Purling on the top and to the angle iron on the bottom. With self tapping metal screws it is a pretty easy process and the 2x4's seem to be pretty sturdy. Once I had the 2x4's up, it was a simple matter of holding the cabinet up while Cathy was helpful enough to put a few screws in.After 3 trips to Lowe's I finally had the parts I needed for the plumbing job. I have boxes of PVC fittings but they never seem to be the right ones. It was also a pain to find the right parts for the sink trap since at some point this sink had a disposal on it and not the normal extension.

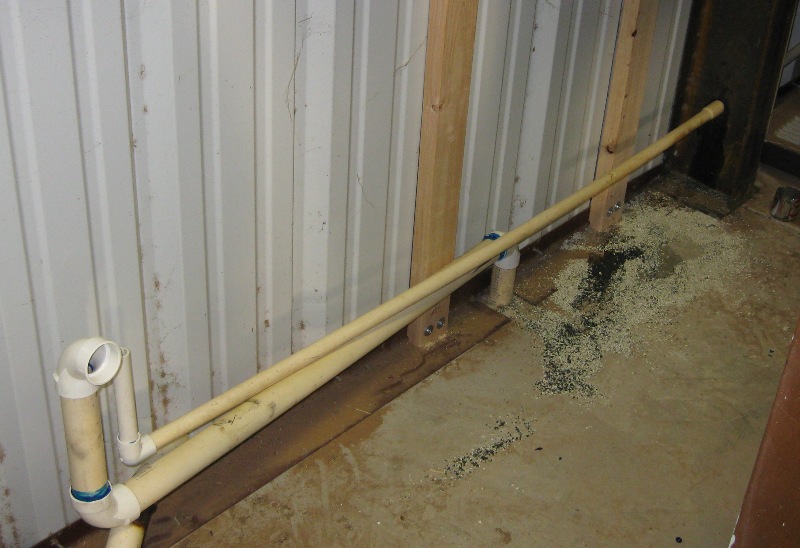
Here's the plumbing roughed in. (The kitty litter is from me spilling the cup of oil I was using to cool the drill bit when drilling the hole in the I-Beam).After that, just a few more fittings to install and I was up and running. One of the few projects were I actually got it done without a single leak!

I still need to figure out how I'm going to attach the lower counter cabinet to the wall though. It isn't perfectly stable and it will be a pain to retrieve items from behind it if they fall back there. Since the plumbing is running behind it I can't push it up against the wall, but I'm thinking some pressure treated plywood left over from my hunting blind project might do the trick.

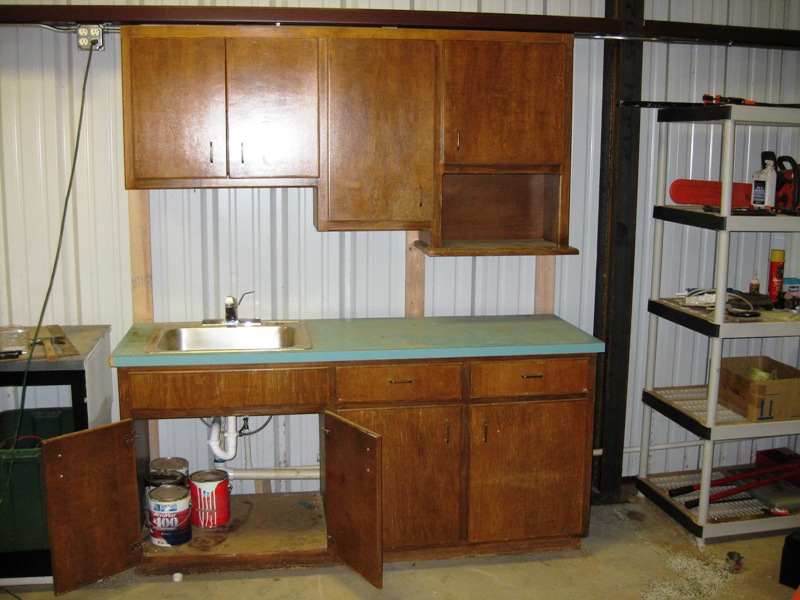
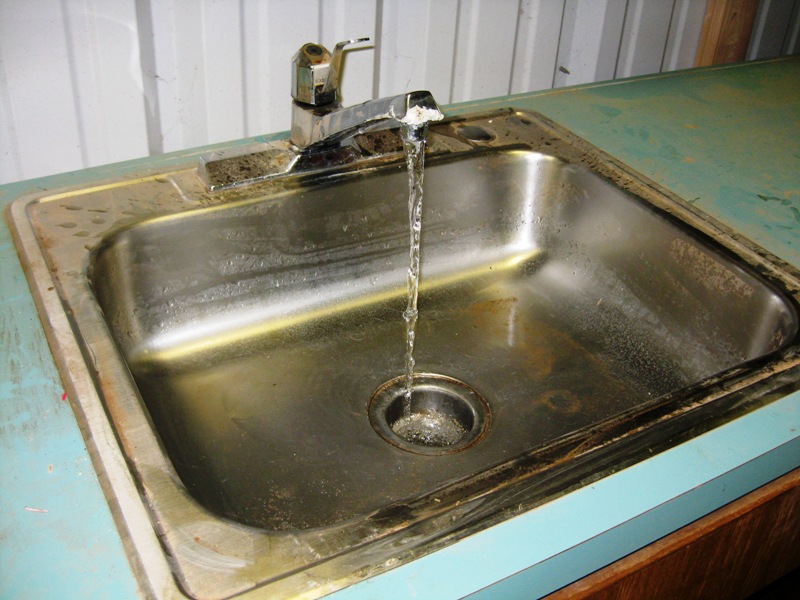
Here's the finished project. And of last but not least, a picture of the sink with water running! I still need to redo the top on a couple of the counters but I'm really nearing completion on the barn. I may start working on setting up a workshop area sometime down the road, but for now I think I'll just enjoy it the way it is for a while.

That's it for now. Nathan

Saturday, July 11, 2009

Snow Day!

Well, it's been nearly a week since we got back from our week in Montana, but I had a conference in San Antonio that I was doing a presentation at and a lot of other stuff going on at work so I'm just now back home again and have a little spare time to make a post. I'm getting some other stuff done in the barn as well, but since it has been 105+ the last several days I'm taking a break during the heat of the day. Kinda makes this post even more amazing.

We decided to take the ATV and my motorcycle up Arasta Creek and show my brother Arasta Lake. It isn't that great of a lake and isn't worth the 7 mile one way hike to get to it if you don't have an ATV or motorcycle, but it is one of the few trails that they do allow you to use an ATV or motorcycle on so it is well worth it then. And the ride is as fun as the destination.

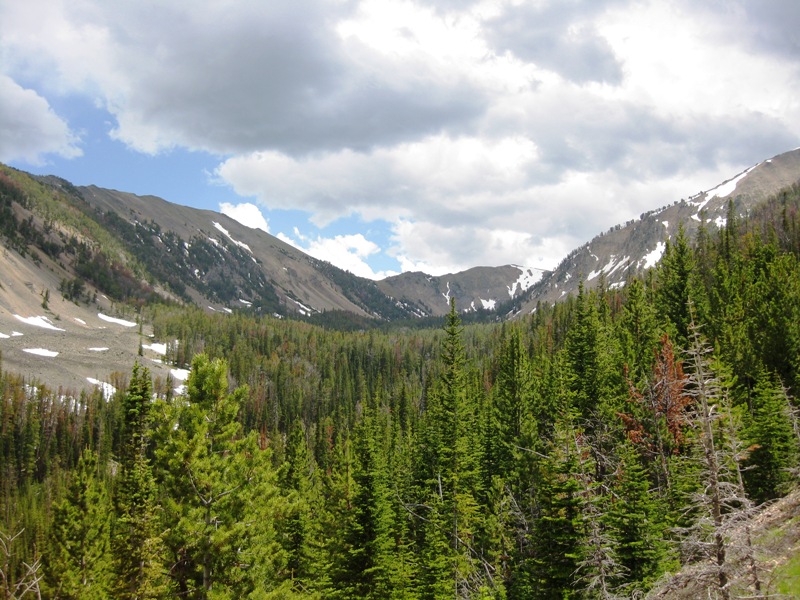
We ended up heading up there on June 30th so we were expecting there to still be some snow, just not as much as we ended up encountering! I made a post last year when I went up there with my friend Mike, but then we were able to go all the way to the lake very easily and even made it up to the top of another trail that ended up at 10,000 ft. Things were going well and we got into some snow around the 8,500 ft mark. Here's a shot of where we were headed.

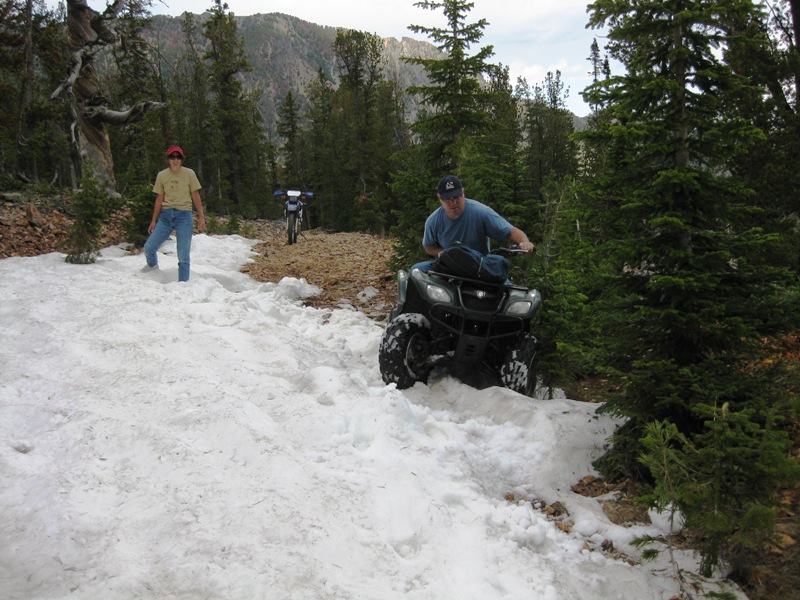
Then we ran into a pretty good sized drift right across the trail. (That's my brother Frank on the ATV and his wife Kerry watching and my bike parked in the background)

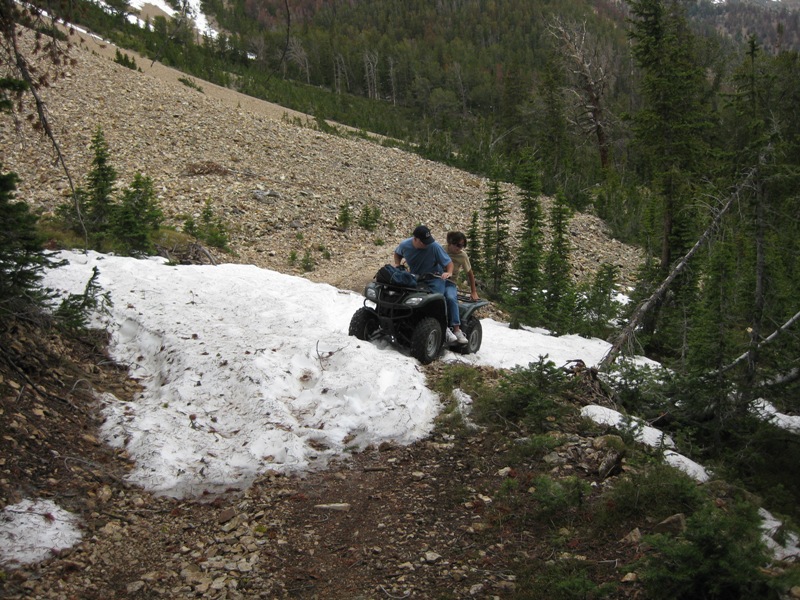
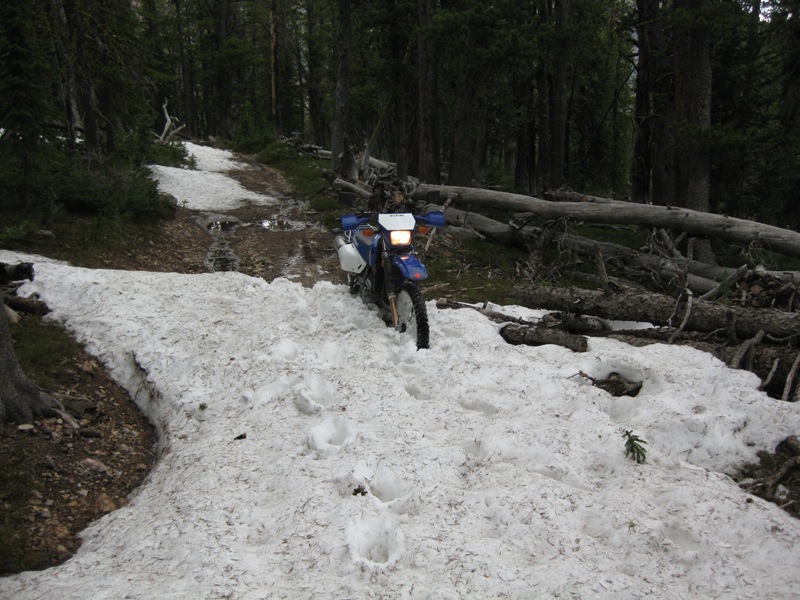
We still had nearly a mile to go at this point and I started to get a little nervous. I had expected that we were going to find some snow, but the snow was finding us! Our ATV is only a 2wd and works well under most circumstances, but it didn't really like the snow. The front wheels just plowed into the somewhat soft snow and the rear wheels just spun out. We tried working around the edges, but there wasn't much edge to work around on several sections of the trail. I was surprised that my motorcycle actually seemed to make it through better than the 2wd ATV.

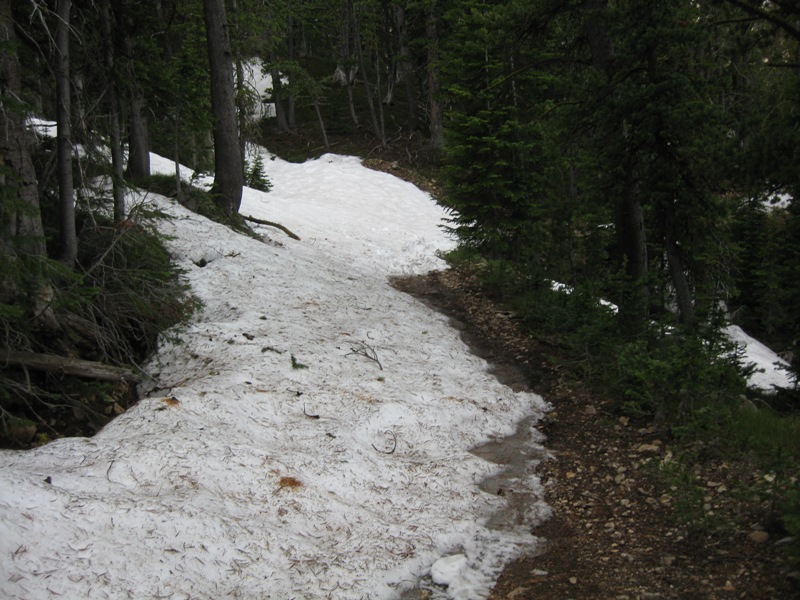
Here's the next decent snow across the trail. Anywhere there was shade across the trail there was snow.


Here's a short video clip of my brother going back through that patch of snow on the way back down.


Here's where we about gave up the first time. We actually left the ATV just up around the corner here. I kept after it on my bike as I could skirt around the snow a little better and it actually went through the snow pretty well for the most part.
This is looking back down the trail. I can't remember if the ATV made it this far or not.
Here's the first spot that I left the bike at. The kickstand isn't down, but it was so stuck in the snow it didn't matter! I actually ended up making it through this spot and probably another couple hundred yards down the trail before giving up and walking.
Here I am standing by the bike while it was in the drift. The snow was hard enough that for the most part with my big feet I stayed on top, but every once in a while you would break through.

Here's a video clip of me coming back through that spot on our way back down. Nothing exciting, but you can get a feel for what it was like riding through the snow.


After abandoning the vehicles we still had maybe a 1/2 mile to go to the lake. We started off on foot, but walking uphill at 9,000+ ft elevation is a little more effort than you might expect.

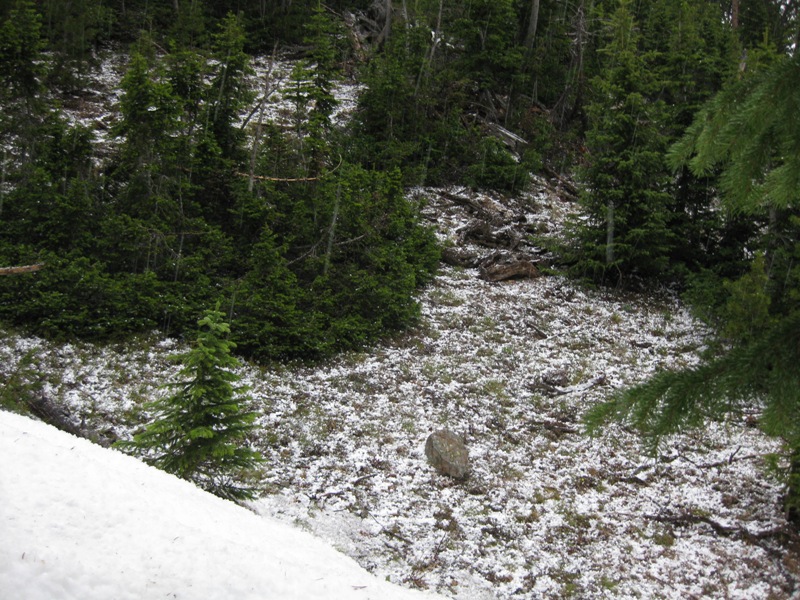
It started raining (it pretty much rained every afternoon we were there) and then my brother said all we need now is for it to snow, so of course mother nature obliged us! It was kind of like hail, but much softer. The temperature was above freezing but not much. Talking with some locals they said that it was called "popcorn snow". Little balls about a 1/2" in diameter. There was enough of them to pretty much cover the ground.

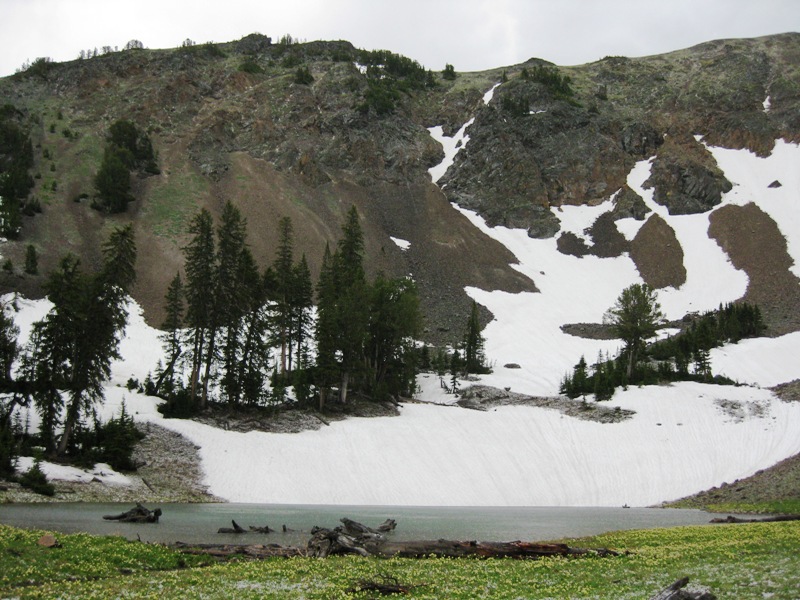
After huddling under some trees trying to avoid the rain and snow for 30 minutes or so, we ended up making it to the lake.
Here's a picture from nearly the same exact spot last year on August 1st. I wasn't able to get the motorcycle in the picture this year though!
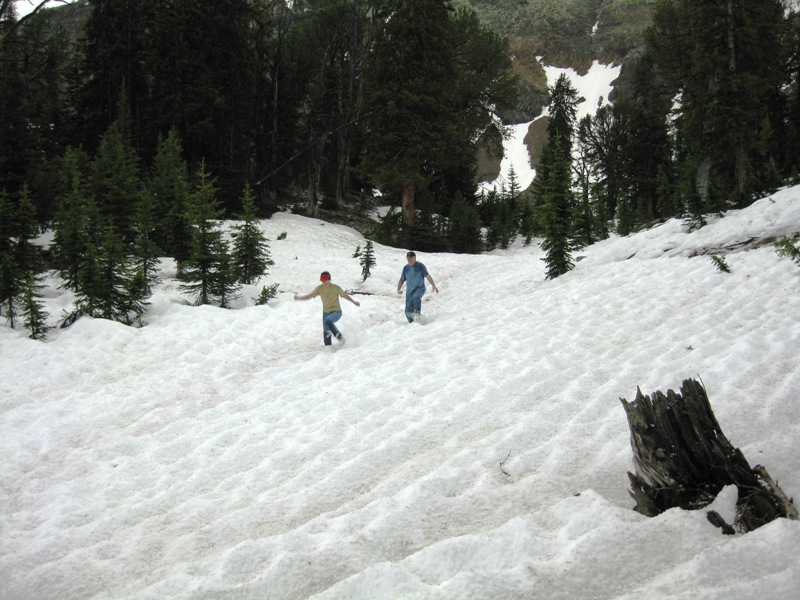
After a few pictures around the lake, we headed back. This picture gives some pretty good perspective on the snow. We weren't trying to find snow, we were trying to AVOID snow and this was the best route down at one point.
After we got back to the ATV and the bike, of course it started raining again. The temperature was still in the upper 30's or lower 40's and although I had my motorcycle protective gear on, my brother was just wearing a T-shirt. Needless to say it was a cold ride back down the mountain on a pretty treacherous trail.

My bike went over for the first time on the way back down. There are 2 creek crossings and 1 of them isn't very wide, but this time of year the water was close to 2 feet deep. I stalled out climbing up the other side of the creek, and couldn't hold the bike up against the current and it fell over in the creek. Thankfully, I was able to get it started right back up and walked it out of the creek without much problems. Of course waterproof boots don't work too well in 2 feet of water, but the bike ended up with just some light scratches on the handle bar end so that part was good.

We didn't get to ride as much as last time but it was still worth taking them up there. It was one of those times in your life where it wasn't that much fun when it was actually happening, but looking back on it makes it seem like it was alot better than it was. Especially sitting here in 105+ degree heat!

I may make another post on our week at church camp in Montana and I've got a few projects I'll post on as I get to them.

Had a great time at camp, but it is good to be home!

Nathan

Sunday, June 21, 2009

Let there be light!

The barn now has electricity!!!

After 3 years of running the door opener and a few other things off of an extension cord running from the house, the barn now is fully wired for electricity!

Cathy talked her sister's husband who is an electrician into coming to visit this weekend and helping out by wiring up the barn. I helped out and learned some tips and tricks that I will probably never use again. We were able to get it done in right at 8 hours and it would have probably taken me at least 4 or 5 times that long doing it by myself. He was super fast at bending the conduit and even faster at figuring out the circuits and running the wire. I hung the light fixtures which took me about the same time it took him to run all the conduit for the outlets and the lights.

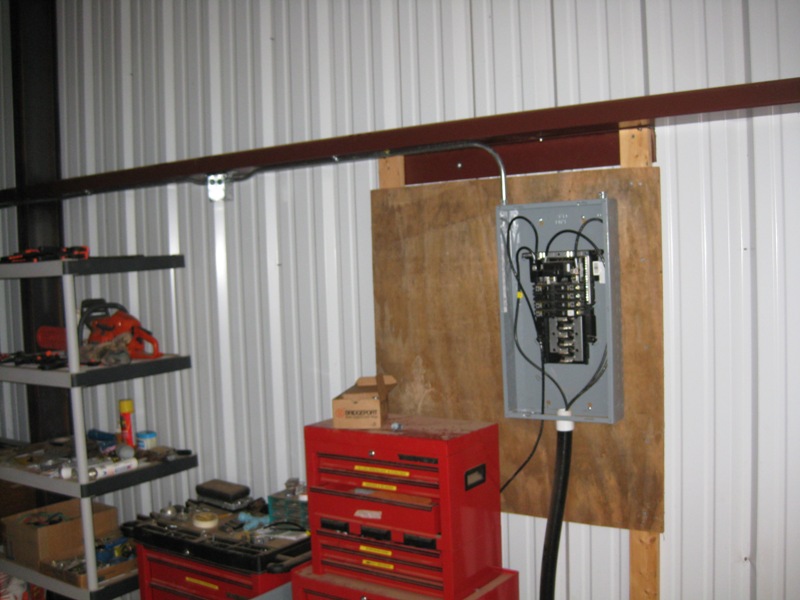
I had already got the panel up and hot last Friday with the help of the local electric cooperative. Here's the 100 amp panel and the first run of conduit running out of it.

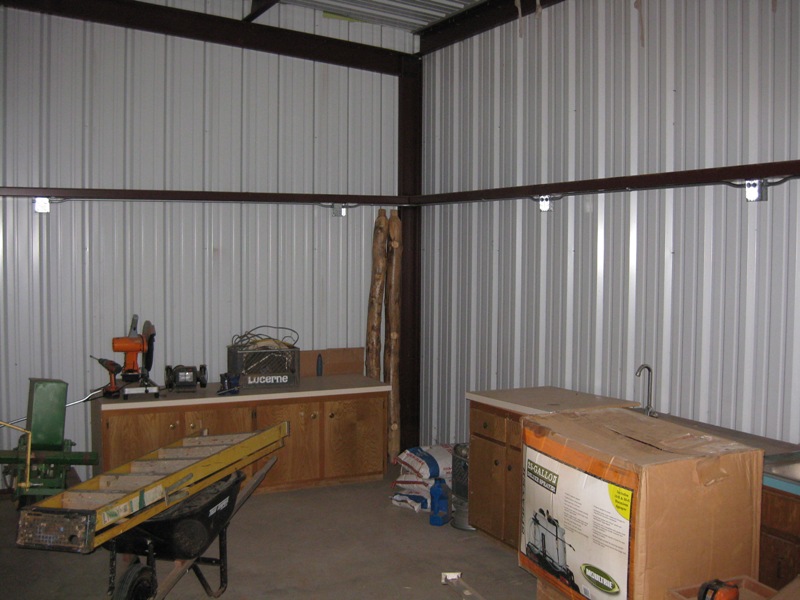
It never seems like you plan for enough outlets so I probably went overboard. I have 10 boxes around the barn perimeter and each of them has 2 outlets in them for a total of 20 outlets. I have another outlet on the ceiling for the door opener as well. The outlets are on 5 separate circuits as well so I shouldn't be tripping many breakers. This corner is where I plan on having some type of shop area eventually and these outlets are setup on 3 different 20 amp circuits.
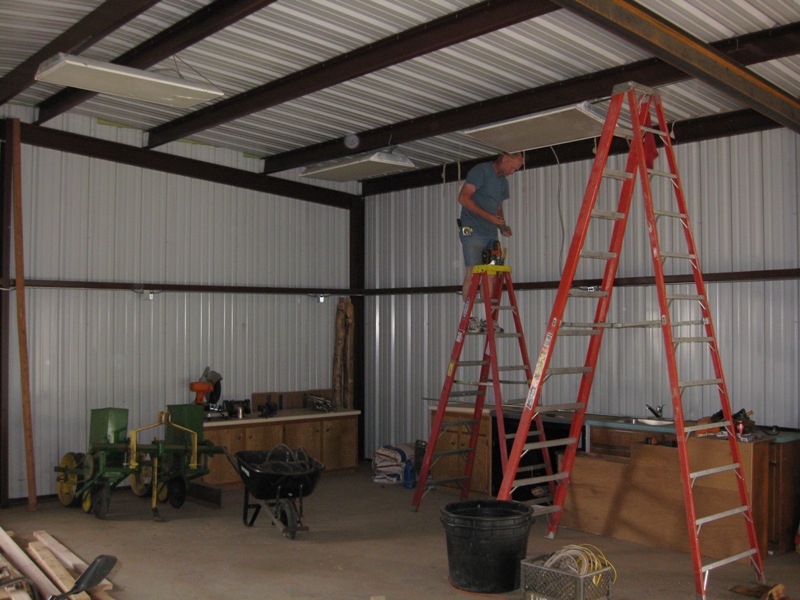
I bought a used 12' stepladder thinking I could use it to hang the light fixtures and then it would be useful in the future to change light bulbs, etc., but as you can see in the picture I think it is too tall. It was useful in hanging the fixtures but it is actually too tall to move around easily and the 8' ladder that my brother in law is on will be plenty tall to change light bulbs and things like that. I'm either going to donate the ladder to our church since someone borrowed theirs and hasn't returned it (I was planning on borrowing theirs instead of buying one) or a co-worker said he would buy it from me if I give him a good enough deal on it.

Here's my brother in law running conduit to the light fixtures.

I got the light fixtures for free when we remodeled our office. I wasn't sure whether they would all work or not as they've been sitting in the barn for 2 years and have been moved around a couple times. I ended up with way too many and sold a few on craigslist, and I still have some left if anyone wants some! Thankfully they all worked other than 1 bad light bulb and 1 poor connection on one of the fixtures that I wired up!

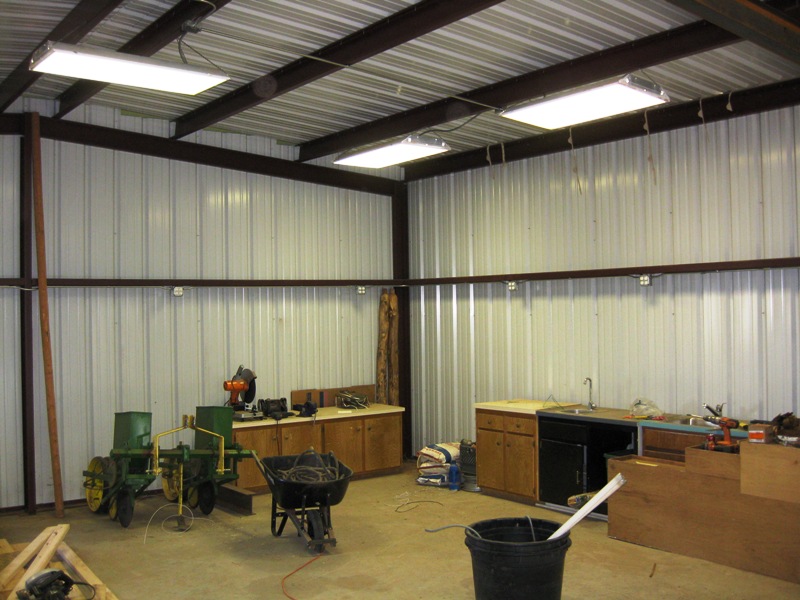
Here's the same corner later with everything up and running!
I still need to put one cabinet up and plumb up a sink. Hopefully I won't wait 3 years before getting that part done!

I didn't take many pictures, but I'm very happy with the end result! It is amazing how bright it is in there with 7 - 4 foot light fixtures with 4 - 40 watt bulbs in each one. A total of 1,120 watts of fluorescent lighting with decent reflectors in the fixtures. I hung 2 fixtures over the future shop area and it is really bright there.

I also now have a hookup for my welder that I've had for a couple years now and never used. Of course I've never even attempted to weld anything and really have no idea where to start, but I now have everything I need to try it other than some welding rods. Now I just need something to practice on!

That's it for now.

Nathan

Thursday, June 18, 2009

Concrete work is finished!

Well, my concrete projects are finished for now!

I got the flagstone sidewalks cleaned up for the most part last night and the driveway is curing nicely.

Overall I'm pretty happy with the driveway. There is one small low spot about 2' long by 1' wide that collects a little bit of water when I'm spraying it down, but other than that it seems pretty good. The small puddle is only about 1/2" deep and the cement is 8" thick where the puddle is so I don't think it will cause any real problems. There are a few other low spots but none really hold much water, they are all less than 1/4" deep and the water evaporates off of them in less than 1/2 an hour.

The finish is good, but they told us to keep the dogs in the garage overnight so they wouldn't walk on the concrete as it dried and we did that, but there are a few cat tracks on the cement and something went across it a couple times and left some light scratches. I meant to take a picture of them but forgot. I think it might have been a rabbit as we've been having problems with them eating Cathy's tomato plants. I think they just add a little character to it, they aren't deep enough to actually be an issue at all.

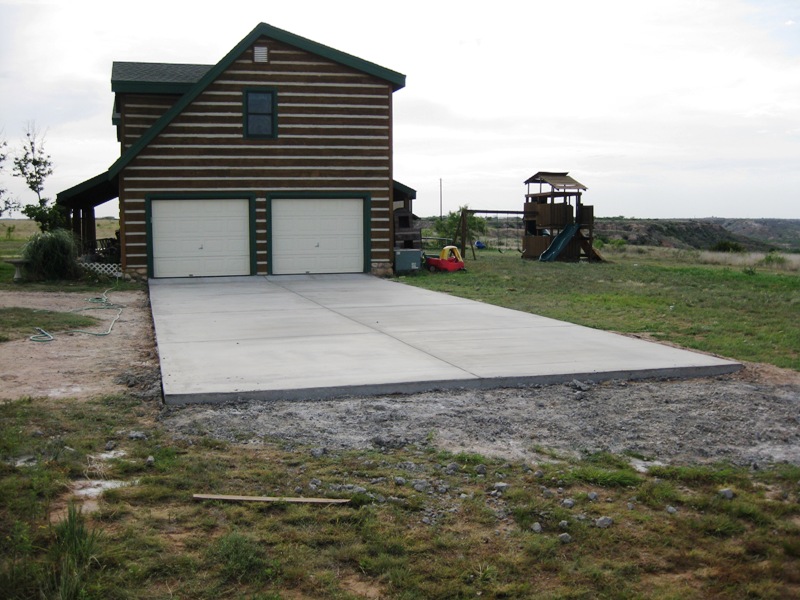
Here's the final product.

I still need to clean up the area around it a little bit and level off the road leading up to it a little but that shouldn't take much time. We are continuing to water it down 3 times a day to help it cure slower and hopefully avoid any major cracking. Eventually I'll bring in some more dirt from elsewhere on the property and build up the ground around it to make it a little more level so there's not such a steep drop off away from the driveway.

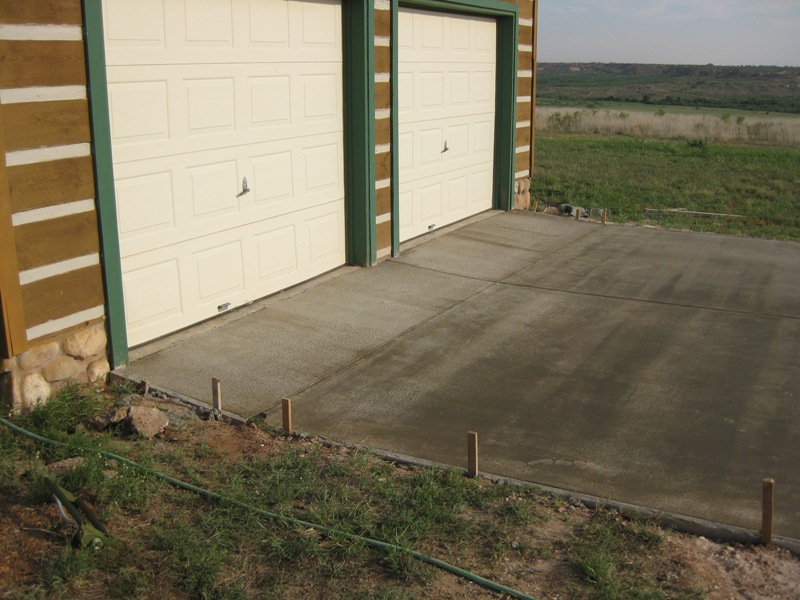
One thing we did with the driveway to keep from having to build everything up around it even more was make some ramps up into the garage. It doesn't look like much but there is a 4 inch drop from the garage to the rest of the driveway over the first 3 feet coming out of the garage. This really helped in matching the driveway to the grade of the land around it and really shouldn't be any issue on getting in or out of the garage at all. Plus if we had a torrential downpour it would help keep rain water from running into the garage.

Here's a picture of the ramp before the forms were pulled off.Back to the sidewalks, that's where I spent my time and effort yesterday.

I mentioned in my previous post that it really wasn't a big deal to get cement on the flagstone since you can clean it off anyway. Well, there's a fine line (or wide line actually) between being overly careful and being downright sloppy and I think I crossed it! When it came time to clean the cement off the flagstone I realized that I should have worked a little bit harder when the cement was still wet to get the flagstone a little cleaner! It took alot more work than I expected to get the flagstone cleaned and there is still some cement left on some of it.

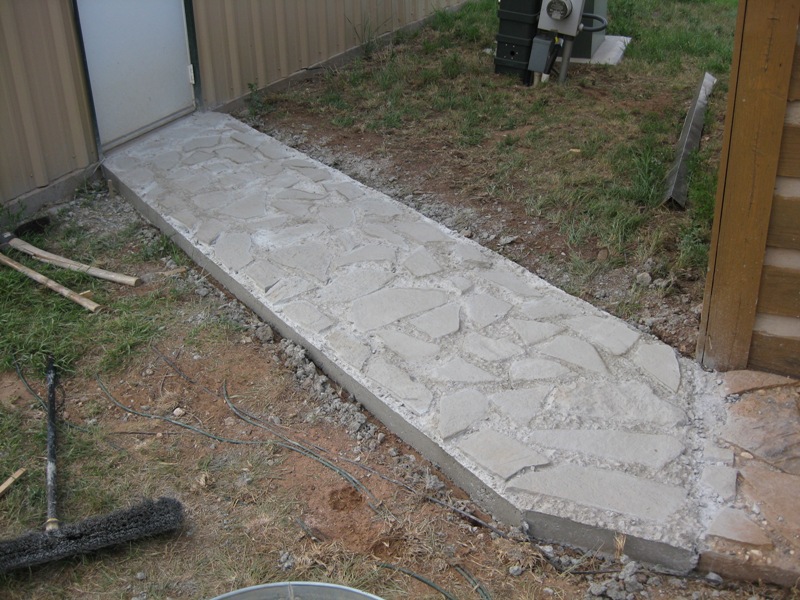
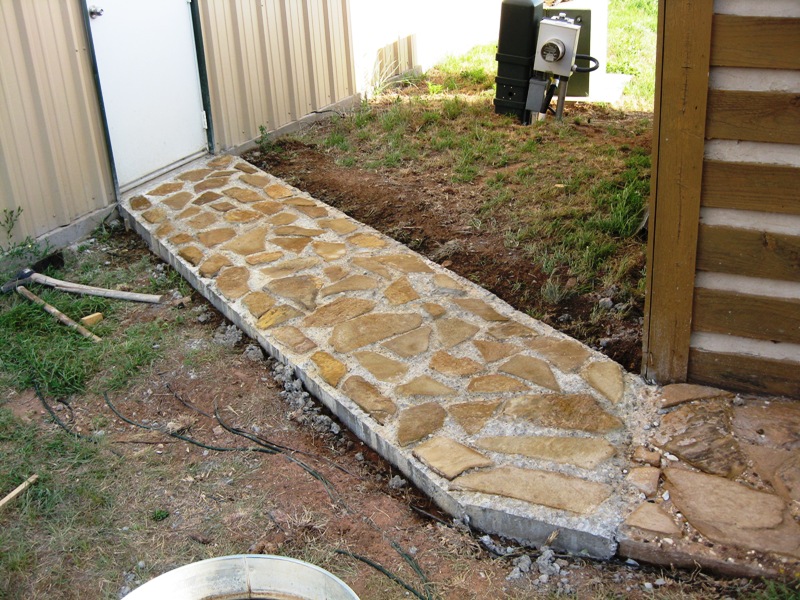
Here's what the sidewalk to the barn looked like yesterday when I got ready to start cleaning it. The sad thing is that it was in alot better shape than the sidewalk by the house! I had 2 gallons of muratic acid and I ended up using both of them. I mixed them at about a 50% mix ratio with water in a 5 gallon bucket and started scrubbing. (I mixed 2 separate batches, that kept the mix cleaner). One thing you should probably do when scrubbing a very basic material (cement) with an acid is wear good eye and skin protection. Of course I was out there in shorts and slip on shoes with no socks! I got stung a few times but the muratic acid really isn't that strong and the only place it hurt was when it splashed on an open sore where I had a scratch on my leg or something.

I washed everything down once with the acid then rinsed it all down then repeated the process. It really is kind of neat scrubbing it down as the acid foams up when it comes into contact with the cement like hydrogen peroxide does when you put it on a cut. The second time around it was easy to see where the worst of the cement was on the flagstone because it foamed up.

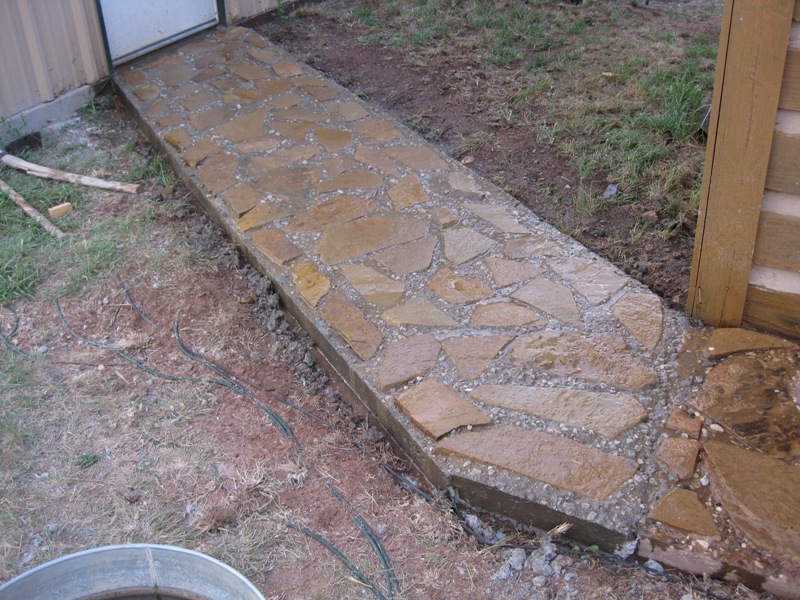
After an hour or so of scrubbing and a final rinse, here's what it looked like. I think it turned out pretty good overall. There are still a few spots with some cement on the flagstone but not too bad.

Here's what it looked like this morning after drying.

For some reason this cement ended up being a little lighter in color, but I think it helps the flagstone stand out better. I think it is because this cement was fibered cement and the last batch I worked with wasn't. I think over time it will get a little dark also.

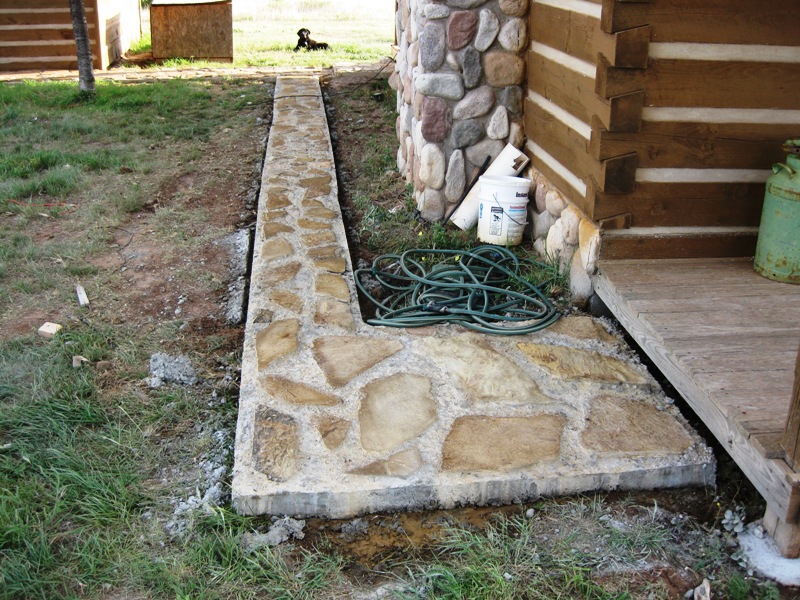
Here's the sidewalk from the front porch to the back sidewalk this morning.

You can see it is a little rougher than the barn sidewalk with the cement, but partly the stones are just a lighter color and don't stand out as much. I'll probably wait until the end of the summer and scrub it down again one more time to see if I can get all the cement off.

I still have a little bit of cleanup to do and I'll probably bring in a little dirt with my tractor and fill in around the edges a little bit, but other than that I'm done.

Overall I'm pretty happy with the results of both projects. My list of things to do is getting shorter and shorter! Hopefully after this weekend the barn will be wired for electricity (lights, outlets, etc.) and that will be one more item off my list!

That's it for now. Nathan

Wednesday, June 17, 2009

New sidewalks. Part 1

Well, I guess I might as well make a post on my sidewalk work. I'm not 100% complete on it yet but it is done for the most part. Just a little cleaning left to do.

Did I mention in my last post that it was 105 degrees yesterday when we were working the concrete? Well trust me, it was.

About 6 or 7 years ago we decided to put in flagstone walkways around our house. I dug down into the ground about 2" and filled it with sand and then placed the flagstone down into the sand so I could level it all out. It looked really good for a while but then grass started to grow up through the sand and most of the grass around our house is actually sand burrs so that didn't end up working out very well.

5 years ago when I built the greenhouse onto the shed I decided to put in some real sidewalks, but we really liked the look of the flagstone walkways so we decided to pour cement sidewalks but put the flagstone on top of the cement. We poured a large sidewalk coming to the front door and a little patio around the hot tub on the back porch and also a sidewalk going to the shed. They turned out really well.

3 years ago when we had the barn built I didn't think ahead to extend the sidewalk out to the barn, but now it was a no brainer that we should extend the sidewalk out to the barn since we were having other cement work done. As I mentioned in my last post, then we decided to add a step on the front porch and also a narrow pathway from the front porch to the sidewalk coming off the back porch.

Not sure why I decided that I was going to work the sidewalks instead of hiring it done (at the price they were charging me it would have only cost a little over $100 for them to do it) but it was something I figured I was capable of doing so I decided I would do the sidewalks myself while they worked on the driveway.

I had some flagstone already in place off the front porch and a little bit on the pathway from the front porch to the back sidewalk and I had some more stacked around our wood pile from the last sidewalk project so the first thing to do was to see if we had enough of it on hand or whether we needed to buy some more.

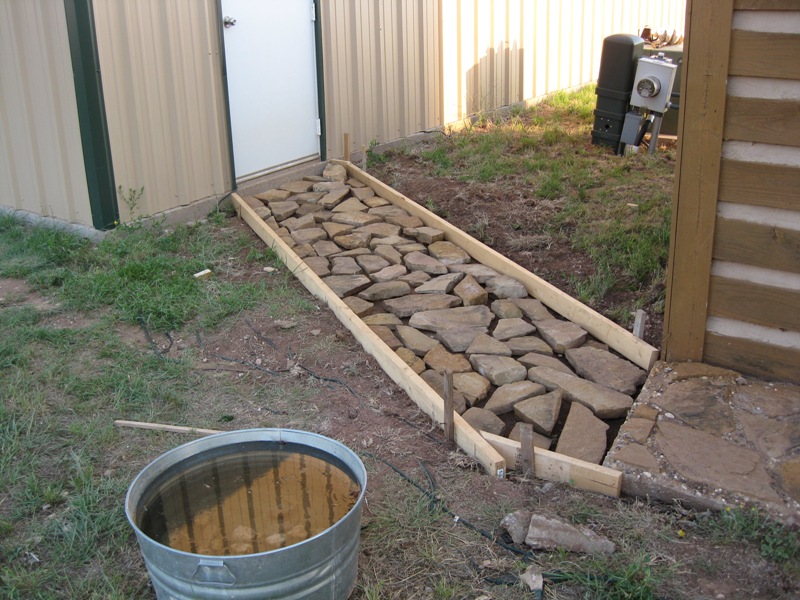
After setting the forms I decided to do a test run to make sure I had enough flagstone. I hate to buy flagstone because it is priced at an outrageous amount if you buy it by the stone so I always end up buying it by the ton since the way they price it, if you buy 250lbs of it by the stone you pay about the same as buying a ton of it in bulk. Last time we did a sidewalk I think I bought a pallet of it which was 2 1/2 tons if I remember right. The problem with buying it in bulk is that you generally end up with more than you need. This time that turned out to be a blessing, because after scrounging around the property and even pulling out some flagstone that I was using to hold up some of my farm implements and replacing it with some concrete pavers I ended up with exactly the amount of flagstone that I needed. Not even one small piece to spare.

Here's the sidewalk going to the barn. You can actually see part of one of the other flagstone sidewalks on the right side of this picture, I actually made that one myself with some extra concrete they had when they poured the barn slab. That sidewalk is only about 8' long x 3' wide and I had about 10 minutes to form that up before they poured it. Also they used a different kind of concrete on the barn slab so it ended up with alot of exposed gravel in the cement between the flagstone. I'm not sure how this batch is going to turn out, but I think it will be similar.
Here's the sidewalk going from the front porch to the back sidewalk. As I mentioned before, this is really more of a walkway than a sidewalk. First i was only going to make it 18" wide, but I ended up making it 20" wide. Kind of like a 1 lane sidewalk.
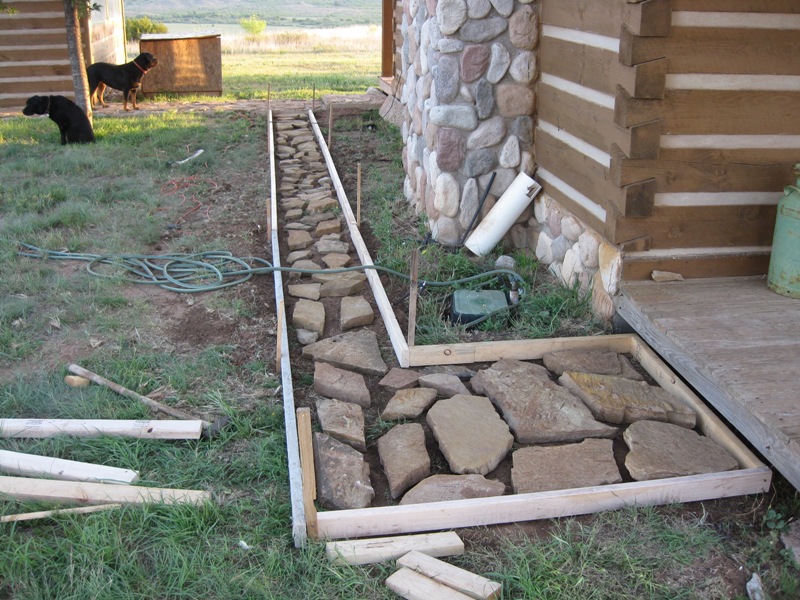
The good thing about putting all the flagstone in for a test fitting was I realized I had exactly the right amount of flagstone that I needed. The bad thing was that I then had to take it all back out to get ready for them to pour the concrete. At least I was able to do that in the morning before it got hot though.

Here's the sidewalk to the barn ready for concrete. I smoothed and packed and watered it several times in the week before the pour. I set the rocks beside it in some semblance of order, but when it came time to stack them back on there I don't think I got them back in quite the same spots as the test fitting.
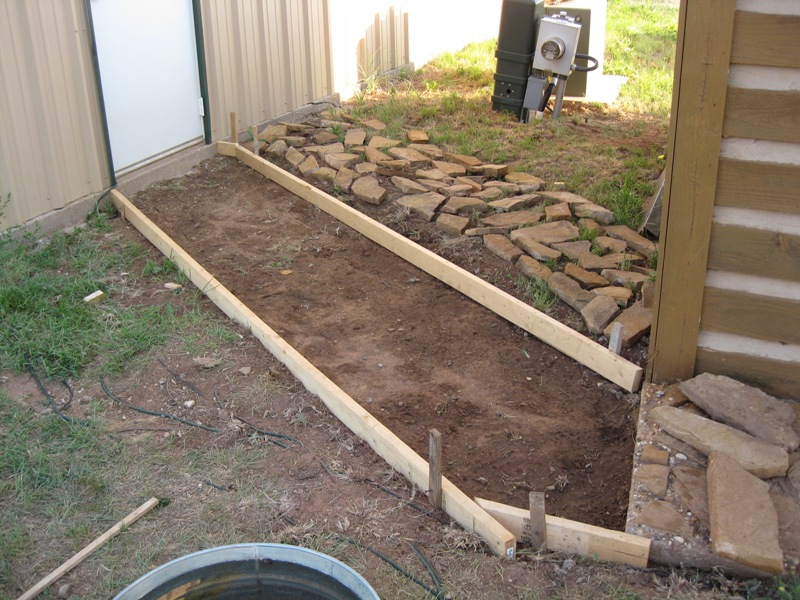
Here's the pathway to the back sidewalk ready for the pour. I did all this the night before the pour because we decided to do it at the last minute. The concrete guys ended up putting us off a couple times and it turned out to be a good thing because I'm really happy we decided to put in this walkway.
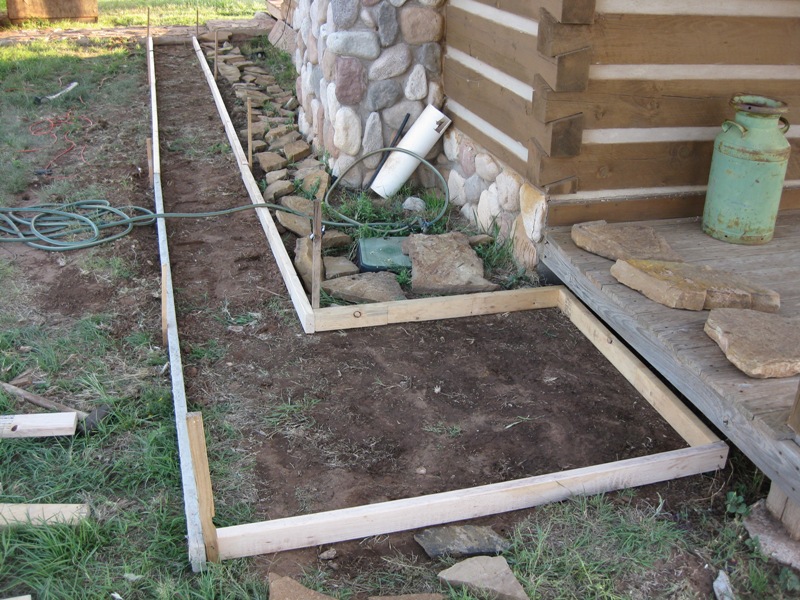
The guys that were doing the driveway did help me get the concrete in the forms. It was like talking a foreign language to get the truck driver to understand how I wanted to pour it, they have some special hand signals that they give the driver to pull forward and speed up or slow down the amount of concrete coming out. I could have gotten it done, but they saved me quite a bit of time so I was very thankful for the help.

The concrete was already setting up when it came out of the truck so I had to work pretty fast. I didn't get any pictures of it in progress as Cathy was at a softball game, but I don't think you are missing out on anything not seeing pictures of me in my cut off slacks and grungy T-shirt and straw hat working with the cement.

Since the cement was so dry I had to actually jump up and down on some of the larger rocks to get them down into the concrete. The key is to get the top of the rocks fairly level and some of the rocks are 1" thick and some of the rocks are 3" thick. When we poured the concrete we didn't fill the forms to the very top with the understanding that as I added the flagstone it would displace some of the cement and end up the full height of the form.

After all the rocks were in the cement and fairly level, I used an old broom to work the concrete into and around the rocks to get it as smooth as possible. When you force the rocks down into the concrete you end up with little berms around each rock, especially when it is dry like it was. I sprayed some water on the top to make it a little easier to work with as well. By running the broom back and forth over everything it knocks those bumps down and fills in any low spots. It takes a little bit of work, and the end result isn't perfect, but you end up with a fairly smooth sidewalk when it is done.

Here what the sidewalks look like after the pour. It seems pointless to spend all that time and effort putting the flagstone in a perfectly good sidewalk if it all turns out gray doesn't it? Well, it isn't going to stay gray. I've seen and tried it both ways where folks try to keep the rocks from getting cement on them and when they don't even bother trying to keep the cement off the rocks. When you try not to get cement on the rocks you end up getting cement on them anyway and you still have clean them off, and if I remember right, cleaning them off isn't very hard. Hopefully my memory is correct because that is the only part I have left to do! You just add some muratic acid to some water (I always have to double check the correct order on adding acid to water or vice versa) and then scrub the cement film right off the flagstone with a broom or brush. At least that's what I remember.
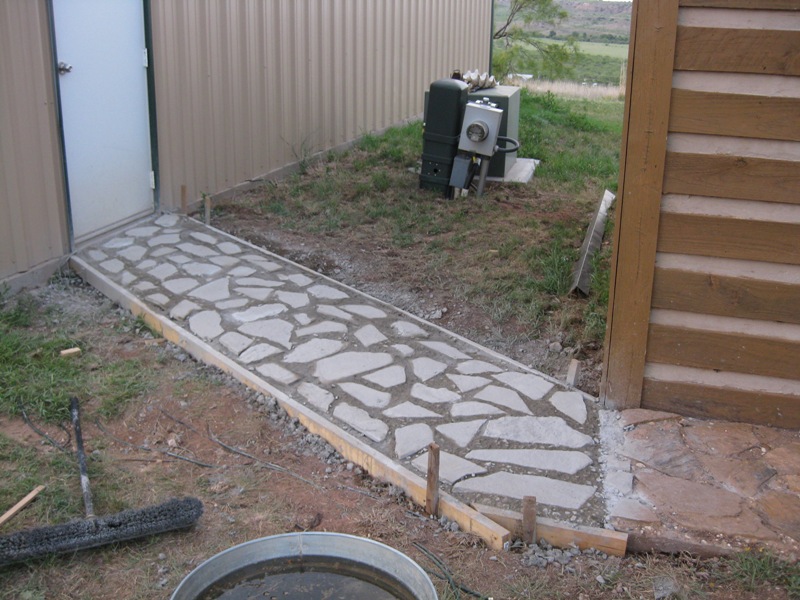
Here's the walkway from the front porch to the back sidewalk.
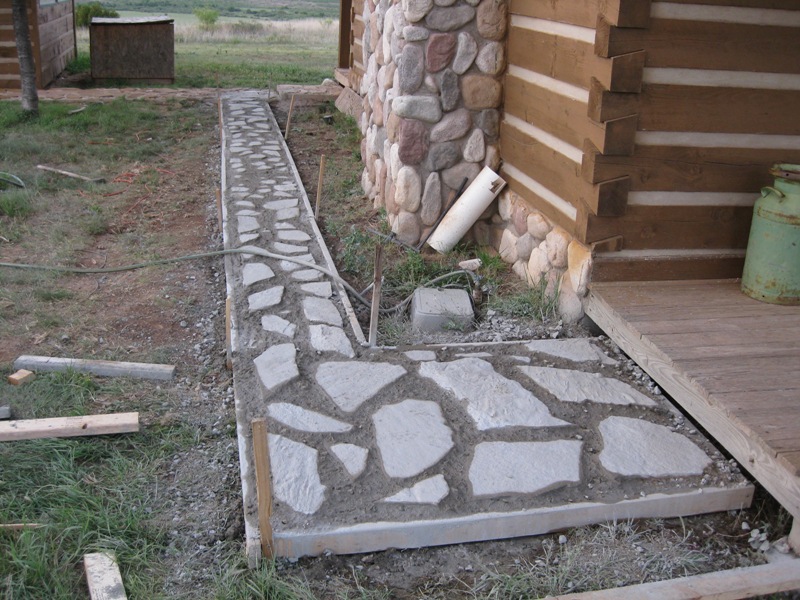
I pulled the forms off this morning and I plan on cleaning the flagstone off tonight so I'll probably have another post with the finished product. I'll update the driveway project with the same post probably.

That's it for now. Nathan