Did I mention in my last post that it was 105 degrees yesterday when we were working the concrete? Well trust me, it was.
About 6 or 7 years ago we decided to put in flagstone walkways around our house. I dug down into the ground about 2" and filled it with sand and then placed the flagstone down into the sand so I could level it all out. It looked really good for a while but then grass started to grow up through the sand and most of the grass around our house is actually sand burrs so that didn't end up working out very well.
5 years ago when I built the greenhouse onto the shed I decided to put in some real sidewalks, but we really liked the look of the flagstone walkways so we decided to pour cement sidewalks but put the flagstone on top of the cement. We poured a large sidewalk coming to the front door and a little patio around the hot tub on the back porch and also a sidewalk going to the shed. They turned out really well.
3 years ago when we had the barn built I didn't think ahead to extend the sidewalk out to the barn, but now it was a no brainer that we should extend the sidewalk out to the barn since we were having other cement work done. As I mentioned in my last post, then we decided to add a step on the front porch and also a narrow pathway from the front porch to the sidewalk coming off the back porch.
Not sure why I decided that I was going to work the sidewalks instead of hiring it done (at the price they were charging me it would have only cost a little over $100 for them to do it) but it was something I figured I was capable of doing so I decided I would do the sidewalks myself while they worked on the driveway.
I had some flagstone already in place off the front porch and a little bit on the pathway from the front porch to the back sidewalk and I had some more stacked around our wood pile from the last sidewalk project so the first thing to do was to see if we had enough of it on hand or whether we needed to buy some more.
After setting the forms I decided to do a test run to make sure I had enough flagstone. I hate to buy flagstone because it is priced at an outrageous amount if you buy it by the stone so I always end up buying it by the ton since the way they price it, if you buy 250lbs of it by the stone you pay about the same as buying a ton of it in bulk. Last time we did a sidewalk I think I bought a pallet of it which was 2 1/2 tons if I remember right. The problem with buying it in bulk is that you generally end up with more than you need. This time that turned out to be a blessing, because after scrounging around the property and even pulling out some flagstone that I was using to hold up some of my farm implements and replacing it with some concrete pavers I ended up with exactly the amount of flagstone that I needed. Not even one small piece to spare.
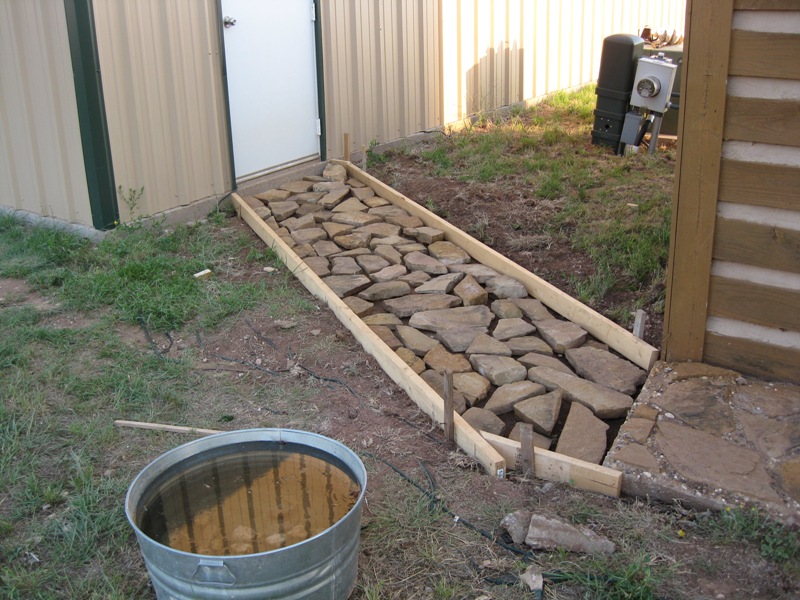
Here's the sidewalk going to the barn. You can actually see part of one of the other flagstone sidewalks on the right side of this picture, I actually made that one myself with some extra concrete they had when they poured the barn slab. That sidewalk is only about 8' long x 3' wide and I had about 10 minutes to form that up before they poured it. Also they used a different kind of concrete on the barn slab so it ended up with alot of exposed gravel in the cement between the flagstone. I'm not sure how this batch is going to turn out, but I think it will be similar.
 Here's the sidewalk going from the front porch to the back sidewalk. As I mentioned before, this is really more of a walkway than a sidewalk. First i was only going to make it 18" wide, but I ended up making it 20" wide. Kind of like a 1 lane sidewalk.
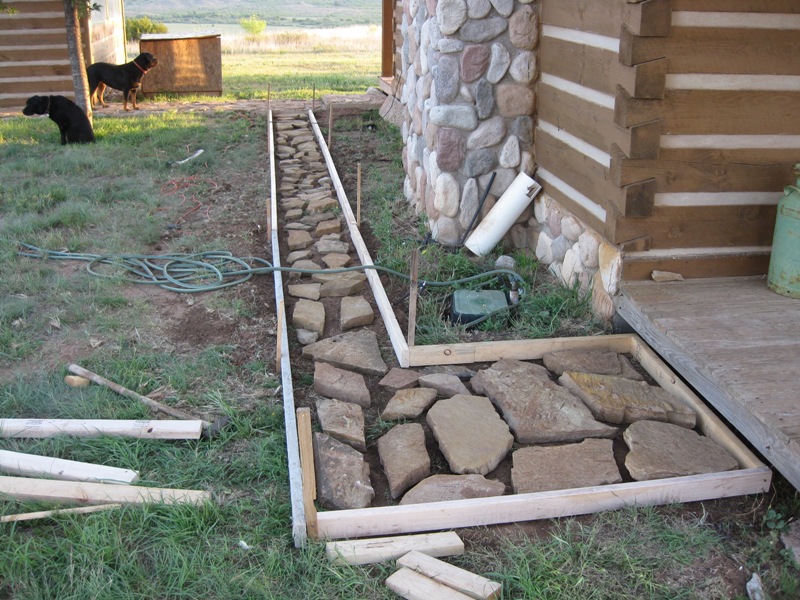 The good thing about putting all the flagstone in for a test fitting was I realized I had exactly the right amount of flagstone that I needed. The bad thing was that I then had to take it all back out to get ready for them to pour the concrete. At least I was able to do that in the morning before it got hot though.
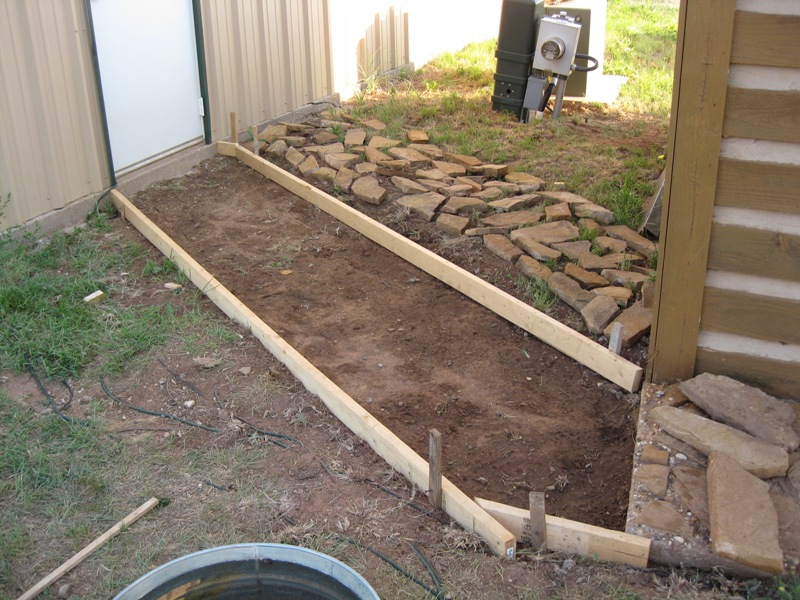
Here's the sidewalk to the barn ready for concrete. I smoothed and packed and watered it several times in the week before the pour. I set the rocks beside it in some semblance of order, but when it came time to stack them back on there I don't think I got them back in quite the same spots as the test fitting.
 Here's the pathway to the back sidewalk ready for the pour. I did all this the night before the pour because we decided to do it at the last minute. The concrete guys ended up putting us off a couple times and it turned out to be a good thing because I'm really happy we decided to put in this walkway.
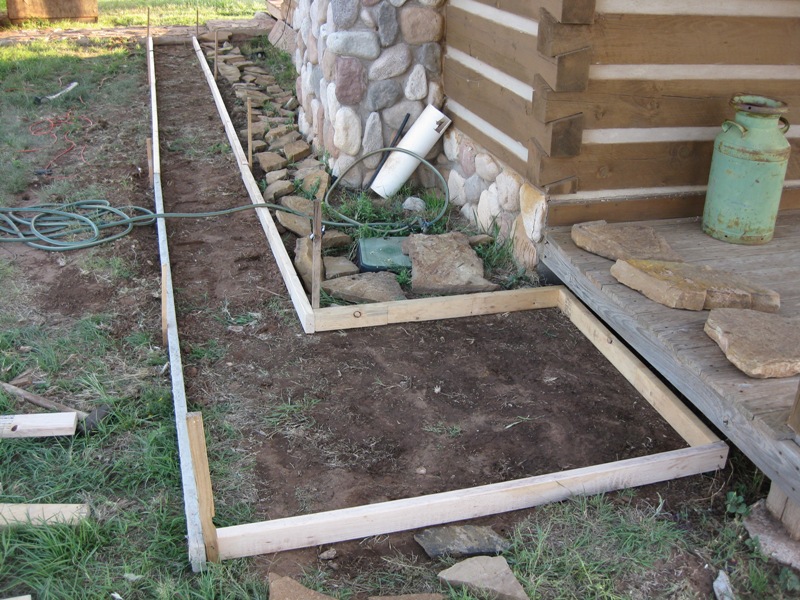 The guys that were doing the driveway did help me get the concrete in the forms. It was like talking a foreign language to get the truck driver to understand how I wanted to pour it, they have some special hand signals that they give the driver to pull forward and speed up or slow down the amount of concrete coming out. I could have gotten it done, but they saved me quite a bit of time so I was very thankful for the help.
The concrete was already setting up when it came out of the truck so I had to work pretty fast. I didn't get any pictures of it in progress as Cathy was at a softball game, but I don't think you are missing out on anything not seeing pictures of me in my cut off slacks and grungy T-shirt and straw hat working with the cement.
Since the cement was so dry I had to actually jump up and down on some of the larger rocks to get them down into the concrete. The key is to get the top of the rocks fairly level and some of the rocks are 1" thick and some of the rocks are 3" thick. When we poured the concrete we didn't fill the forms to the very top with the understanding that as I added the flagstone it would displace some of the cement and end up the full height of the form.
After all the rocks were in the cement and fairly level, I used an old broom to work the concrete into and around the rocks to get it as smooth as possible. When you force the rocks down into the concrete you end up with little berms around each rock, especially when it is dry like it was. I sprayed some water on the top to make it a little easier to work with as well. By running the broom back and forth over everything it knocks those bumps down and fills in any low spots. It takes a little bit of work, and the end result isn't perfect, but you end up with a fairly smooth sidewalk when it is done.
Here what the sidewalks look like after the pour. 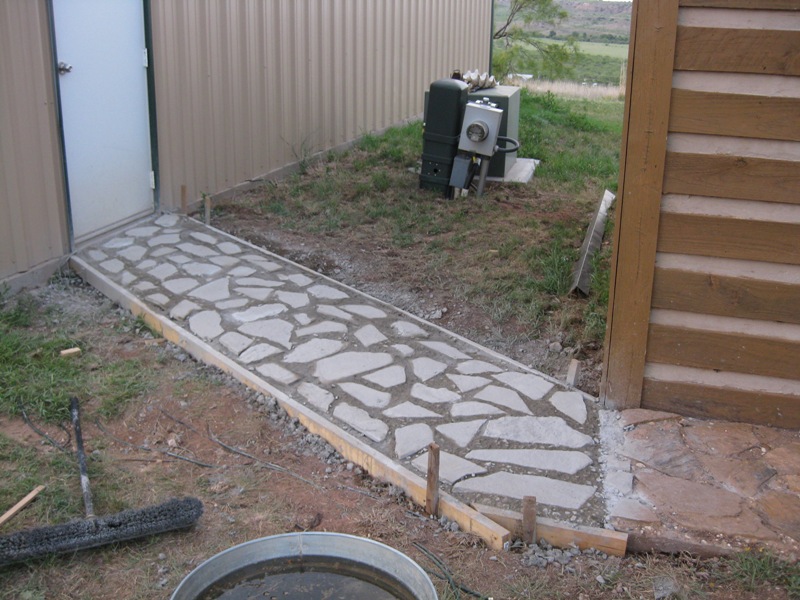 It seems pointless to spend all that time and effort putting the flagstone in a perfectly good sidewalk if it all turns out gray doesn't it? Well, it isn't going to stay gray. I've seen and tried it both ways where folks try to keep the rocks from getting cement on them and when they don't even bother trying to keep the cement off the rocks. When you try not to get cement on the rocks you end up getting cement on them anyway and you still have clean them off, and if I remember right, cleaning them off isn't very hard. Hopefully my memory is correct because that is the only part I have left to do! You just add some muratic acid to some water (I always have to double check the correct order on adding acid to water or vice versa) and then scrub the cement film right off the flagstone with a broom or brush. At least that's what I remember.
Here's the walkway from the front porch to the back sidewalk.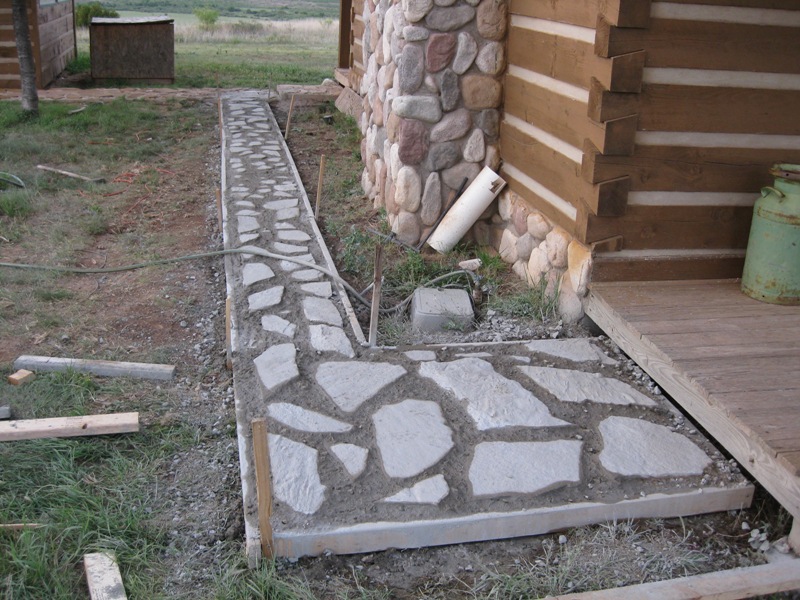 I pulled the forms off this morning and I plan on cleaning the flagstone off tonight so I'll probably have another post with the finished product. I'll update the driveway project with the same post probably.
That's it for now. Nathan


No comments:
Post a Comment