I've been wanting to build a larger hunting blind on my hunting land for over a year now. The one I have down there is only 4'x4' which sounds plenty big until you actually use it. It is big enough for one person, but there have been several times when I bring a friend or two and although you can fit 2 people in it (we've done it) it is very cramped. So I decided there is no time like the present and decided to get to it. I'll move the other blind to a different spot on the land where it will get used on an occasional basis, but not regularly.
I debated back and forth for the last year on how big to build the new blind. Building it 8' x 8' seemed like the way to go as it would make efficient use of building materials and that would be plenty big enough, but I talked to a few different people who said that 8' x 8' was too big. It worked well for two people, but one person has a hard time effectively seeing out all the windows. Since probably around 80 percent of the time I am using by myself, I didn't want to make it too big for me to use by myself. I went back and forth between 6' x 6' and 7' x 7' and ended up deciding on 7' x 7'. Not a very efficient use of materials and a LOT of extra cutting, but I really think that is the size I will be happy with.
There really aren't any decent plans for a blind that free, and of course I didn't want to pay the $19.99 for some plans, so I spent a few hours drawing it up and figuring the measurements. Then I came up with a materials list and hit Lowe's. It always takes me longer than I think it is going to, and 3 hours later (after changing my mind on some of the materials at least once) I headed home with a trailer full of lumber. The folks at Lowe's were really pretty helpful and even loaded it up on my trailer for me with a forklift. I'm sure it had something to do with the amount that I was buying, but next time you are there buying lumber, ask them if they will load it for you and they might surprise you.
Okay, as usual, I'm over 4 paragraphs into my post before my first picture. Don't worry, I'm going to post enough to make up for it. Here's the trailer back at the house with the lumber on it. (Ignore the mess in the barn, the electrical panel is a project that I've been meaning to get to for over 2 years now!)
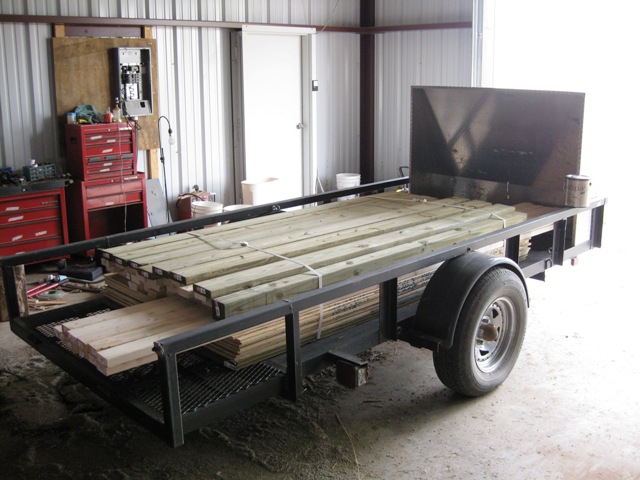 You might think to ask, "Why is the trailer in the barn?". Well there was a chance of rain overnight and I didn't want to get all the wood wet. Turns out I should have just left it out, not because it didn't rain that night (it actually did), but because the wood was going to end up getting wet anyway as you'll see as this novel progresses.
One thing I wanted to point out to anyone that doesn't already know this, but clamping another piece of plywood to the sheet that you are cutting makes cutting plywood MUCH easier! I had always just drawn a line using a 4' straight edge or something and then freehanded the cut. In much less time you can just mark both ends and then use a piece of plywood the same length or a little longer and clamp it where you want it (4 1/2" offset for my saw) and just zip down the plywood using the other piece of plywood as a guide. Thanks to my brother for this tip.
Here's a picture of this on a relatively short cut. It works great even when ripping the entire length of the plywood though. (P.S. - make sure you measure the 4 1/2 inches on the correct side of the cut though, don't ask me how I know this)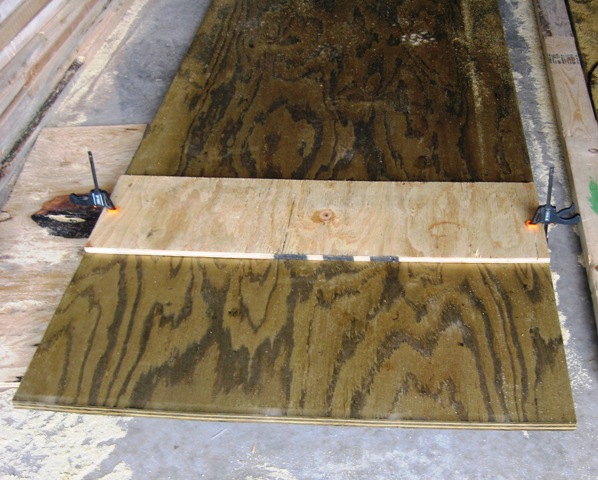 I got all my cuts made and then at the last minute decided to use 3/4" plywood and put shingles on it instead of just using 1/2" plywood and painting it so I made one more trip to Lowe's and then headed down to the land. Of course I planned on heading down there before noon and it was a little after 2 when I actually headed out. I ran through some rain on the way down there, but things stayed fairly dry. Here's the wood cut up and loaded in the pickup at the top of the hill where I built the blind.
 Everything ended up being more work than I anticipated. Just unloading everything was a chore. I had loaded it up slowly as I cut it, but I unloaded it all at once, worried about the weather the entire time.
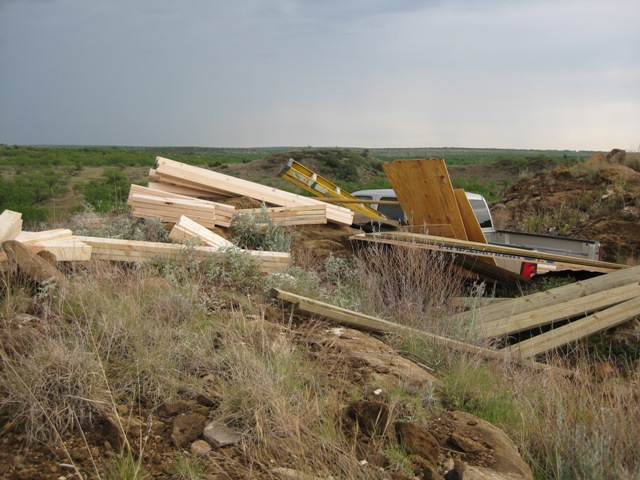 This is a storm that had actually just passed before I got there. I did get rained on several times, but mostly just sprinkles and light rain, enough to get things wet but not a complete downpour.
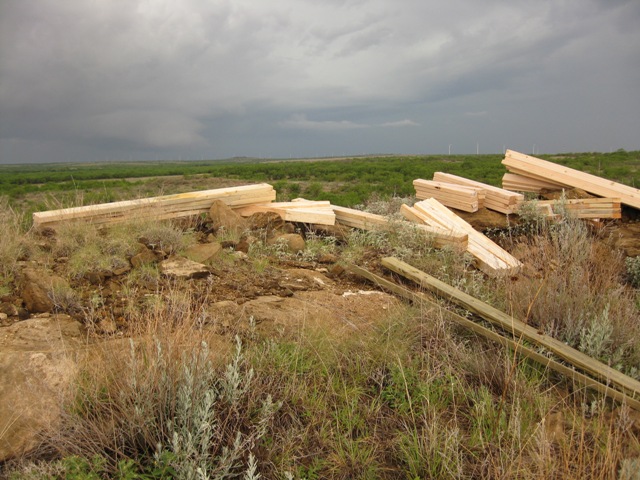 Things actually went really well, again, everything just took longer than anticipated. Here's the floor framed up and leveled out. I used pressure treated 2x6's and 4x4's for the legs. The front of the blind is setting on the rock of the hill, the back of the blind is about 2 1/2' off the ground.
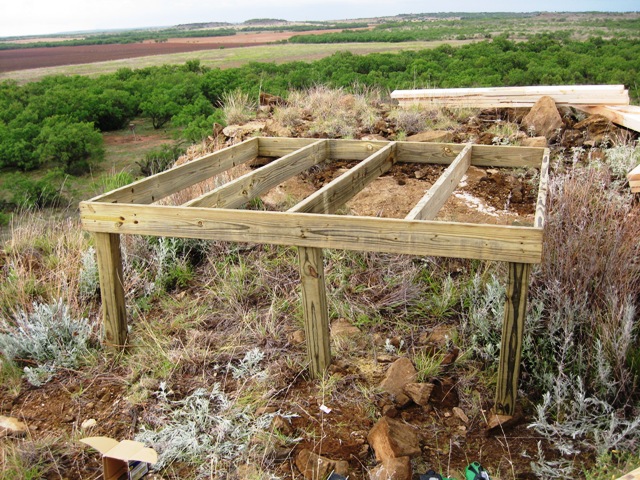 Here's the floor with the decking on it. I used pressure treated 3/4" plywood. I also added a brace on the legs for stability. They are pretty short, but it never hurts to overbuild!
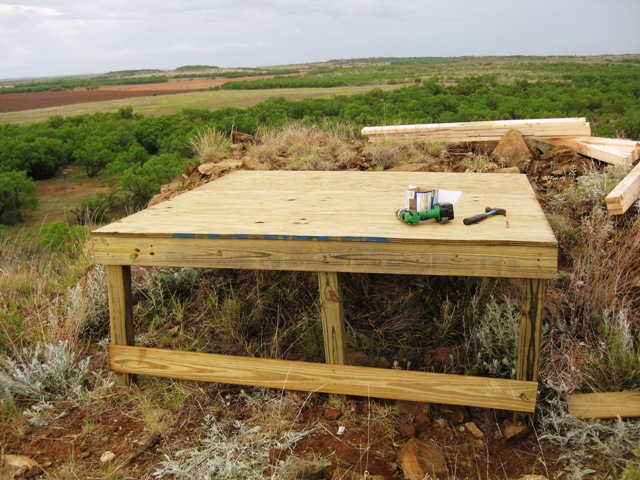 Here's the front wall framed out. I just used regular 2x4's for framing the walls. The windows are 15" high. That's a little taller than most of the plans that I've seen but this gives me some flexibility if I ever decide to put in real windows in the future.
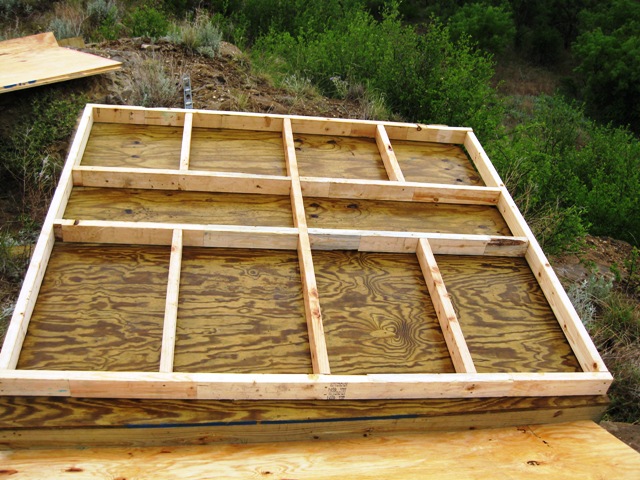 Here's the first wall with the plywood on it and stood up. Things were going well, but not as quickly as I had thought.
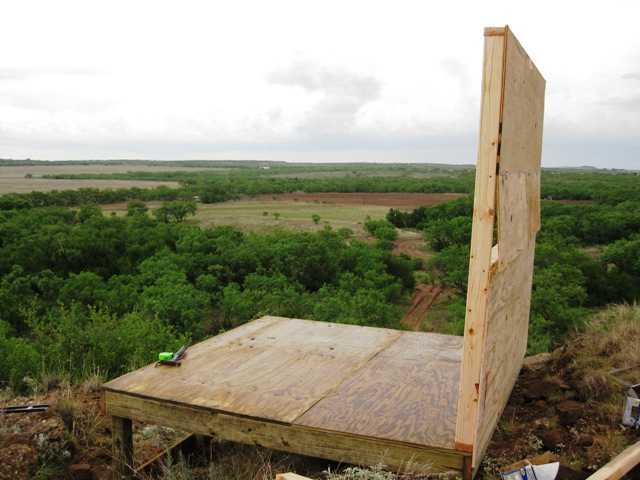 Did I mention that I underestimated how long this was going to take? I had planned on getting this done in one day, you might guess from the picture that I didn't make it!
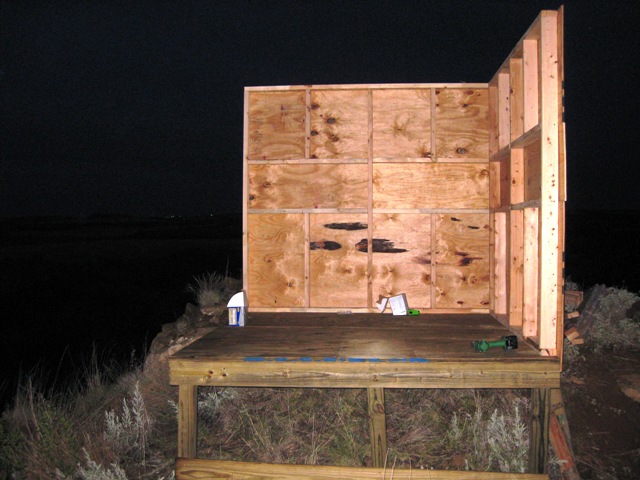 I ended up just spending the night in the trailer and starting on it bright and early the next morning. I had been using the floor as a perfect spot for framing and putting the plywood on the walls before setting them up. As I started to frame the 3rd wall I realized I was going to lose my work area if I set it up too. I ended up framing the last two walls out at the same time and then putting plywood on them both before setting them up.
 I was using a friends cordless tools that use Lithium Ion batteries and while they are amazing how much they can do on a charge, they do need recharged. Luckily he has two batteries so I pretty much kept one charging the entire time. I lost count, but I think I ended up using 7 charges before it was all said and done. On the first trip back to the trailer to swap the batteries out I took this picture of the progress.
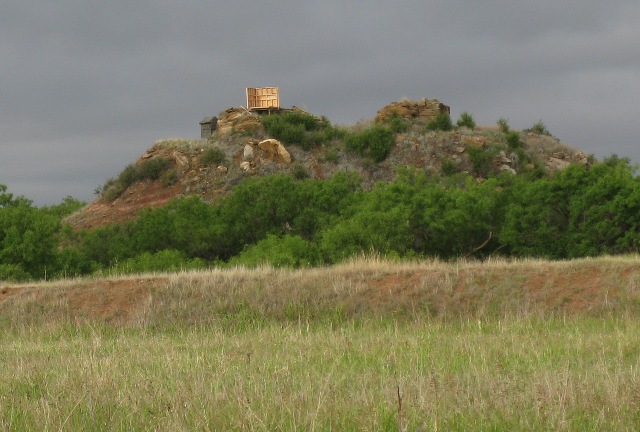 Here's the last wall about to go up. I double checked before I set it down that I could actually lift it. No idea how much it actually weighed, but I could lift it (just barely).
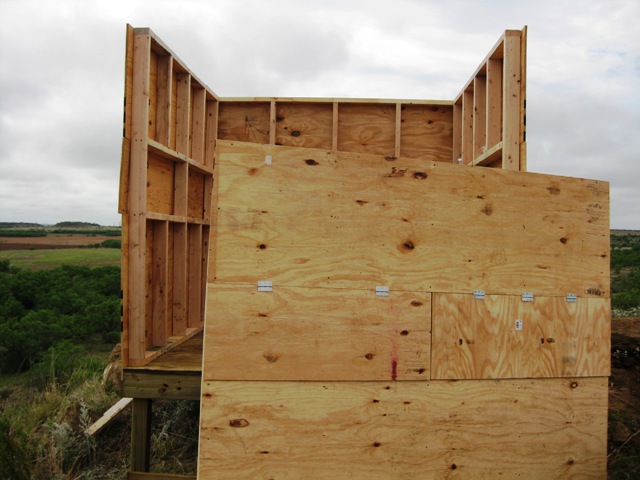 All 4 walls are up! This was a milestone, but there was plenty of work left to do!
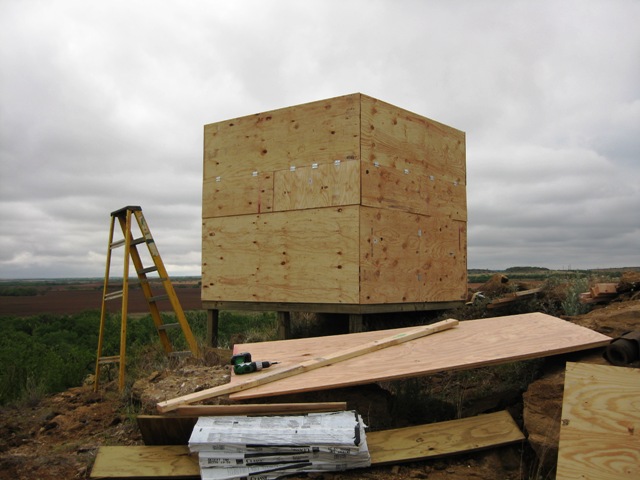 Here's the roof framed up. As I mentioned earlier, this was a last second change in my plans. Turns out I had messed up on my plans and measurements and each center rafter was 1 1/2" too long. I didn't realize this until I had already cut the angles on them. I also ended up with 3 sets of rafters instead of the one center rafter in my original plan so that was a slight snag. Good thing I made them too long instead of too short though!
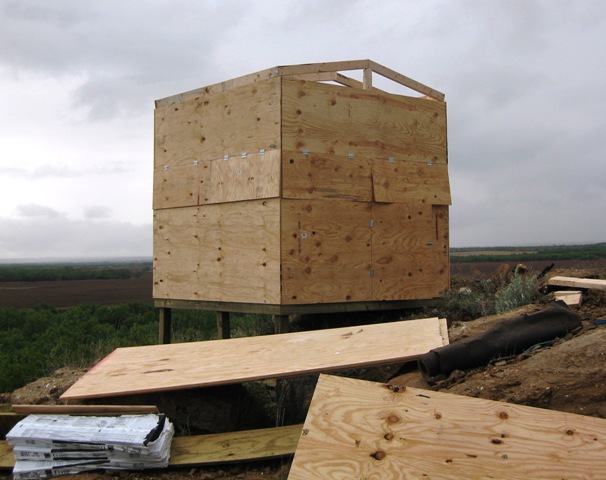 Here's a close up of the rafters. Nothing too exciting, but I think it should work.
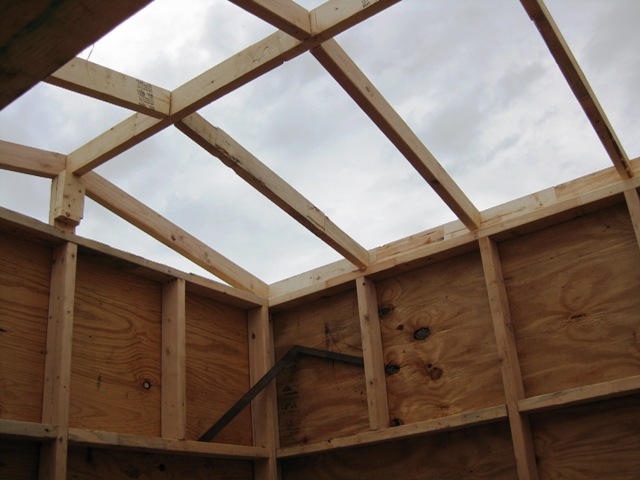 The Hitachi cordless tools really did work great. I wasn't confident in my design to cut the angles on the roof until I had it mocked up and it zipped right though everything I had to cut, I even cut the 4x4's with it although I had to make 2 cuts on them. Here it is basically dried in.
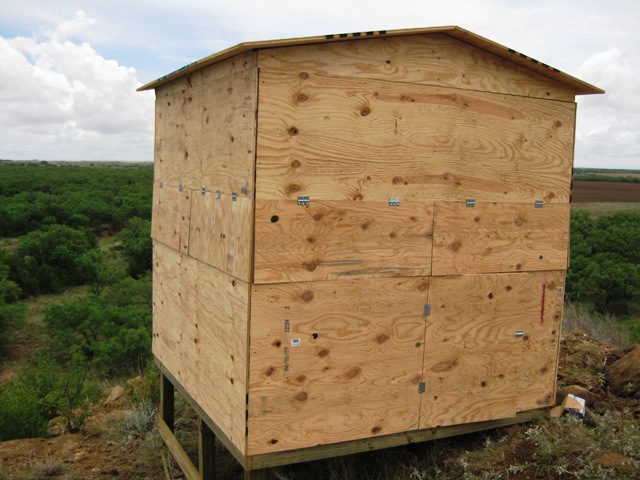 I haven't put on shingles in a long time (that's what roofers are for right?). I didn't do a perfect job, but I think I got better as I went along. Another not so exciting picture, but I was happy to be done with the roof!
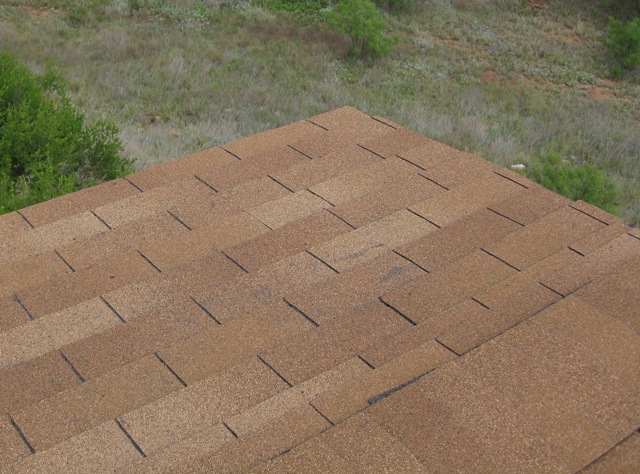 Here it is pretty much done for now. I had intended on painting it, but with the on again off again rain, I didn't want to put paint on wet wood.
 Turns out I couldn't have painted it even if I had wanted to. About 1/2 way though getting things cleaned up it started to rain again and this time it looked like it was going to keep going for a while. I ended up getting finished on day 2 a little earlier than I expected to get done on day 1. I got started at 6:30 am and finished around 4:30 pm.
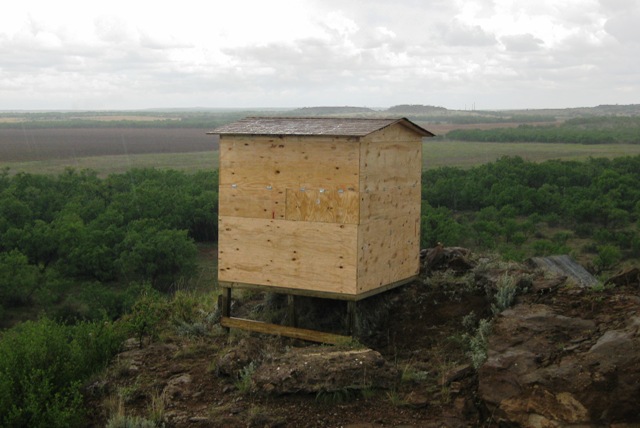 Here's the old blind sitting down on the ledge with the new blind sitting up on top. Hopefully when I get it painted it will blend in a little better!
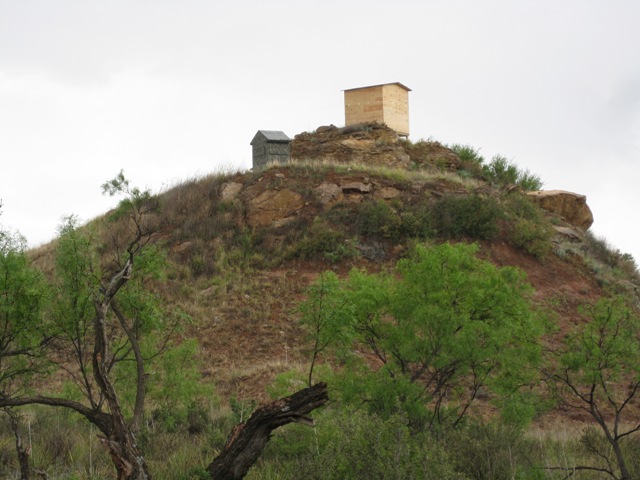 And last, a picture from up by the trailer. I will be able to see nearly my entire property from the new blind and see for miles in most directions.
 That's it for now. This ended up being quite the novel, congratulations if you made it though it. Hopefully I'll get back down there next weekend and get it painted and I'll post an update on it then.
Needless to say, I am one VERY sore 41 year old and somehow I managed to get a pretty good sunburn between the rain showers. I was still pretty proud that I was able to get it all done by myself.
Nathan


5 comments:
Great looking blind! Do you have the number of each of the materials you ended up using by chance? Also price range when all said and done?
Thanks. I didn't keep a list of the materials that I used or track the costs very well. I made it an odd shape so it took more wood than if I had stuck with 2' increments like 6x6 or something like that. I think when it was all said and done I had about $400 - $500 of materials in it.
Wonderful post i enjoy your article.
Its really a Nice post,Hunting blinds are wonderful.
It sounds like you have an exciting DIY hunting blind build planned.
Post a Comment