Friday, May 28, 2010

Replaced my tractor seat.

Based on the title, that doesn't sound like much of a project, but believe me, it was.

My tractor seat has been in disrepair ever since I bought the tractor 4 years ago. It has been getting worse and worse and for the last year or so it has been more like riding a bucking bronco than riding a tractor. Cathy was helping me with a minor repair of the steering a week ago and I needed her to sit on the tractor and turn the steering wheel while I put the pitman shaft in and when she went to sit down she almost fell onto the floor of the tractor so I figured I really needed to break down and replace the seat.

My tractor had somewhat of a hard life before I got it, so I'm not sure what happened to the seat to break it in the first place, but the factory parts to repair/replace it were over $500. You can buy a complete new seat at Tractor Supply for $100 so of course that was the option I went for first.

I knew it would possibly take a little extra work and maybe even some drilling in the floor of the tractor, but the aftermarket seat even looked a little more comfortable than the stock seat so I thought it would be worth it. After getting the seat home and checking it out I found a problem. The seat was too tall.

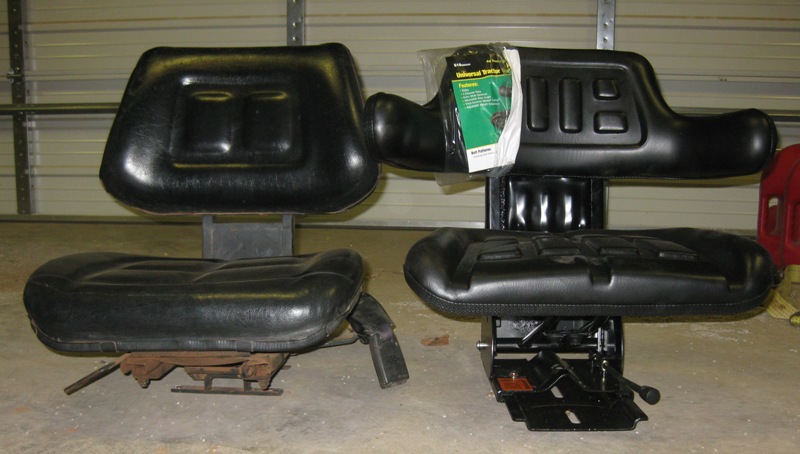
Here's a picture of the stock seat next to the one I bought at Tractor Supply. It doesn't look like that much difference, but it was. The distance from the floor to the base of the stock seat was 5" and the distance from the floor to the base of the new seat was 9". That 9" gives plenty of room for a suspension to improve the ride, but it put my head into the canopy of the tractor and knees into the steering wheel. It was not going to work no matter how many holes I drilled.

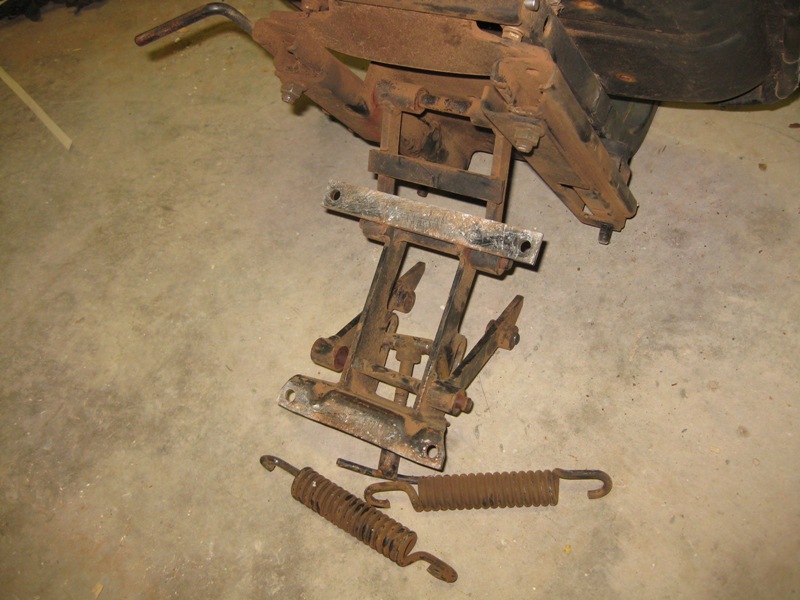
Here's another picture of the bottom of the stock seat. I didn't do anything to bust it up or anything, just set it on the floor and you can see how bad of shape it was. I had pieced it back together before and it stayed for a while, but it was pretty much beyond repair now. I may hold onto it and practice my non existent welding skills on it sometime as there is a metal bar that is broken and missing that holds the suspension parts in place.
After looking around online, and posting on a tractor discussion board, I finally found a nearly identical seat to the one at Tractor Supply at http://www.agrisupply.com/ that was only supposed to be 4" between the base instead of 9" like the one from Tractor Supply. The stock seat was 5" so I was thinking the new seat would work perfect. Well there was a little bit of false advertising, the seat was 5.5" from the base to the bottom of the seat, but I thought it would still work. 2 hours and plenty of drilling and creative thinking later I had the seat installed. It is still a little bit higher than the factory seat when it is all said and done. I think it will work though. I have to mow the yard this weekend so I should find out for sure pretty quick. It will be interesting to see how much different it rides when there is actually a suspension in the seat vs. in the past when every bump I hit went straight up my spine (and there are lots of bumps when you are running a tractor).
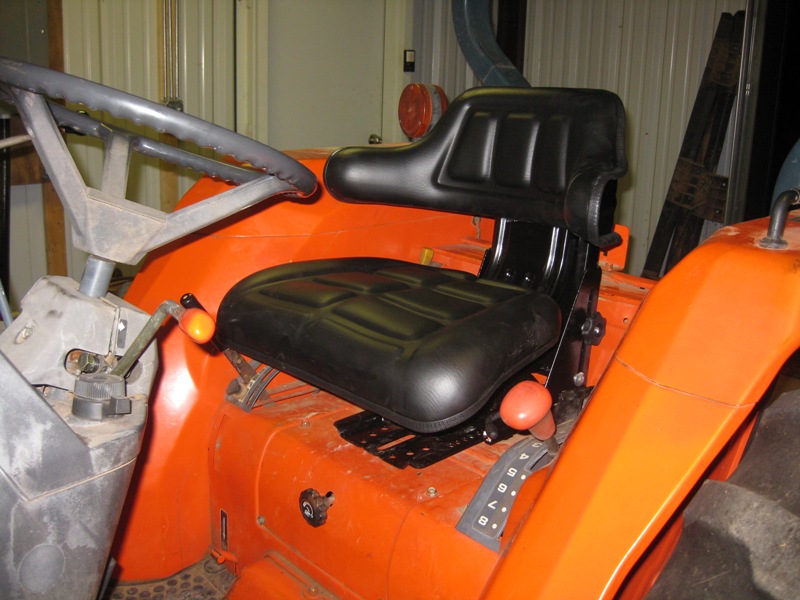
Oh well, not very exciting, but not very many of my posts ever are!

Nathan

Monday, May 24, 2010

Hog Hunting

Last week we had some friends come down from Wyoming for their daughters graduation from ACU and for a change they were able to stick around and actually spend more than 1 night trying to hog hunt.

We made it down to the land and hunted the first night but it was really windy and we got in the blind kind of late and didn't see a thing. The next morning was a bust as well and we had some rain in the forecast and I had been working on getting some warm season grasses planted so I spent the afternoon planting and spraying roundup on some newly sprouted weeds while my friend checked the cameras and set out some raccoon traps.

I got everything finished with a few minutes to spare, and we got in the blind around 6:00. Sunset was set for 8:30 so we had a long wait ahead of us but hopefully we would see something and make the wait worthwhile. It was still pretty windy, but not near as bad as the night before. Around 7:00 we saw some deer moving through some trees, but it still seemed pretty dead. We had setup an special LED light over the feeder so we were prepared to be there for the long haul. The night before a boar hog showed up around 9:30 and we had left the blind around 9:00 because it was getting too dark to see, so we were prepared with the feeder light.

Around 8:30 we saw a pig moving through the trees. I stayed back in the trees about 20 yards to the north of the feeder and then moved out. Before I ever hunted over a feeder I had always heard how the animals got used to the sound of the feeder going off and would come running. Either that isn't true or I do something wrong because I don't recall ever seeing any animals come running to my feeder when it goes off. (Of course it probably doesn't create a sense of security when their buddy ends up getting shot when they do end up coming into the feeder!).

Anyway, the pig left and it was getting close to dark. We had setup the feeder light during the day and it is activated by a sensor and only comes on when it gets dark so we were hoping that we had it setup right because it looked like we were going to need it. Then about 10 minutes later the same pig comes back toward the feeder from a completely different direction. It looked like he had circled completely around the feeder to see if he could smell anything. He was very cautious, but not cautious enough!

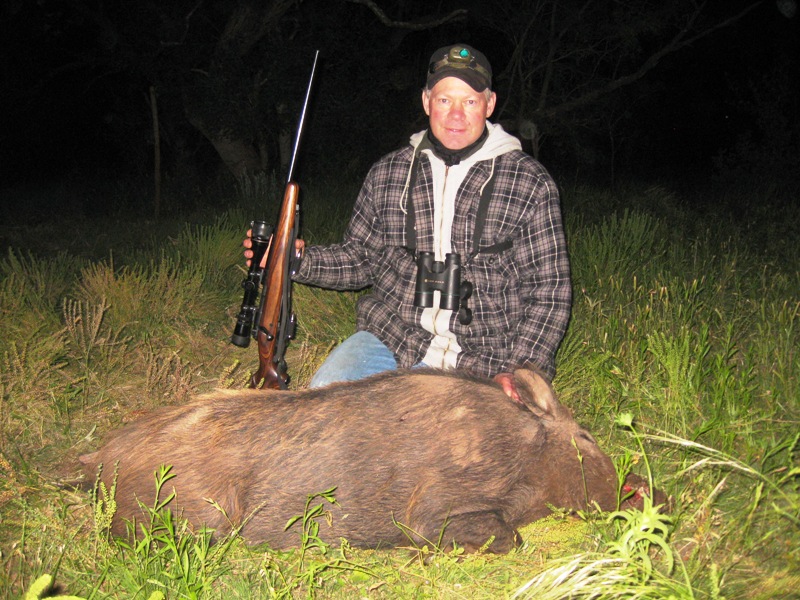
After about 30 seconds he moved broadside and then my friend put him down with his .300 WSM. He dropped right there. Turns out we didn't need the feeder light after all.

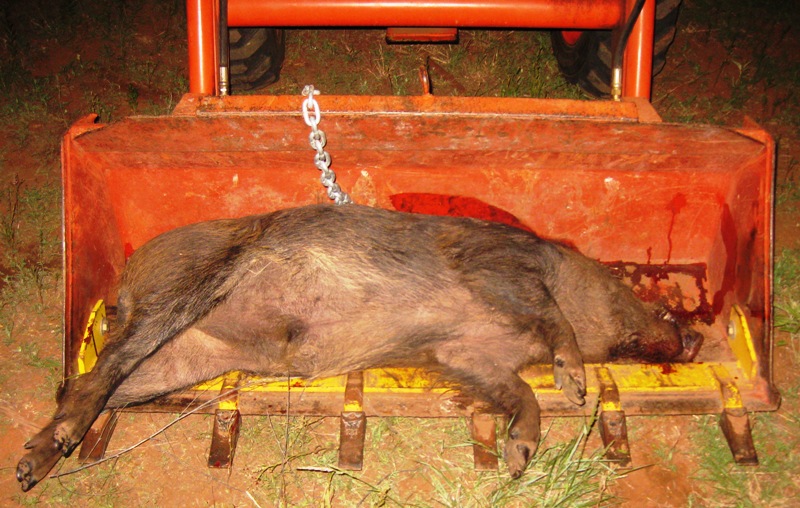
Since I had all my farming implements including my tractor there doing my planting, I was able to just go pick him up with the front loader of the tractor. Pretty decent sized hog. The bucket on the tractor is 5' wide.

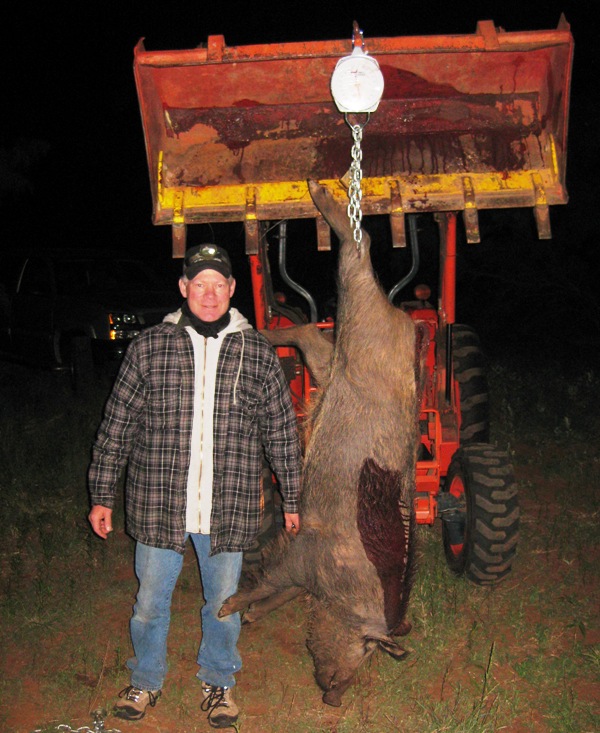
Something that I try to do whenever possible is actually weigh the animals that are taken on our land. Sometimes I am unable to, but with the tractor down there it made it easy to weigh this one. Here's a picture of him on the scale with my friend standing next to him. My friend is 5'10" and weighs 185lbs for perspective. The pig's nose is about 2" off the ground.

When I told my friend that I thought his pig was a 200 pounder he seemed a little bit disappointed. When we got him on the scale it turned out I had under estimated a little and he weighed in at 210lbs on the hoof. I told him that it was an ACTUAL 210lb pig, not someone just guessing. I told him that most people who say they shot a 300 or 400lb pig didn’t actually put it on the scale, they just guessed.

To prove my point I posted pictures of the pig on 5 different bulletin boards and asked other hunters to guess how much he weighed. Overall there were 115 guesses and the average guess was 285lbs. The highest guess was 700lbs and the lowest guess was 145-150lbs. I’m not 100% sure that the 700lbs was a legitimate guess, but the next highest guess was 470 and that was a real guess based on the comments by the poster. There were 10 guesses that it was 400lbs or bigger and 43 folks had it at 300lbs or bigger. The overall results were brought down by 2 places I posted this where people are more experienced hog hunters, otherwise the average guess was over 300lbs on the 2 general hunting forums I posted it on.

That makes guided hog hunt success number 2 now. I really think the key is being able to spend more than 1 night hunting because they can be pretty unpredictable. My friend was actually prepared to spend another night if we didn't connect on the 2nd night but it worked out pretty good. We were able to turn the pig into sausage and a started the backstraps curing into ham and they were headed back to Wyoming with time to spare.

The only negative to the hunt was that it was a boar hog that came in by itself so I didn't get a chance to try out my AR-15 to see how many little piggies I could count with it!

That's it for now. Nathan

Sunday, May 23, 2010

New gun safe.

Well, after buying the AR-15 and the new turkey shotgun, and after reading about several folks getting their homes broken into and their guns stolen, I decided that I probably should buy a gun safe. Also, I ended up buying one with a 1 hour fire rating and probably the most important reason is to keep the guns locked up so Eli can't get into them unsupervised.

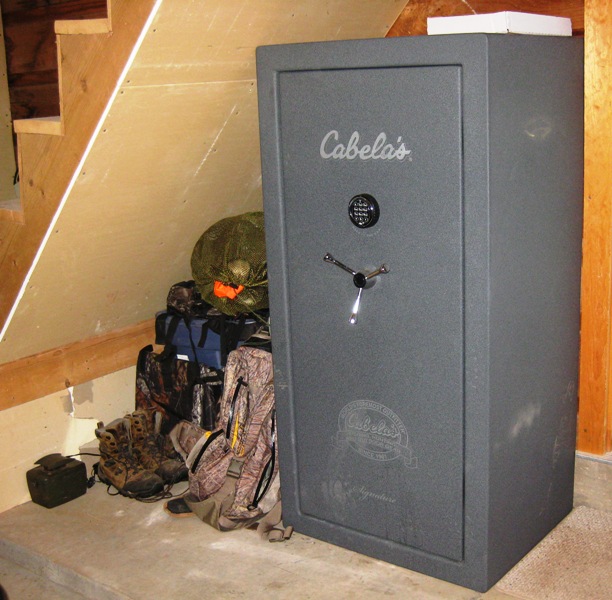
I ended up making a whirlwind trip to Dallas to present an audit and decided to drive the pickup and pick up the safe at Cabelas on the way home. The safe weighs 700lbs, but it really ended up being pretty easy to pick it up (3 guys helped load it in the truck) and was amazingly easy to unload and setup at the house. My brother in law came over and the 2 of us had it out of the truck and set where I wanted it in about 15 minutes.

The thing that did not go as smoothly as I was expecting was anchoring it to the cement slab. You would think that a 700lb safe wouldn't need to be anchored, but If 2 of us could unload it and move it, then it wouldn't take too many folks if they were determined enough to take the entire safe. (Of course the 700lbs is empty, I probably already have 100lbs of stuff in it!).

I ended up using up 3 masonry bits to drill the holes in the cement, and it probably took 4 hours to get the anchor bolts installed, but they are rated at 6,000lbs of horizontal force each so I really doubt that safe is moving anywhere now.

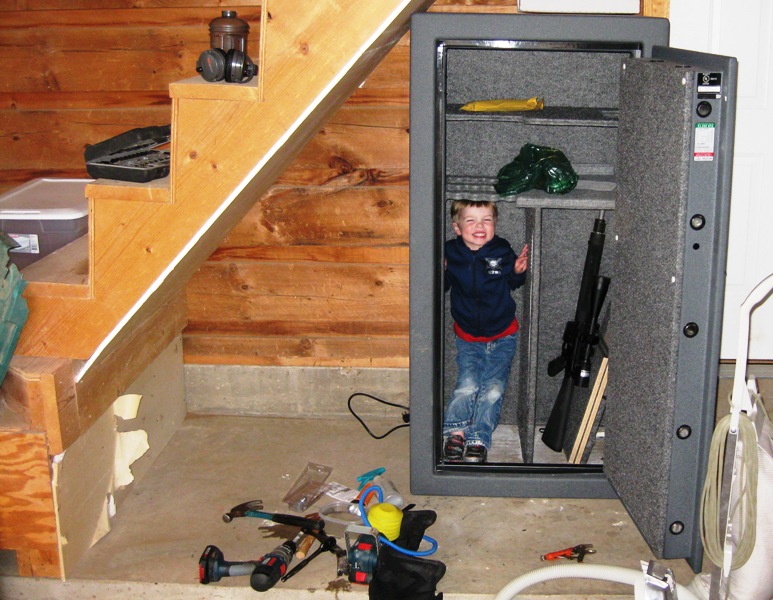
Here's Eli helping out when I was working on drilling the holes. You can see that the safe fits under the stairs in the garage VERY snugly. That should make it even harder to move if anyone ever wanted to try. Here is the finished product and most of my hunting stuff stacked up next to the safe in the nice little cubby hole that should work pretty well. It was always a pain to haul everything upstairs where I used to put it all, so hopefully this will make it easier when I get back home to get everything unloaded out of the truck and into the safe or beside it.
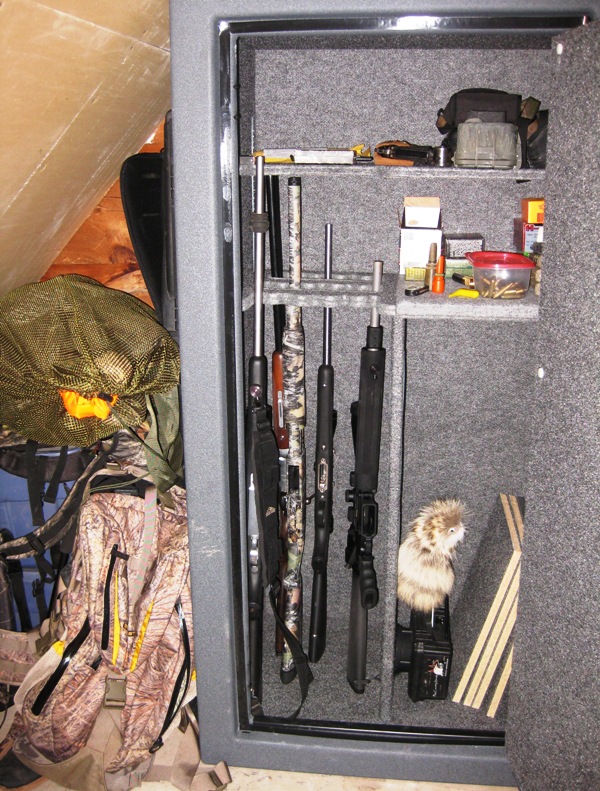
Here's what's inside it now. Plenty of room to grow! It says it is a 24 gun safe, but I've only got 5 in there right now and I think it would only comfortably fit about 10 or 12. I think I'm going to buy a 1 hour fire rated box that I am going to put all of our important papers in and then keep it inside the safe. That would give the important stuff at least 2 hours of fire resistance. Hopefully we will never have to find out how long it is actually good for!Oh well, not that exciting of a post, but I'm a few projects behind on getting things posted and this seemed like a good place to start.

Nathan

Thursday, May 6, 2010

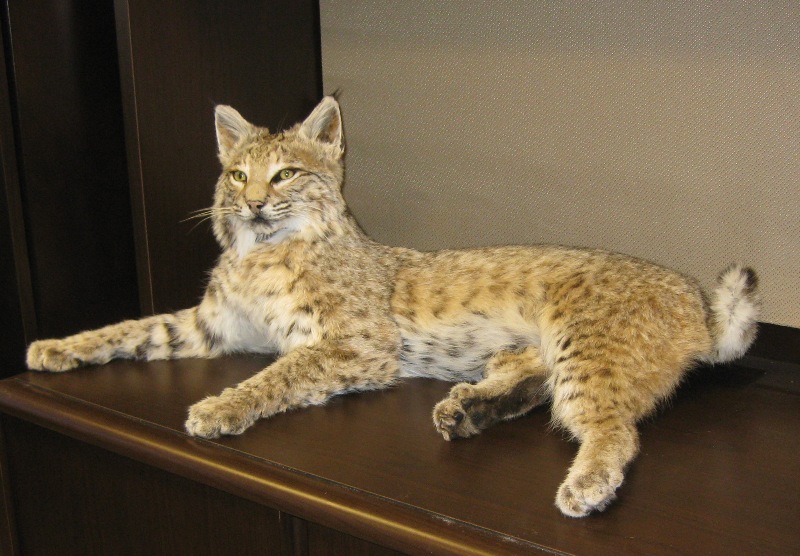
Bobcat mount is back!

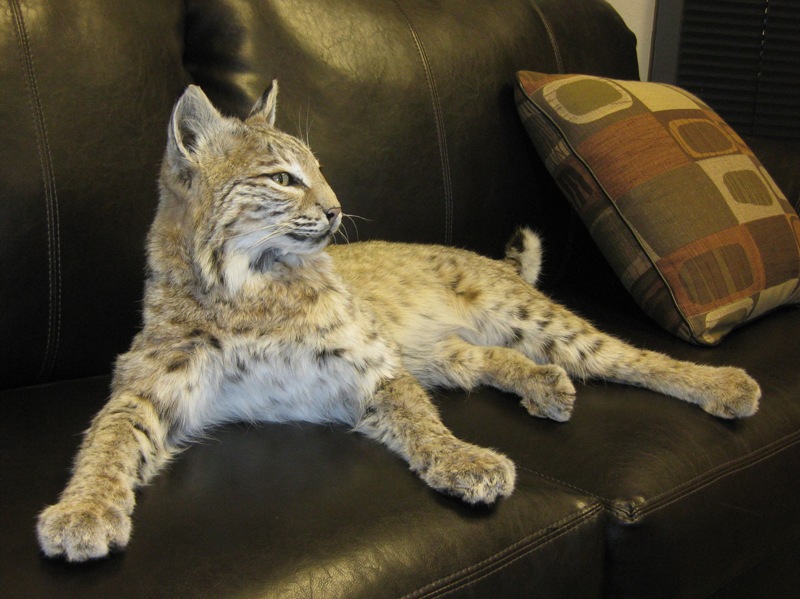
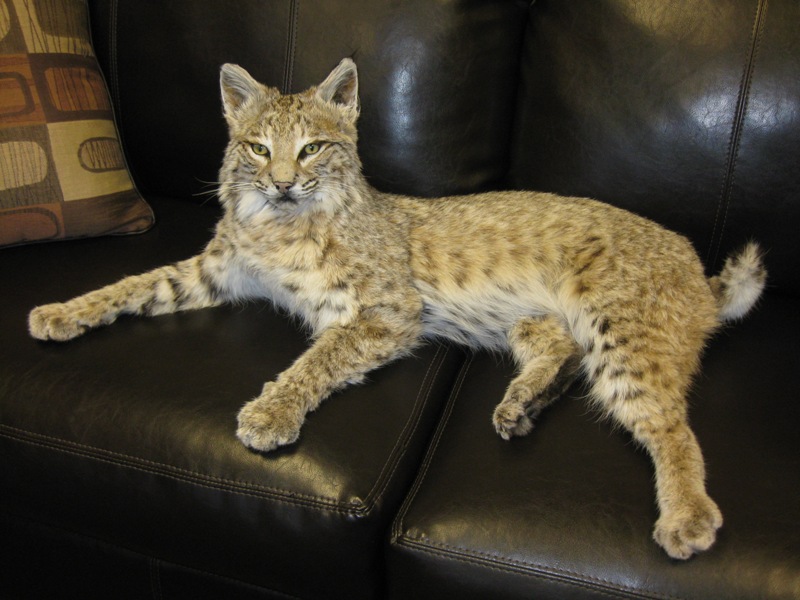
Well, after a short 4 months, my bobcat is back and sitting in my office! I really like the laying down pose as it give a lot of different options on where to place it. There's a picture on a world famous taxidermists website of a bobcat mount laying on the couch that looks awesome, so I took a couple pictures of it on the couch in my office.

I think it is going to go on my credenza for now.

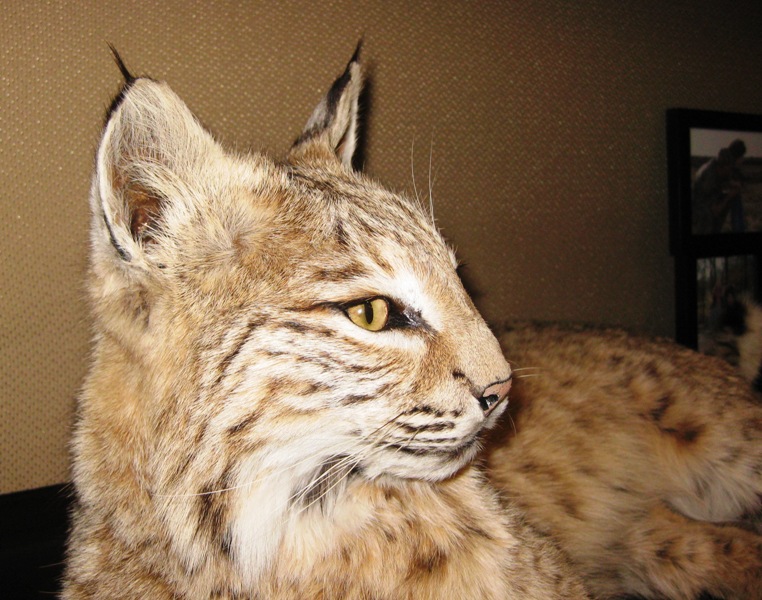
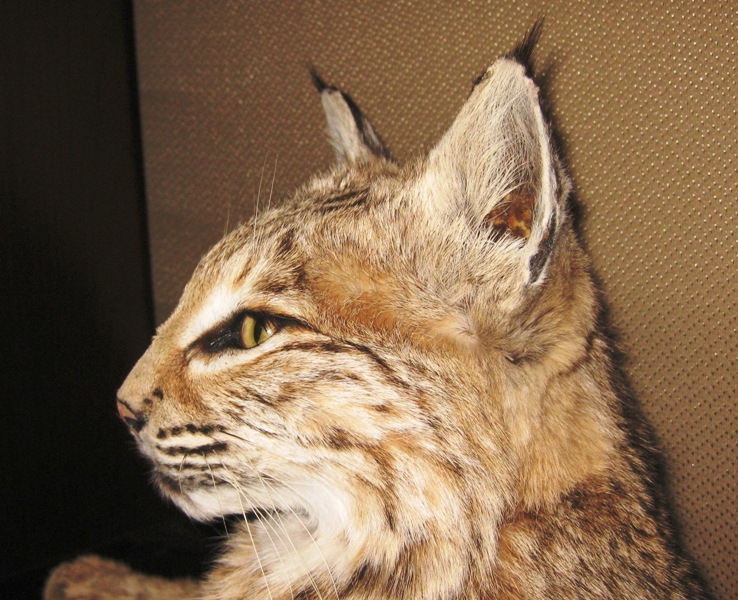
Here's a couple close ups of it's face.

I'm one of those guys who hasn't seen very many bobcat mounts that I like in the past, but I'm very happy with this one. This mount isn't perfect, but it is pretty darn good I think. The price was pretty reasonable, and the turn around time was pretty good too. It worked out pretty easy shipping the skin and he did an awesome job with the packaging shipping it back to me after it was mounted. I should have taken a picture of the way he had it boxed up, that was an art form by itself. When it is all said and done I'm REALLY happy that I shopped around and sent it off to a guy I knew would do a good job.

Another thing I noticed is how hard it is to take a picture of it that does it justice. I'm sure if I had a nice light colored backdrop and some good lighting I could make it look really good, but I just took pictures here in the office with a little point and shoot Canon camera.

Thought I would share.

Nathan

Tuesday, April 20, 2010

Porcupine!

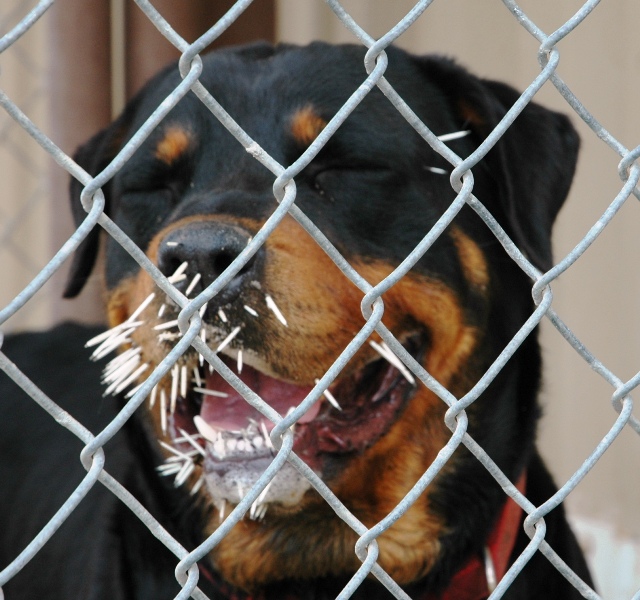
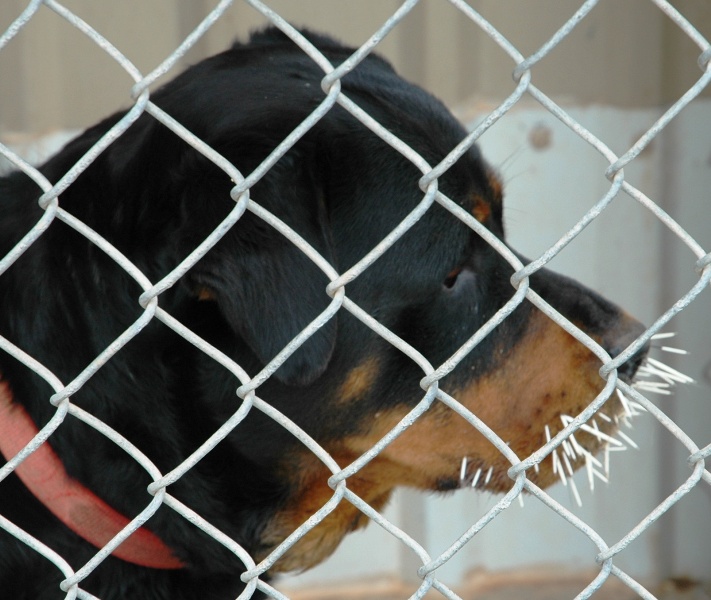
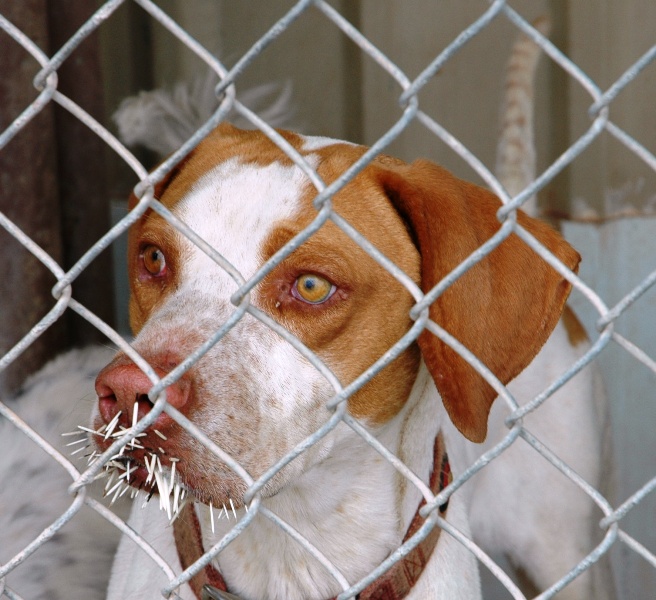
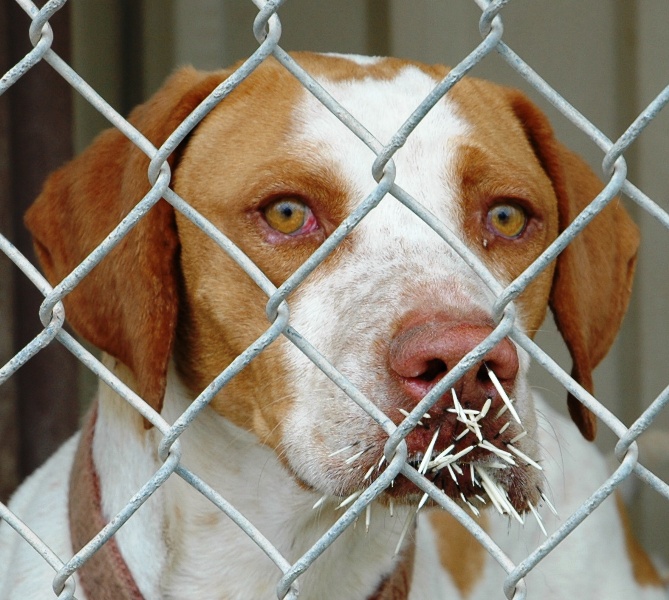
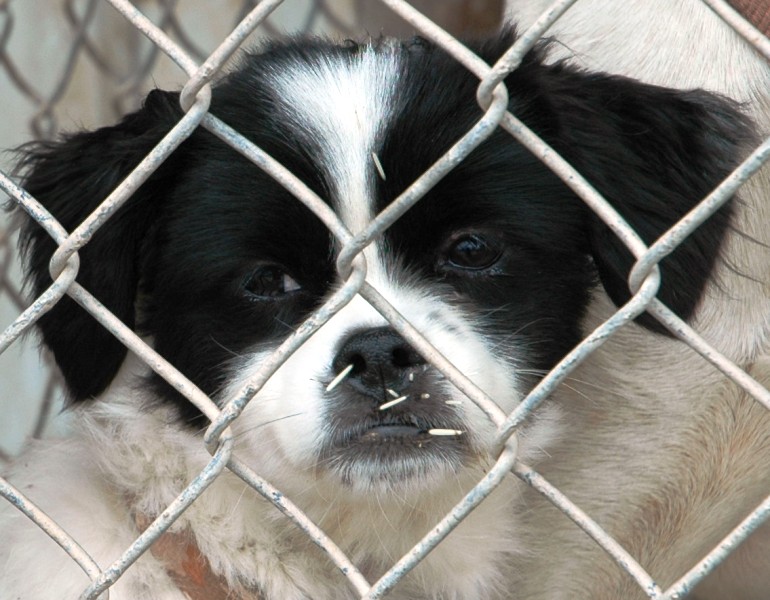
Well, I got a call from Cathy around 1:00 this afternoon with the news that the dogs had a run in with a porcupine. We've had this happen a few times with Jake several years ago but thankfully porcupines are not really common around here, especially up on top of the canyon rim.

Cathy was able to get the dogs loaded up and took them to the vet to get the quills removed. Theoretically you can do it by yourself, but holding down a 100+ pound Rottweiler while you are torturing it by pulling quills out of it's face isn't my idea of fun. The vet puts them under anesthesia and pulls them out while they aren't feeling a thing. If it was a matter of 5 or 6 or even 10 quills I might try it, but our dogs didn't just run into the porcupine, they tried to EAT the porcupine.

Here's Baby at the vet.
And Pedro.

We are babysitting a dog for a friend and he must not have tried to eat the porcupine, but he got close enough to get some quills in his face.
Well, the last time our dog Jake got into a porcupine a few years ago we took him to the vet and got them removed and within a month he had another run in and ended up worse the second time than the first. Our current dogs appear to have less intelligence than Jake ever had so I started thinking that it was pretty important to find that porcupine and remove it so the dogs didn't have another run in with it once they got back from the vet so I decided to head home and see if I could find it.

I got home around 2:30 and rode around on my 4 wheeler looking for it, but after about an hour decided I wasn't going to be so lucky. Eli woke up from his nap around 4:15 and we decided to go riding around on the golf cart to see if we could find it. We don't have just a ton of trees around the property so of course we were looking in the trees for a porcupine. Eli kept telling me that he saw a porcupine around every corner, but he was pretty adamant at one tree that there was a porcupine in it. I told him there wasn't one in the tree and tried to get him to show me where it was. I ended up getting out of the cart and looking and low and behold there was a porcupine in the tree! (Of course it wasn't anywhere near where he was pointing).

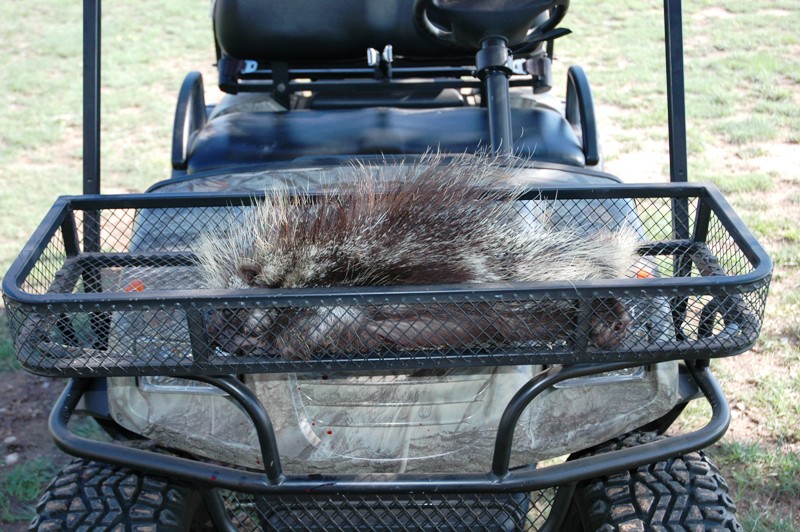
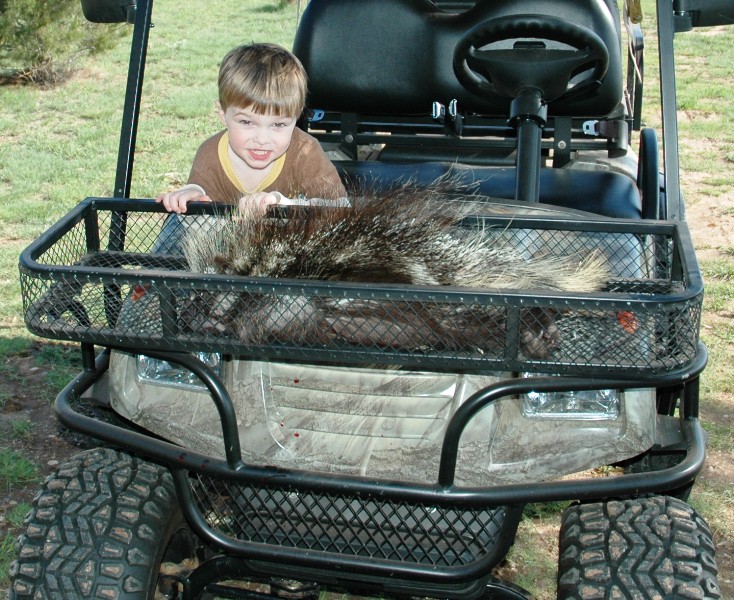
I had brought my .22 pistol so I shot the porcupine out of the tree and brought it back to the house. Here it is in the golf cart once we got back to the house.
I guess this is the first animal that Eli was actually out there with me when I shot it. He seemed to think it was pretty cool.
I pulled the guard hairs off and am going to try to find someone who wants them. There is a market for the quills, but I didn't think I had the patience to mess with pulling them out. As many quills as the dogs had in their faces you would have thought the porcupine would have been bald, but really it still had the vast majority of it's quills, just a few small bald patches.

Well that's about it for now I guess. Hopefully we don't have to mess with another porcupine for several more years.

Nathan

Saturday, April 10, 2010

Rock River Arms Predator Pursuit is here!!

Picked my rifle up from my FFL this week! Took about 6 weeks from when I ordered it.

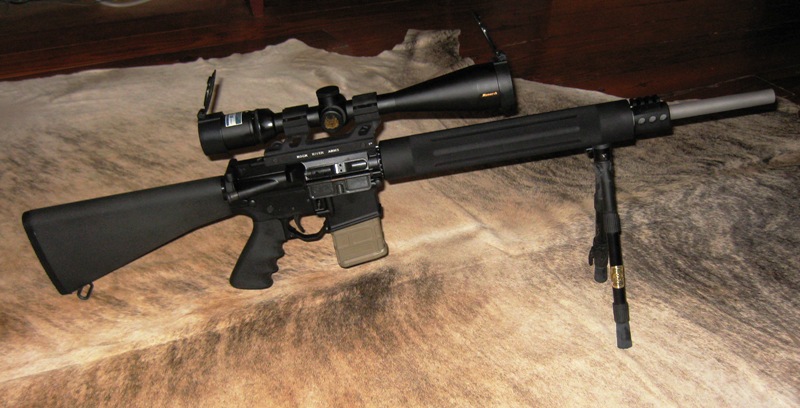
It's a Rock River Arms Predator Pursuit with a 20" heavy match grade barrel and a 2 stage national match grade trigger. It has the RRA Hi-Rise scope mount and is topped with a Nikon Monarch 4-16x 50mm scope with the BDC reticle. I had an extra stoney point rapid pivot bi-pod setup since I bought a prone and a kneeling version so I hooked that up on it too.

Here it is:

I was surprised at how compact it is. Just about the same size as my Ruger 10/22, just weighs about twice as much with the heavy barrel!

I was able to make it out this afternoon to get it sighted in. I spent a little over an hour sighting this bad boy in and I'm VERY happy with it.

Started out at 25 yards, then went to 100 yards and ended up shooting 40 rounds total. I was shooting the cheap 100 round Federal Value Pack 55gr FMJ from Walmart.

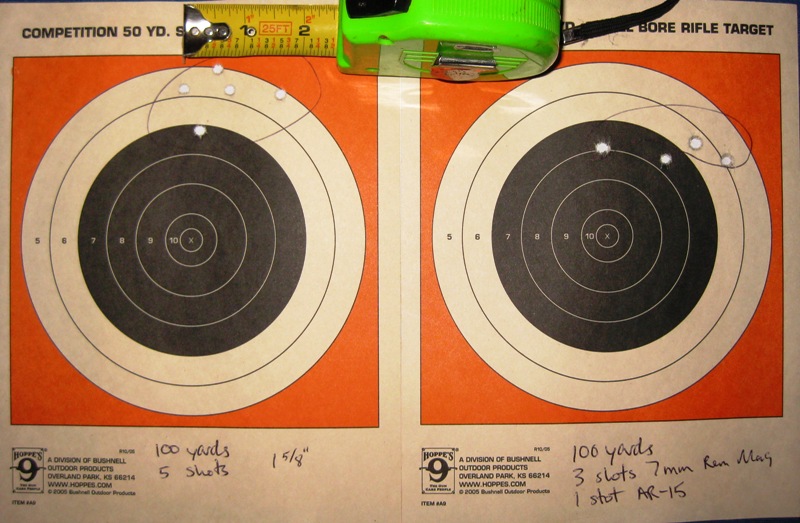
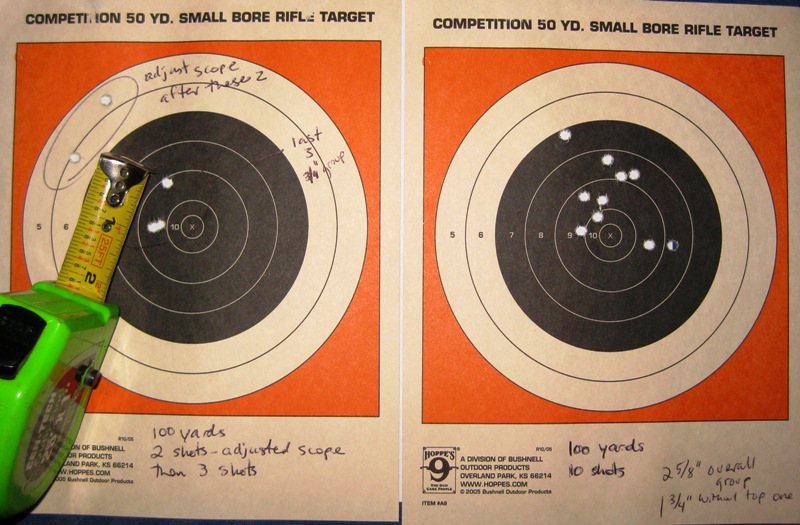
Here's the first 2 targets. On the left is shooting at 25 yards, then I moved out to 100 for the one on the right. I didn't even think about bore sighting it. I already had it assembled so I just shot it and luckily it hit the paper with the first shot (the one on the bottom). I adjusted the scope and it looked pretty much good to go. Moved out to 100 yards and shot 3 times and could easily see it hitting high with the Monarch scope on 16x so I adjusted it and then gave it 10 shots pretty in pretty quick succession. Next 2 targets. I cleaned it after the first 18 shots and shot my 7mm Rem Mag Browning A-Bolt while I was waiting for it to cool down with the copper bore cleaner in it. That's the target on the right. Then after I got it cleaned I shot a single with the PP on that target. Then I shot 5 shots with the PP on the left target.
Last 2 targets. I adjusted the scope and shot the first 2 rounds in the target on the left and could see it was off, so I adjusted it and shot 3 more times on that target. I guess the PP already lived up to it's accuracy claim because that 3 shot group ended up right at 3/4"! I decided it was good to go and shot 10 more shots at the target on the right. Nothing spectacular, but without the one on the top the group was under 2" for a 10 shot group, not terrible by any means for cheap factory ammo on basically a brand new gun.
Didn't have a single misfeed, and I could have put a 2' diameter shallow bucket and caught nearly every single piece of brass. I had 2 that ended up about 2' from the pile. The placement of the pile was perfect as well, about 6 feet to my right and 2 feet behind me.

Lastly, this wasn't shot at a range with a fancy benchrest setup. I shot it on my property in a caliche pit. I have a wooden bench made out of an old picnic table and I was using an old futon type pillow for a rest. The wind was light and variable so that was nice.

I'm VERY happy with this gun so far! I've got a few more different brands of ammo that I want to try, and I need to get a badger tach latch put on it sometime as well.

I guess I'm an official card carrying black rifle owner now! That's my initial report.

Nathan

P.S. - It really was fun to shoot!

Thursday, April 1, 2010

Trying to pattern a shotgun for Turkey.

Well, Turkey season starts Saturday so I've been trying to get things ready to do a little Turkey hunting. I have a Mossberg 835 12 gauge shotgun that I'm wanting to pattern to be able to shoot effectively out to 40 yards. It came with a full choke already so I was hoping that it would work without having to change anything else.

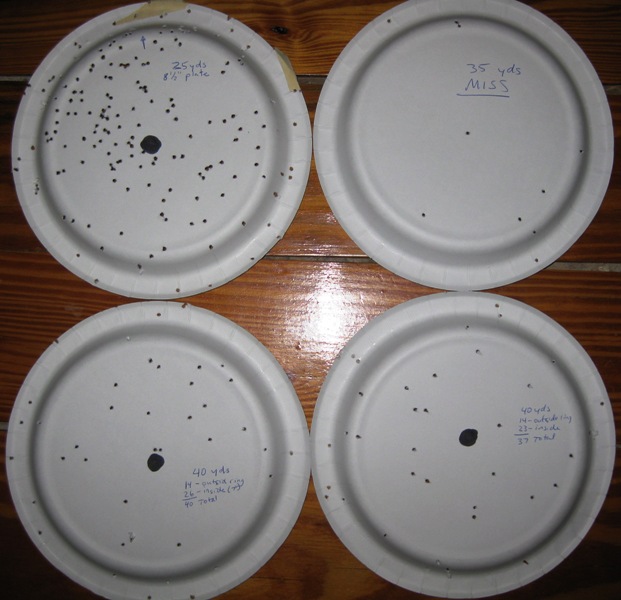
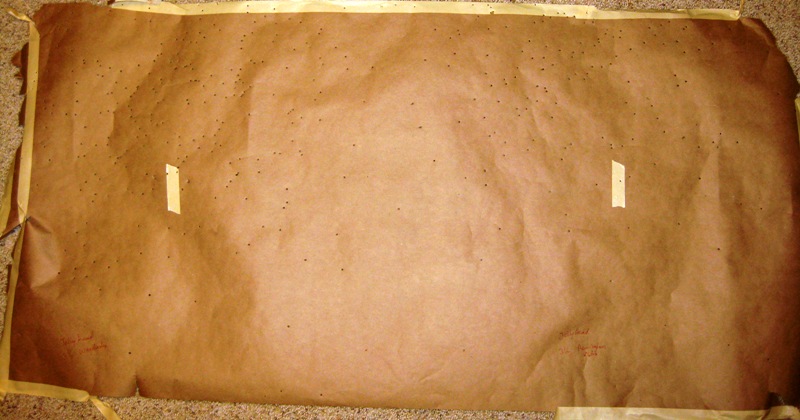
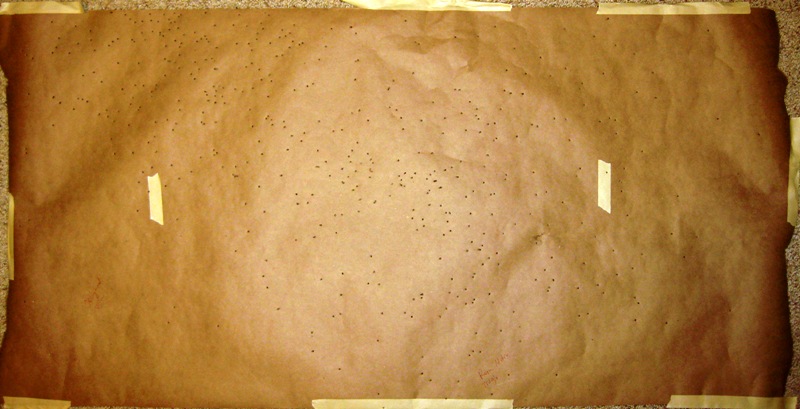
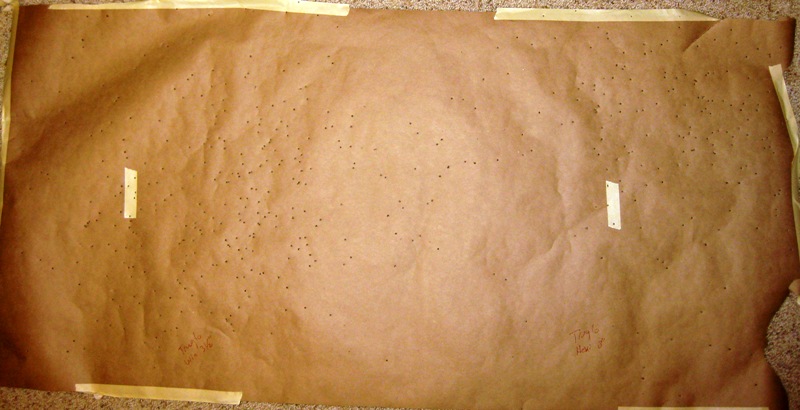
Monday evening I went out and shot some paper plates at various yardages hoping I could get out to 40 yards with a good pattern. I should have used a larger target, especially after seeing what happened when I did use a larger target, now I probably need to go back and shoot the stock choke again just to make sure. Anyway here were the results. The top left was at 25 yards and the bottom 2 were at 40 yards. The top right was the last shot and it was at 35 yards and was pretty much a clean miss. Shooting 3 1/2" Magnum 12 gauge shells at paper targets actually hurts. So after researching several different chokes, I bought a Primos Jellyhead and a Truglo Gobbler Stobber to try out. They have colorful names if nothing else! I also bought another box of shotgun shells to try out as well. Some Remington NitroTurkey shells that were also 3 1/2" Magnums.

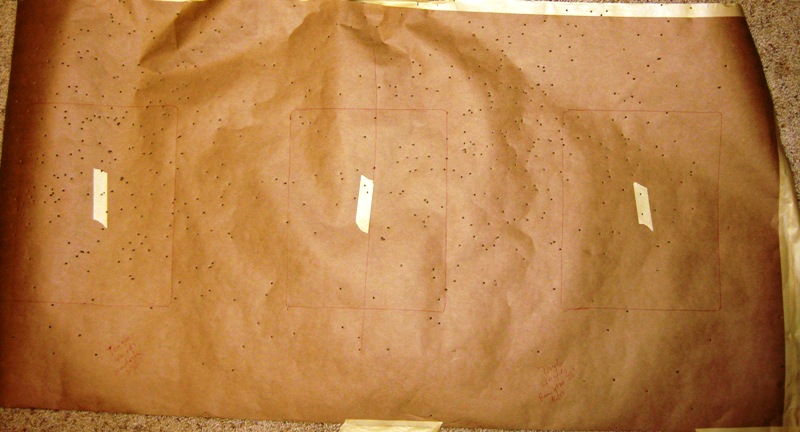
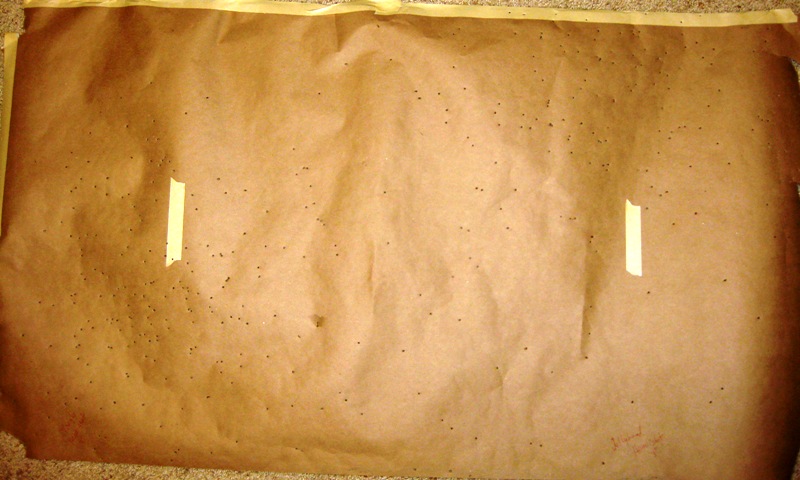
I used some packaging paper from work to give me a larger target so I could see the hits better and drew some 8.5" by 11" squares on it and put tape in the middle. The packaging paper is 24" tall. I thought I was going to be able to shoot 3 times on each target, but I changed to only 2 times on each target after seeing how wide the spray of the pellets was. All shots were at 40 yards measured with a rangefinder.

This is with the Truglo choke. Winchester Supreme 3.5" #5 shot on the left and Remington NitroTurkey 3.5" on the right. Both shots with the Remington NitroTurkey in the Truglo choke ended up pulling left. Could easily have just been poor aim though, I was mimicking actual conditions using shooting sticks and the wind was blowing pretty good.I didn't bother to draw a circle or a square on any of the other targets, just the tape where I was aiming. I think you can still get a pretty good feel for the pattern though.

This target was both with 3" Hevishot 1.5 oz. Left was the Truglo and right is the Jellyhead. Again, not a for sure because I wasn't on a bench, but every shot with the Jellyhead ended up a little high. Both of these shots are with the Jellyhead. Winchester supreme 3.5" #5 on the left and Remington 3.5" NitroTurkey on the right. Both shots were a little high.
On this one, I used the Jellyhead with the Winchester supreme 3.5" # 5 on the left and the Truglo with Remington 3.5" NitroTurkey on the right. Again the Jellyhead was a little high and the Remington NitroTurkey out of the Truglo was a little to the left.
Last target I stuck with the Truglo and shot Winchester 3.5" #5 on the left and the 3" Hevishot on the right.
When it is all said and done I think I'm going to go with the Truglo with the Winchester 3.5" #5 for now. I'm probably going to try a few more with a better target and make sure it is hitting where I want it, but it seemed to be the best pattern out of all of them. I might try a couple shots with the stock choke as well just to make sure my first test shots with the paper plates were actually showing the true pattern and weren't actually misses in one direction or the other.

I also put a Limbsaver recoil pad on the shotgun and while it still kicked like a mule, I don't think I could have shot 10 times at paper targets with the factory recoil pad on there.

Not very exciting, but hey, no one ever said this blog was exciting!

That's it for now, who knows, maybe I'll have a Turkey on the ground Saturday.

Nathan