Sunday, May 31, 2009

Building a hunting blind - Part 2

Well, I got back down to the land this weekend to finish the hunting blind and brought a friend along to possibly get in some hog hunting, but I'll save that part for another post. I'll dedicate this post to finishing the hunting blind.

I would have been fine with some off the shelf paint, or scratch and dent paint, but they don't really carry it like that anymore so I got some medium brown (I think the actual color was Carmel Gold) and then later decided I would use some more dark brown on the inside and to do a little camouflage with. I think that was Dark Walnut or something like that.

I brought 1 gallon of primer and the 2 gallons of paint and thought it was completely overkill, but I found out that I thought wrong! The other new aspect of the project was that I decided to try out one of the Wagner power sprayers to paint it with. I really thought it would save time on the inside of the blind with the exposed 2x4's and windows and stuff. Reading the reviews online it seemed like people either loved it or hated it and said it didn't work at all. I would give it 3 stars out of 5 personally. It did a decent job on my hunting blind, but I probably wouldn't use it on anything that needed a nice finish. Occasionally it would throw some blobs of paint out and you needed to have a paint brush handy to smooth it out a bit. I'm for sure going to keep it though because I think it will be perfect for when it comes time to stain Eli's playground.

Okay, back to the hunting blind. One other thing that I forgot was a ladder so I ended up using (and eventually destroying) a folding chair that I had been using in the old hunting blind for reaching the higher areas. The first gallon of primer went on pretty well (did you remember that I only brought 1 gallon of primer?) and then I had to wait while Ben made an unscheduled trip into Sweetwater to buy another can of primer. The worst thing is that I have another can of primer at home, I just had no idea that I would need it. An hour or so later and I was done with the primer, but I ended up using every drop out of both cans. I ended up pretty much covered in paint thanks to the sprayer, but I really think I saved quite a bit of time overall. I just brought my generator this time and it worked great and I didn't have to worry about charging any batteries.


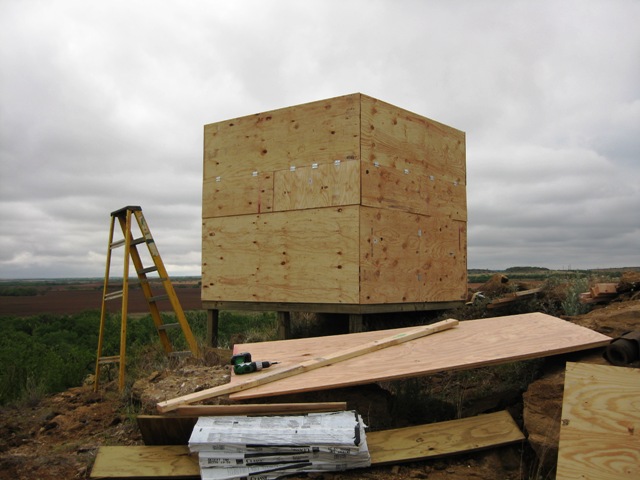
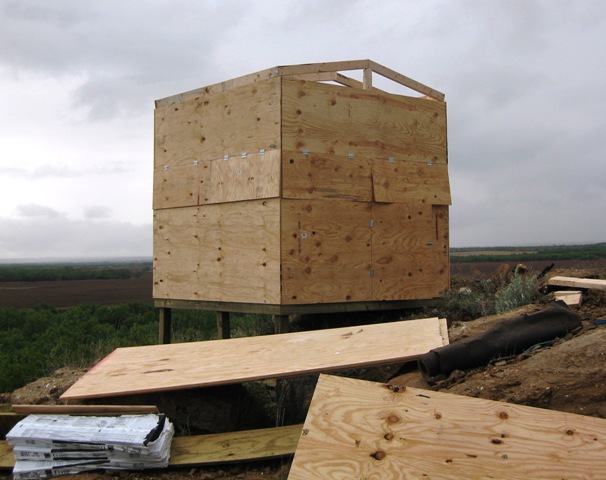
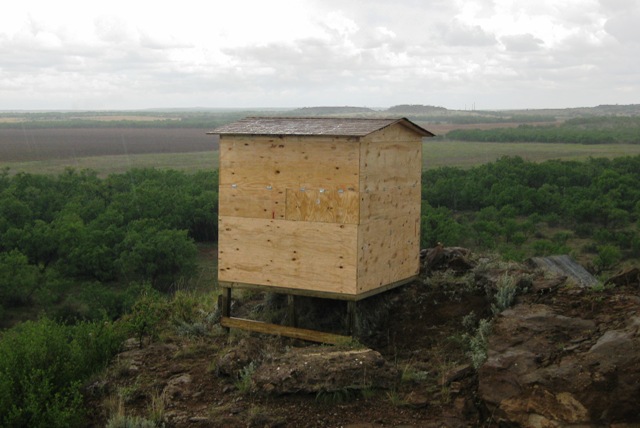
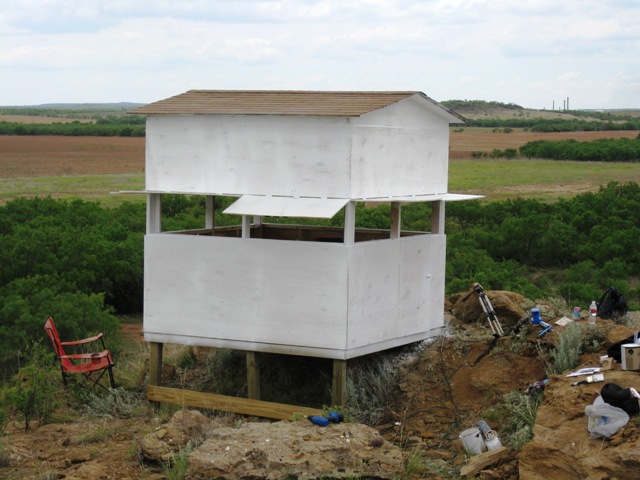
Here is the blind with it's coat of primer on. I also put a few tubes of caulking on it to try to keep it as weather tight as possible, if nothing else, then to prolong the life of the plywood.

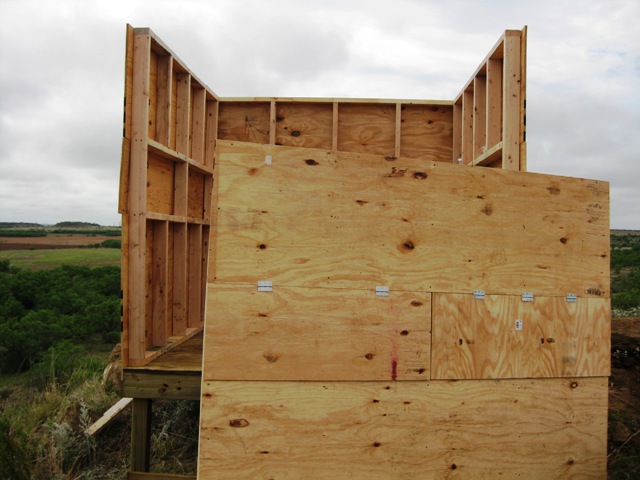
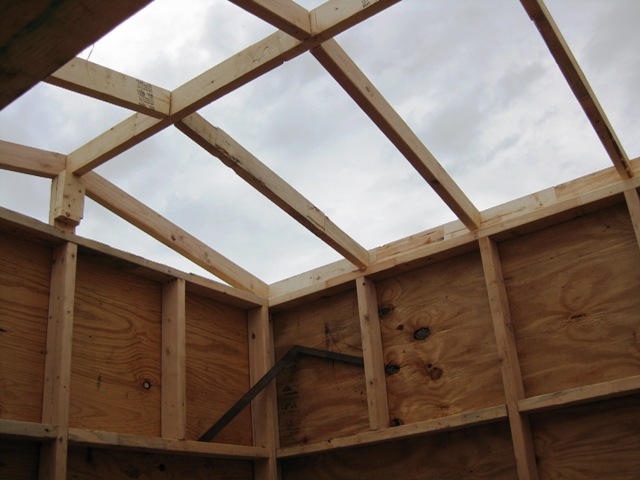
Here's another comparison shot with the old blind. The new blind truly has a 360 degree blind field of view where the old blind really only had about a 180 degree field of view. I've worked on the windows a little more so they all open up more evenly.
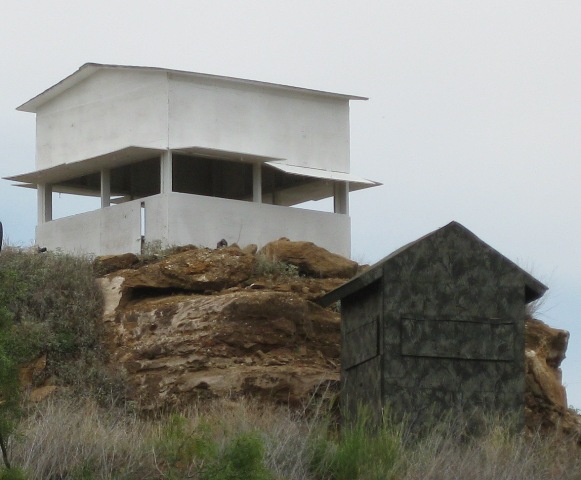
Are you ready for the final result? Well, maybe not final, but good enough for now. I ended up using most all of the darker paint on the inside, and the medium brown on the outside. It ended up taking about 2 hours to actually paint it with another hour or two to clean up between the primer and waiting on the new primer. We then spent about 10 minutes with a couple spray cans trying to camouflage it. It kind of looks like a couple grade school kids went after it! You can see my chair has about had it by this time.
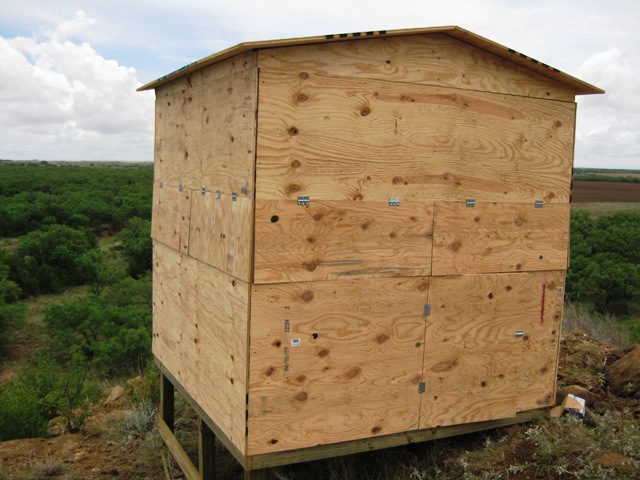
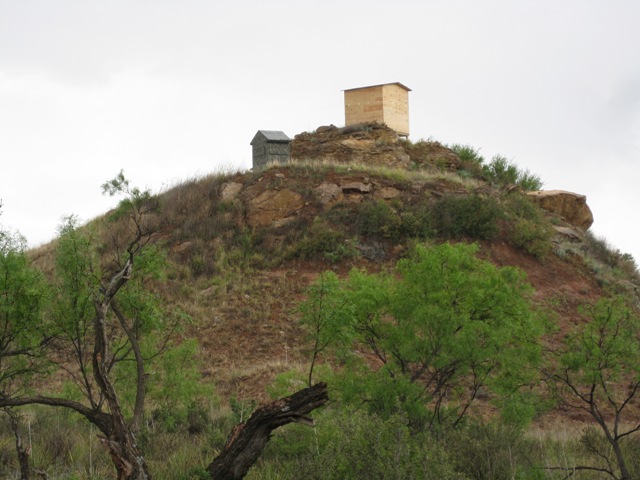
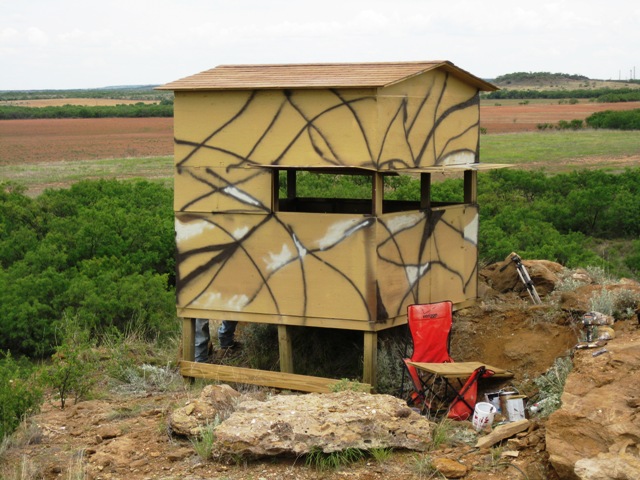
Here's a picture from a little farther off after we cleaned it up and shut the windows. It looks a little better in this picture. I'll probably bring a few more cans of spray paint down and put some additional touches on the camouflage job. Not sure if it will make it better or worse!
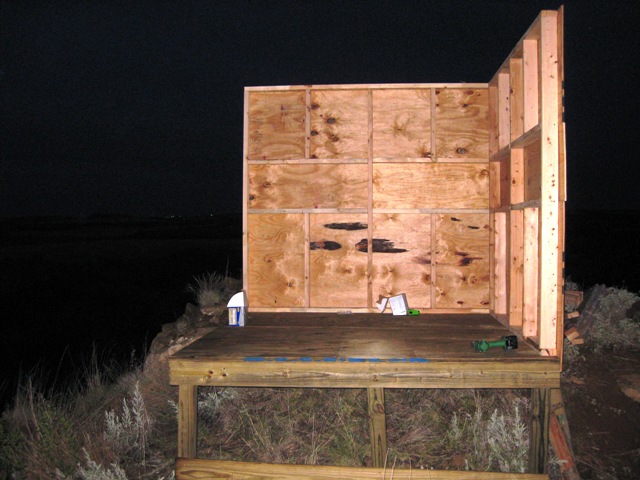
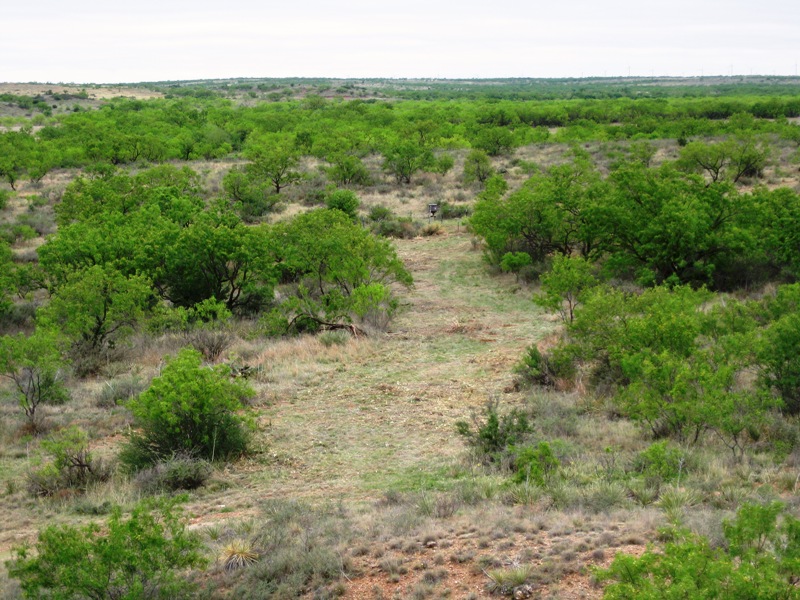
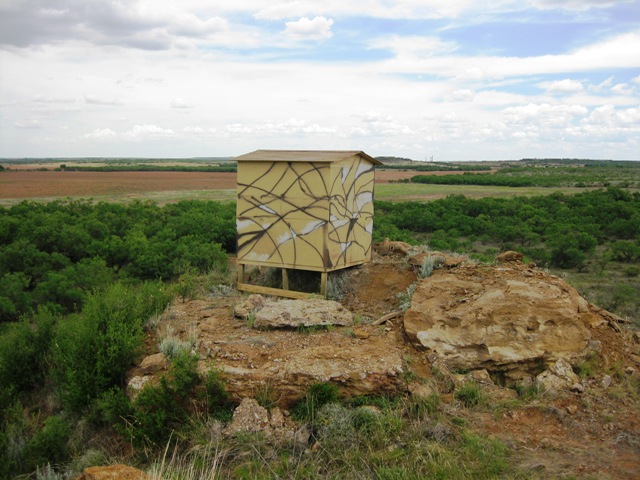
It really isn't that bad when you get a little farther away from it. Here's a picture of it at the top of the hill after we moved the other blind. If you look really close you can see the red chair and the windows are open in this picture.
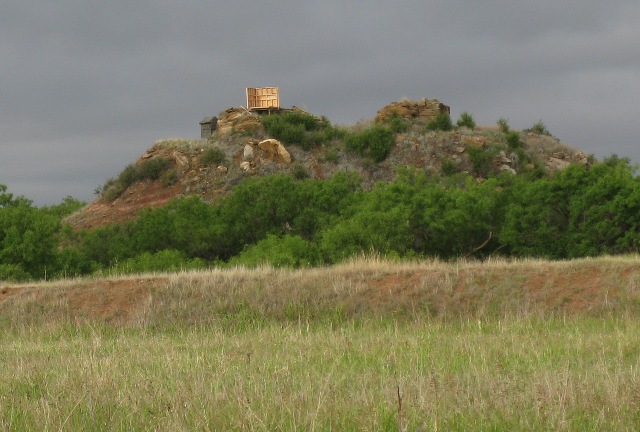
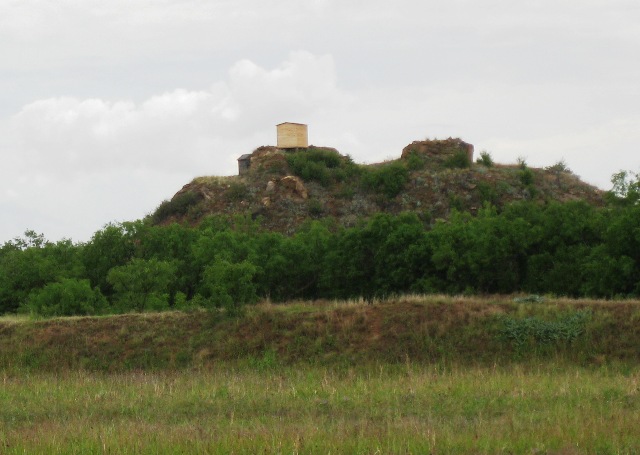
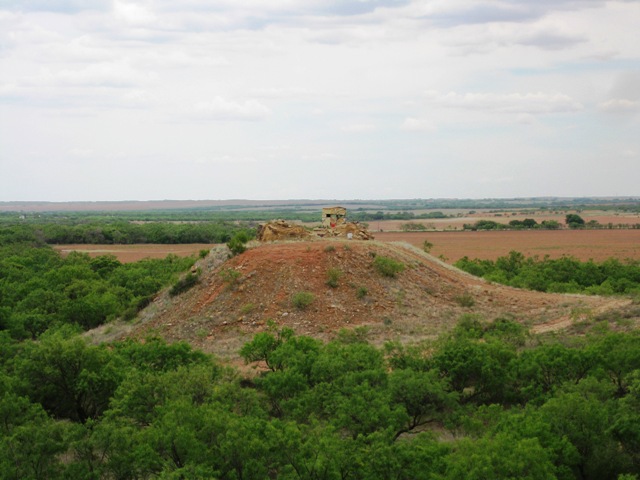
Last picture from a different angle. Again, it doesn't look quite as out of place from this angle. I really didn't want to end up with a road going to the top of the hill here, but I wasn't about to haul all that stuff up there and I ended up making quite a few trips back and forth and wore a track in a little bit. Maybe if I don't drive on it for a while it will blend in a little better.
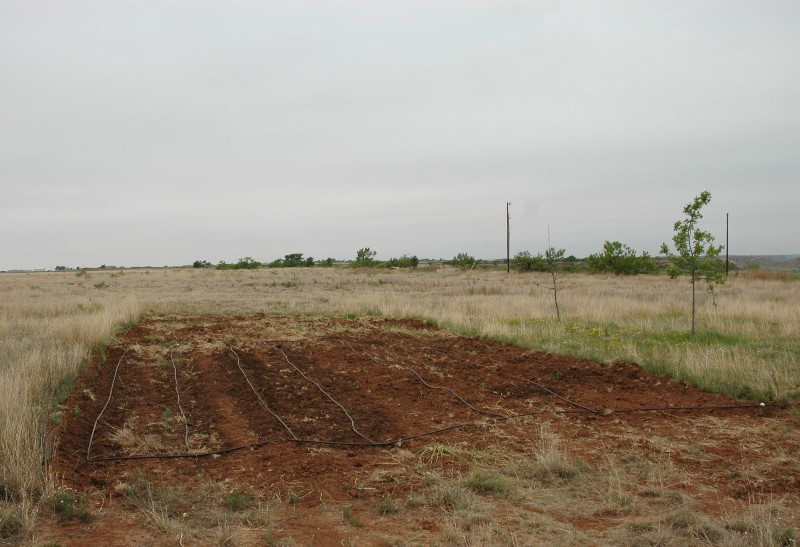
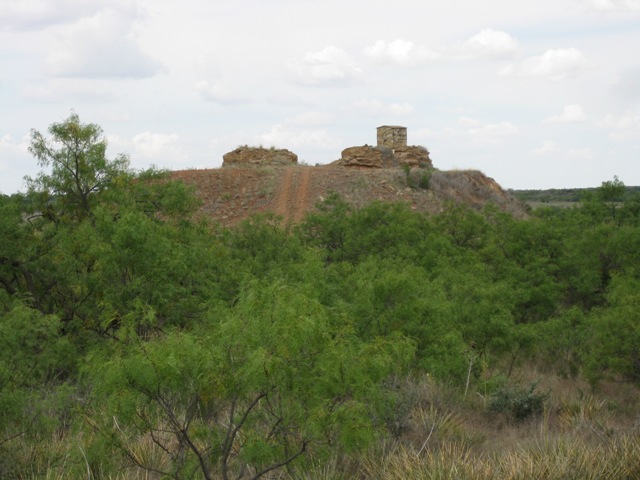
About the only things I'm not 100% happy with are the windows and the door, but doing it differently would cost quite a bit of money. If the plywood warps too badly, I might switch it out for some hardi-board and see how that works. I could replace all the windows with 1 - 4'x8' sheet of hardi-board if it comes down to that. Using actual windows would have doubled the price of the project so I ruled that out for now.

Oh well, that's the completion of this project anyway. I'll make another post soon on the results of our hunt and whether the camouflage mattered to the animals or not.

Nathan

Sunday, May 24, 2009

Building a hunting blind - Part 1 (it's still a novel)

Well, I have a bunch of other things I need to post on, but I think I'll skip ahead and post about the most recent one while it's fresh on my mind. I may go back and post on the other stuff later.

I've been wanting to build a larger hunting blind on my hunting land for over a year now. The one I have down there is only 4'x4' which sounds plenty big until you actually use it. It is big enough for one person, but there have been several times when I bring a friend or two and although you can fit 2 people in it (we've done it) it is very cramped. So I decided there is no time like the present and decided to get to it. I'll move the other blind to a different spot on the land where it will get used on an occasional basis, but not regularly.

I debated back and forth for the last year on how big to build the new blind. Building it 8' x 8' seemed like the way to go as it would make efficient use of building materials and that would be plenty big enough, but I talked to a few different people who said that 8' x 8' was too big. It worked well for two people, but one person has a hard time effectively seeing out all the windows. Since probably around 80 percent of the time I am using by myself, I didn't want to make it too big for me to use by myself. I went back and forth between 6' x 6' and 7' x 7' and ended up deciding on 7' x 7'. Not a very efficient use of materials and a LOT of extra cutting, but I really think that is the size I will be happy with.

There really aren't any decent plans for a blind that free, and of course I didn't want to pay the $19.99 for some plans, so I spent a few hours drawing it up and figuring the measurements. Then I came up with a materials list and hit Lowe's. It always takes me longer than I think it is going to, and 3 hours later (after changing my mind on some of the materials at least once) I headed home with a trailer full of lumber. The folks at Lowe's were really pretty helpful and even loaded it up on my trailer for me with a forklift. I'm sure it had something to do with the amount that I was buying, but next time you are there buying lumber, ask them if they will load it for you and they might surprise you.

Okay, as usual, I'm over 4 paragraphs into my post before my first picture. Don't worry, I'm going to post enough to make up for it. Here's the trailer back at the house with the lumber on it. (Ignore the mess in the barn, the electrical panel is a project that I've been meaning to get to for over 2 years now!)

You might think to ask, "Why is the trailer in the barn?". Well there was a chance of rain overnight and I didn't want to get all the wood wet. Turns out I should have just left it out, not because it didn't rain that night (it actually did), but because the wood was going to end up getting wet anyway as you'll see as this novel progresses.

One thing I wanted to point out to anyone that doesn't already know this, but clamping another piece of plywood to the sheet that you are cutting makes cutting plywood MUCH easier! I had always just drawn a line using a 4' straight edge or something and then freehanded the cut. In much less time you can just mark both ends and then use a piece of plywood the same length or a little longer and clamp it where you want it (4 1/2" offset for my saw) and just zip down the plywood using the other piece of plywood as a guide. Thanks to my brother for this tip.

Here's a picture of this on a relatively short cut. It works great even when ripping the entire length of the plywood though. (P.S. - make sure you measure the 4 1/2 inches on the correct side of the cut though, don't ask me how I know this)
I got all my cuts made and then at the last minute decided to use 3/4" plywood and put shingles on it instead of just using 1/2" plywood and painting it so I made one more trip to Lowe's and then headed down to the land. Of course I planned on heading down there before noon and it was a little after 2 when I actually headed out. I ran through some rain on the way down there, but things stayed fairly dry. Here's the wood cut up and loaded in the pickup at the top of the hill where I built the blind. Everything ended up being more work than I anticipated. Just unloading everything was a chore. I had loaded it up slowly as I cut it, but I unloaded it all at once, worried about the weather the entire time.
This is a storm that had actually just passed before I got there. I did get rained on several times, but mostly just sprinkles and light rain, enough to get things wet but not a complete downpour.
Things actually went really well, again, everything just took longer than anticipated. Here's the floor framed up and leveled out. I used pressure treated 2x6's and 4x4's for the legs. The front of the blind is setting on the rock of the hill, the back of the blind is about 2 1/2' off the ground.
Here's the floor with the decking on it. I used pressure treated 3/4" plywood. I also added a brace on the legs for stability. They are pretty short, but it never hurts to overbuild!
Here's the front wall framed out. I just used regular 2x4's for framing the walls. The windows are 15" high. That's a little taller than most of the plans that I've seen but this gives me some flexibility if I ever decide to put in real windows in the future.
Here's the first wall with the plywood on it and stood up. Things were going well, but not as quickly as I had thought.
Did I mention that I underestimated how long this was going to take? I had planned on getting this done in one day, you might guess from the picture that I didn't make it!
I ended up just spending the night in the trailer and starting on it bright and early the next morning. I had been using the floor as a perfect spot for framing and putting the plywood on the walls before setting them up. As I started to frame the 3rd wall I realized I was going to lose my work area if I set it up too. I ended up framing the last two walls out at the same time and then putting plywood on them both before setting them up.
I was using a friends cordless tools that use Lithium Ion batteries and while they are amazing how much they can do on a charge, they do need recharged. Luckily he has two batteries so I pretty much kept one charging the entire time. I lost count, but I think I ended up using 7 charges before it was all said and done. On the first trip back to the trailer to swap the batteries out I took this picture of the progress.
Here's the last wall about to go up. I double checked before I set it down that I could actually lift it. No idea how much it actually weighed, but I could lift it (just barely).
All 4 walls are up! This was a milestone, but there was plenty of work left to do!
Here's the roof framed up. As I mentioned earlier, this was a last second change in my plans. Turns out I had messed up on my plans and measurements and each center rafter was 1 1/2" too long. I didn't realize this until I had already cut the angles on them. I also ended up with 3 sets of rafters instead of the one center rafter in my original plan so that was a slight snag. Good thing I made them too long instead of too short though!
Here's a close up of the rafters. Nothing too exciting, but I think it should work.
The Hitachi cordless tools really did work great. I wasn't confident in my design to cut the angles on the roof until I had it mocked up and it zipped right though everything I had to cut, I even cut the 4x4's with it although I had to make 2 cuts on them. Here it is basically dried in.
I haven't put on shingles in a long time (that's what roofers are for right?). I didn't do a perfect job, but I think I got better as I went along. Another not so exciting picture, but I was happy to be done with the roof!
Here it is pretty much done for now. I had intended on painting it, but with the on again off again rain, I didn't want to put paint on wet wood.
Turns out I couldn't have painted it even if I had wanted to. About 1/2 way though getting things cleaned up it started to rain again and this time it looked like it was going to keep going for a while. I ended up getting finished on day 2 a little earlier than I expected to get done on day 1. I got started at 6:30 am and finished around 4:30 pm.
Here's the old blind sitting down on the ledge with the new blind sitting up on top. Hopefully when I get it painted it will blend in a little better!
And last, a picture from up by the trailer. I will be able to see nearly my entire property from the new blind and see for miles in most directions.
That's it for now. This ended up being quite the novel, congratulations if you made it though it. Hopefully I'll get back down there next weekend and get it painted and I'll post an update on it then.

Needless to say, I am one VERY sore 41 year old and somehow I managed to get a pretty good sunburn between the rain showers. I was still pretty proud that I was able to get it all done by myself.

Nathan

Thursday, May 14, 2009

Planting, Planting and More Planting...

Well, we've been busy planting stuff over the last week or so. I figured I'd just combine it all into one post so I don't have to worry about breaking last month's record 7 posts for a while.

We traditionally plant a small tomato and pepper garden up by the house and ended up waiting a bit longer than usual to get it planted this year. By the time we got around to it this year, nearly all the normal places were very low on plants. We ended up finding nearly everything we normally plant by going to Lowes, Home Depot and Alco but couldn't find any Chili Piquin peppers anywhere so I guess we will have to do without them this year. They are the secret ingredient to our hot sauce and you very rarely ever see them in stores, but I guess we will have to make due. Next year we need to make sure and get everything going by the end of April.

Last year I improved the drip irrigation system to the gardens and we put down a weed mat and it worked okay. Not as well as you would expect, but we had some left over from last year so we put it down again this year.

Here is the garden planted before putting down mulch.

Here it is after putting down the mulch and some perimeter fencing and tomato cages to try to keep the dogs from laying on the cool moist ground and crushing the plants.
The last couple years I've tried to grow some pumpkins and watermelons and failed miserably. I'm going to give it a try one more time and see if I can make it work. I also planted some sweet corn and green beans and we'll see how that works. This garden is 25' wide by 75' long. It takes about 5 minutes to plow it up with the tractor so it actually wasn't that much work. I had the drip irrigation system in last year but I improved it quite a bit this year so hopefully that will make a difference.
I just got through with the last of the planting last night. I keep about 5 acres of land planted in wheat and sorghum for dove hunting in the fall. In the spring I plant sorghum and in the fall I plant wheat and oats. I also planted some german millet and a few sunflowers mixed in this time. I took this picture with my cell phone and the color is messed up (somehow my orange tractor looks red) but you can get a feel for it anyway.

I don't have any kind of irrigation setup on this, so I'm hoping the 40% chance of rain tomorrow turns out to be right. If you add up all the rain chances over the weekend you get well over 100% so that means it is going to rain for sure right? ;-)

Here's another cell phone picture of the finished product. Again, sorry for the quality, but I didn't think to bring a camera with me. You can see the wheat and oats on the right side of the picture and the newly planted area on the left. In the fall I will mow down the wheat and oats and hopefully the sorghum will be tall enough to sit in and it makes for some pretty good dove hunting usually. Another shot of the newly planted field looking back to the north. There is about 2 1/2 acres of wheat and oats and 2 1/2 acres of newly planted sorghum, millet and sunflowers now.
It was 100 degrees yesterday when I did my last discing and planting and the tractor worked well. I never did figure out what was causing the problems last year, but I think it must have been a problem with the cooling system being dirty or something. It worked pretty hard for about an hour when I was discing and got warm but not hot by any means and didn't ever lose power like it was last year.

Well, not too exciting, but that's what we've been up to the last week or so. It might not look like much, but there is some sweat equity involved in it.

Nathan

Thursday, May 7, 2009

Tractor Repairs...

Well, I mentioned in my last post that I had some tractor repairs ahead of me, and thankfully it didn't turn out to be anything too major.

When I tried to curl the bucket on my front end loader, hydraulic oil would spurt out the top of the control valve and the bucket wouldn't curl. The boom worked fine and oil didn't spew out the control valve when I lifted it up or down so I continued to work with it like that and I got what I had to get done, but I knew I had some work to do when I got it home.

When I got home, I looked up the parts in my parts manual and did some research online at http://www.tractorbynet.com/ and decided to attempt to replace the seals on the loader control valve and see if that worked.

Here's the part's diagram (you can get these free online).

Here's a picture of the control valve for the loader.
When I bought the parts to replace the seals, they came as a complete seal kit that included everything for the top and bottom of the cylinder rod. Only the top was leaking, but I figured I had the parts to replace the bottom seal, so I might as well go ahead and do it. What I didn't expect, was that when I took it apart was to be chasing springs and ball bearings across the barn floor! Here they are after I collected them.
I have a friend who works on heavy equipment for a living, and it's always nice to be able to call him when a crises arises. The solution? Vaseline! After cleaning everything up, I just globbed some vaseline on the ball bearings and that held them in place while I slipped the rod back into the sleeve it goes in. He also said that the vaseline is actually good for the hydraulic system and will clean and lubricate it.

Well, that's it as far as the pictures go. Not too exciting of a repair from that standpoint. I got everything back together after replacing the seals and started the tractor up and picked up the bucket and tried to curl it and nothing. Oil wasn't spurting out the top of the control valve anymore, and the loader boom would raise and lower, but the bucket still wouldn't curl or dump.

I did some more reading online and decided to swap the hydraulic hoses out to see if I could isolate the problem. I swapped the hoses that controlled the boom going up and down with the hoses that controlled the bucket curl and dump. I fired the tractor back up and Wallah! I picked up the loader boom about 3 feet off the ground and then tried the bucket. The bucket curled and dumped fine using the other control valve, I went to pick the bucket up a little farther and BOOM!! Hydraulic oil exploded everywhere! Upon closer inspection, one of the hydraulic hoses feeding the control valve now had about a 3" split in it. The quick disconnect had popped off as well for good measure! Now I pretty much knew that the problem was in the control valve. Now the loader boom wouldn't come down and it was stuck about 5' in the air. I disassembled that control valve and was able to get the loader lowered with a little persistence and about a gallon of hydraulic oil puddled on my barn floor.

As I disassembled the control valve, it seemed like there was an o-ring down in the valve where it shouldn't be. If you look closely at the picture of the control valve I posted above, the bolts that are in the control valve that wasn't working properly were not factory spec (note the flat head screwdriver heads) and as about everything that I run into problems with on this tractor, it looks like the previous owner had been in there first. Sure enough, they had used some thin 0-rings and the wiper wasn't OEM either. I replaced the seals and had everything back together and replaced the blown hydraulic hose and everything was ready to go.

Started her up and the hydraulics were completely dead. The 3 point lift didn't work, and nothing on the loader worked. Pretty scary.

I did think that with all the hydraulic oil on the floor, there might not be enough left to operate the hydraulics, so I ran out and bought some more hytran fluid (most tractors use the same oil for both their hydraulic system and the transmission fluid). I added about 2 gallons and I started it up again and the hydraulics were still completely dead. I started to feel sick. I knew that it couldn't have leaked 2 gallons since it was working last night. I started adding some more and noticed the level start to register on the sight glass. At about 2.5 gallons I was almost to the middle of the sight glass and I started her back up. (At the time I bought it, I was thinking the 5 gallon bucket of oil was overkill but that's the only size they had it in).

After a second of nothing, the 3 point lift sprang to life!! Then the loader started working, and it raised and lowered the boom, and curled and dumped the bucket!!!!!

I ran it through several cycles and everything seemed fine. I didn't take it out and actually try to dig or put any extra pressure on it, but I'm thinking there must have been something blocking or jamming that control valve cylinder and that was the problem the entire time. So, a few extra hours of repair time, but the seal kits cost less than $50 and everything else including the 5 gallon pail of hytran was about another $50 so a pretty inexpensive repair in terms of $.

That's it from this end. Hopefully nothing else breaks anytime soon!!

Nathan

Wednesday, May 6, 2009

Weekend at the land

Well, I got down to the land over the weekend to do some tractor work, turkey hunt and whatever else I could think of to do.

I struck out on the turkey hunting, although I did get 2 gobblers within about 30 - 40 yards but I just wasn't able to close the deal on them. I saw them both and probably should have taken a shot at one, but I thought he was going to come closer, and instead he decided to go farther away so I never did take a shot at him.

I did shoot a coyote that was stalking in on my turkey decoy on Saturday morning though. That was pretty neat. Saw several deer and one got as close as 5 yards away before it saw me so that was cool. Overall things seem to be doing well down on the land although the pond is really low though, I hope we start to get some good rain down there soon!

Well, back to the tractor. From where I typically sit and where I plan to build a nice shooting house on the top of the hill I can see pretty good once the leaves fall off the mesquite trees, but before that, spotting a deer through the brush can be pretty challenging. Last year I cut some narrow shooting lanes through some of the brush so I could at least see the deer when they crossed through them. The deer ended up using them as trails as well so it seemed like a big success. This year I decided to widen one of them to be big enough to pull my grain drill down (14') and on another I not only widened it, but ran it all the way through where I had stopped at some big trees in the past.

Tractors really are amazing machines in the amount of work that they can do. In just a couple hours I cleared brush and trees that would have taken weeks if not months to do by hand. Mesquite is very hard wood so I would just raise my loader up about 5 or 6 feet high on the tree and push and generally they would snap right at the base of the tree and fall over. Then I would push them out of the way with the loader and shred the smaller brush with my mower.

Things were going pretty smoothly until all the sudden my loader bucket wouldn't tilt up or down anymore and every time I tried to move it a spurt of hydraulic oil would come out the top of they control valves! I was working the tractor pretty hard, but I don't think that had anything to do with it when it was all said and done, but we'll get to that later.

Here's how it looked before I got started. It wasn't taken from the exact same spot, but pretty close. It was taken from more of a wide angle though so it's not the exact perspective, but you should get a pretty good idea, pretty thick stuff.

Here's the end result of the work. There was one rather large stump I wasn't able to move so I just left it there for now. You can see it about 1/3rd of the way from the bottom on the right side of the shooting lane. I still should be able to get my grain drill through there though. I plan on discing it and planting wheat on it this fall. The end of the shooting lane is about 250 yards from my stand. I still might cut one limb off of the tree that pokes out into the shooting lane about midway down it.

Here's the other shooting lane. Here is what it looked like before, I kind of just zigged and zagged through around the trees. Last year this was a huge benefit during the hunting season to be able to see deer and pigs crossing through here.
And here's what it looks like now. I didn't zig and zag around the trees this time!
I also plan on discing and planting wheat on it this fall.

I got finished at about 6:30 on Saturday evening and put everything up and went back to my hunting blind and at about 7:30 a doe and fawn came walking down the new shooting lane to the west. Looks like it will be a resounding success, especially if I get it planted in wheat for this fall.

I'll make another post soon on my tractor repairs.

Nathan